
What are
/r/PrintrBot's
favorite Products & Services?
From 3.5 billion Reddit comments
The most popular Products mentioned in /r/PrintrBot:


The most popular Services mentioned in /r/PrintrBot:
Thingiverse
Youmagine
OctoPrint
MatterControl
Aliexpress
IndieGoGo
Cura
Google Groups
Cults.
HackADay
Google Drive
Raspberry Pi
Google Photos
KeepingYouAwake
Slic3r
The most popular reviews in /r/PrintrBot:
Here's a link to some custom firmware I downloaded for my Simpler Maker Wood (1405), it checks 9 points on the bed instead of 3 and totally alleviated my issues with the sensor which were exactly as you describe.
https://drive.google.com/file/d/0B5KOKdJs8wWOR21PUlRUeDE4djg/edit?usp=sharing
I had to change my M212 X offset to 0 otherwise it wouldn't move after installing the firmware, just a heads up.
I did the no-sag upgrade from jonlawrence, and also did the extended X axis upgrade from jon. He has a ton of upgrades for the printrbot simple. http://www.thingiverse.com/iamjonlawrence/designs
Also built my own box for the power supply, and found a stick on heating element for the heated bed.
I have a glass plate and custom made bed mounts that I am going to install once my new GT2 belt comes in the mail. The glass is going to have a PEI sheet on top of it as well.
Once I have the extended bed installed, I will be printing out the complete frame that jon has, and both X and Y will be switched over to double precision.
Certainly! Here's the link to the OctoPrint page: http://octoprint.org What you are looking for is a the OctoPi image for RaspberryPi. It'll basically make your RaspberryPi into a dedicated print server with a web interface. If you have the camera module for the Pi, it'll enable you to also monitor the print, and make time-lapse videos, but it's optional. Here's a great how-to video on it: https://www.youtube.com/watch?v=EHzN_MwunmE
Printrbot calls it a Z Coupler. The version they are currently selling appears to be solid aluminum rather than the flex/screw style.
https://printrbot.com/shop/z-coupler/
If yours is slightly misaligned and needs to flex, you can make series of cuts along the length of the coupler with a hacksaw that stop between 60% and 75% of the way through and turning the coupler 90 degrees between each cut.
Here are some couplers on Aliexpress. Might be better for you on shipping: https://www.aliexpress.com/wholesale?catId=0&initiative_id=SB_20161022032849&SearchText=Flexible+Coupler
If you need to print today, you can replace it with some 1/4 inch (6.35mm) ID rubber tubing secured with a couple zip ties.
The adafruit adapter is shit. Give me a few minutes and I'll find the link to the parts I use which work really well in stopping the wrap around.
Edit: my apologies if this isn't right but I'm on mobile and on a shitty connection. But, here are the links for two parts that I use together which work really well for flexible filament. Use only the top bracket from the link that has two parts; a top bracket and a straw like second piece. The straw price just breaks a lot. Then use the bottom adaptor that fits over the hot end opening.
http://www.thingiverse.com/thing:524171
http://www.thingiverse.com/thing:439617
Edit2: the bottom piece that you're already using should interfere with your hobbed bolt at all. It should sit only on the hot end input. I leave it on when using normal PLA and have no problems with it.
Flexible filament, in my experience, is much more temperamental than normal in that your setting have to be just right to get good quality. Also, I have a partial blockage in one of my hot ends that seems to have no effect when printing normal PLA but ninjaflex comes out super stringy. If you notice that when you extrude your normal filament that it tends to hook to one side when coming out then you may also have a partial blockage. You can remedy this sometimes by doing a cold pull or by taking apart the extruder, removing the nozzle and blow touching it until red hot. The blockage will burn out and clear.
Thank you both for the advice! I was just doing the cost benefit for this mod vs. the 1405 upgrade and was leaning towards the upgrade. So you've pushed me over the edge. Too bad I wasn't patient enough to wait for shipping and didn't just get the 1405 from online rather than the 1401 from micro center and then I missed the Black Friday deal... I guess you live and learn. Maybe I'll take the spare parts from the 1401 to slowly put together a modded printer.
May not help you, but there are printable wrenches on thingiverse. http://www.thingiverse.com/thing:356910
I actually didn't use the calibration piece when I converted to the 1405, I followed I think this video: http://youtu.be/lgVmNuwMH68 where Brook talks about adjusting the settings.
Sorry about the delay - Been in pretty bad shape. Here's the goods. Better have a set of needle files because I made the stuff super tight. :-D
http://www.thingiverse.com/Archindividual/designs
Made a new Y tensioner that just went up as well.
Anyone know if there is any reason this wouldn't work with the Simple that was out in July of 2013? Think that was the first model out of beta if I remember correctly.
Edit: Got a hold of them and they said it should work fine.
EditEdit: Apparently the extruder from the 2013 model won't fit the upgrade kit, going to still buy one and try my hand printing it from http://www.thingiverse.com/thing:281015 before buying the metal upgrade.
Because your external dimensions are too large, your internal dimensions are too small, and your error is constant from part to part regardless of part size, I don't think you're X/Y steps are off.
I honestly think it's related to extrusion; your perimeter walls are likely thicker than expected.
Try printing a 1 perimeter thick shape with zero infill and measure the single layer width. Like this one: http://www.thingiverse.com/thing:37137
You've already checked most of the things that govern extrusion (filament diameter, E steps, etc), so this won't pinpoint your problem, but it will rule out a lot of things.
1.) Assembly will definitely take a while. 1 hour maybe if you're experienced and dont have to read instructions.
2.) Print the upgrade to GT2 belt if you want a permanent solution. It will run you about $30 in parts. http://www.thingiverse.com/thing:220484
3.) you can mod it however you want, as long as you reconfigure appropriately. If you make the bed any deeper you may have to extend your Y axis, though.
4.) Yes. I'm printing on my hotbed right now, I MUCH prefer it over the standard blue tape/cold bed. Especially with the metal :/ Kapton tape is literally magic.
http://www.indiegogo.com/projects/printrbot-simple-xl-extended-heated-bed
/u/Roxel happens to be the guy who is producing the beds. You may be able to buy the large bed (I believe) on his site here in the future: http://3dpaftermarket.bigcartel.com/ Right now you can get the smaller bed though.
I had a lot of success using MatterControl rather than Repetier with my Simple Metal. I found it easier to use and the default settings gave me better prints out of the box. It's free as well so it's worth giving a try:
The extruder wires cable chain has been the best accessory I have made for my simple http://www.thingiverse.com/thing:561148
And I do like the feet in ninjaflex https://www.youmagine.com/designs/printrbot-simple-feet
when I replaced my dead probe, I ordered from Amazon, https://www.amazon.com/DC6-36V-Tubular-Inductive-Proximity-LJ12A3-4-Z-BX/dp/B01F58UDA8/ref=sr_1_9?s=industrial&ie=UTF8&qid=1486673633&sr=1-9&keywords=LJ12A3-4-Z-BX The savings should cover a 6-pack for when its over
Gonna be as many different suggestions as opinions; that said am using this style from Amazon and Molex style connector soldered in to replace the stock power connector. Replaced all my stock barrel connectors after melting one, don't think it's the best choice for a printer with heated bed.
Did it look like that in the slicer preview?
If you used this one, the comments basically state that it is garbage.
You need to jump around with Sketchup (install the solid inspector plugin then find the red), Blender, and Netfabb to fix all the problems. If you get it to work, please post it as a remix.
My Cthulhu in Power Armor
I had printed maybe four simple things before I went all in and remixed some stuff and printed him.
I must have failed due to printer setting issues or poor support 8 or 9 times.
The final still isn't perfect, but it's the first print I'm proud of.
My poor extruder just doesn't like this stuff. I'm not sure if it's the hot end or the actual extruder at this point.
I tried reducing the print speed to 20 mm/s, but it still wrapped around the gear. Next I tried printing a NinjaFlex adaptor link. I went with this because I could try it without taking the extruder apart. This helps with the buckling, but the consistency of my prints went way down, even with PLA. I think the piece is just too wide to allow the gears to get a good bite.
From here I tried to vary the temperature in 5 degree increments up to 230 C. No dice. I can't even get it to extrude nicely pushing by hand...I ran a few prints with standard PLA to verify I hadn't screwed up my hot end and clean up the nozzle.
So, any advice? I was planning on printing this Printrbot Flexible Filament Direct Drive Extruder. If that doesn't work I may need to look into making an entirely new extruder O.o
You've got a bit stringyness at the top, caused by oozing. You can try turning the print temp down a few degrees, or increasing the retraction settings in slic3r a bit.
Honestly, just putting the fan shroud on the printer will change how things print. I suggest installing the shroud, then printing a couple calibration/testing pieces. http://www.thingiverse.com/thing:533472
Additionally, everything on the print prior to the stringy bits at the top looks excellent.
I don't have a solution, but I believe it to be an issue with not enough external cooling, and the piece doesn't solidify before the next perimeter passes over it. You can really see the problem printing small spheres, like this test piece.
I'm investigating adding additional external cooling. I tried adding a fan duct but my fan didn't have the oomph to keep a high airflow through a restricted nozzle.
so i went down to 197 and tightened the belts and it didn't make a very big change. http://imgur.com/Jh5tVNT ..so i printed out a stabilizer for the z-axis rods http://www.thingiverse.com/thing:368472 and now i am going to try reprint the cube.
edit: fixed link
That's not bad for a first print.
You've got a little bit of warping around the edges - a little hairspray on the bed can help with that.
You're also a bit hot for PLA. I normally print my PLA around 185-190C.
I'm really fond of this print: http://www.thingiverse.com/thing:84795
And the accompanying instructions here: http://blog.mcmelectronics.com/post/3D-printer-calibration
Calibrating your filament and extrusion are critical. Get that right and print quality goes way up.
Welcome to the future! It's fun and frustrating and exciting and maddening here.
I honestly don't know.
I found this thread that references it a bit: http://www.raspberrypi.org/forums/viewtopic.php?t=63738&p=475255
It seems that maybe the Raspberry Pi cam could use the GPU more, but a USB webcam probably uses the CPU more and pipes it to the GPU?
Ideally, the nut should only be secured to the gantry as far as rotation and upward movement in the Z direction is concerned. If the lead screw could rotate and wobble on its own (moving the nut around freely in the X and Y direction) while the nut was unable rotate at all or climb upwards, you'd have a perfectly isolated gantry as far as Z wobble caused by bent or misaligned lead screws. In real life this complete isolation is pretty impossible/impractical to achieve. A lot of mods exist to try to get closer though, such as this one:
http://www.thingiverse.com/thing:40272
This mod theoretically holds the nut steady from rotation while allowing it to wiggle around a little in the X and Y directions. I haven't tried this one, so I don't know how effective it is, but the idea is sound and has been repeated countless times by others on 3d printers of this general design.
I printed this without the restrictive adafruit cover:
http://www.thingiverse.com/thing:341614
And it makes a HUGE difference on longer prints. My extruder motor stays cool to the touch whereas it would be too hot to touch without the fan.
IMHO This fan should have been part of the original design, but hey, it's a $3 fan, and you get to mod your printer some more.
https://www.dropbox.com/s/oe7ndwx59q1obj5/2014-07-23%2022.02.18.jpg?dl=1
I found the grille on thingaverse.
Ah! Yes, I had seen his Y-axis replacement carriage here:
http://www.thingiverse.com/thing:229854
I hadn't thought to look up the user on that. So far I love "iamjonlawrence"'s mods, if for nothing else than the precision of his designs and his use of the Printrbot inventor diagrams.
Looking through Ahaer's stuff- the LED/fan-cooler looks fantastic! I'll have to add it to my growing list of upgrades, as soon as I figure out my jamming problem.
Thanks!
Sounds like it could be the issue I was having about a month ago. My issue was due to the filament slipping off the gear. The gear is wider the bearing, so the filament can slip off. I found the filament guide provided by printrbot was not adequate enough at guiding the filament properly. I needed it to guide the filament closer into the center of the gear. After a monitored print of this, and re-aligning the gear against the bearing, I haven't continued to have any slip problems. Of course, this may not be your problem as it seems you've done a lot of different checks and tests. Hope this could be of help regardless.
Your print looks great! Could you please share your Repetier settings? I have not been able to get a smooth extrusion like you show in the picture. Instead, they always come out quite blobby, especially in the interior.
EDIT: For reference, I was trying to print the thrift store angel on Thingiverse at 0.3 scale, but aborted mid-print.
For an ubis 13 metal if you didn't have the fan running, or bumped the fan it would clog, my 13S has not had the same problems. I printed a test cube with the fan off and it went fine.
You can get the fan shroud here, it is the same as the all metal Ubis 13 https://www.youmagine.com/designs/ubis-metal-hot-end-fan-shroud
Not familiar with Sketchup and it's compatible formats but Printrbot has their printers on YouMagine.com in STEP format. Should be able to do something with that.
I have the metal spool holder. I had to take it off because it's too wide for the hole on some of my spools. The printed spool holder fits all of my spools just fine though.
As far as stability goes. The side mounted spool does make it a little tipsy. Not enough for it to fall over in use, but enough that it did tip over once when I bumped into it. To solve the issue, I printed and installed these legs. I have had no issues with stability since then. With the soft rubber feet, it's quieter now too.
I just order a roll of this Overture filament https://smile.amazon.com/dp/B07PGY2JP1/ref=cm_sw_r_cp_apa_fabc_g-KeGb17WCP9E?_encoding=UTF8&psc=1 it's nice filamentand it comes with a free sheet of buildtak clone that works just as good or better. Removable flexsteel pei is the way to go but this works wonderfully if you are on a budget
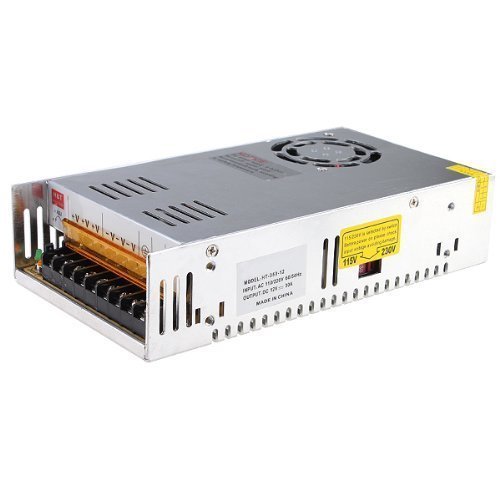
The power supply that comes with the Simple Metal is rated for 12 volts at 6 Amps with a 2.1 mm x 5.5 mm barrel connector. It's also the same barrel connector used in 12v LED lighting. The connector is nearly universal on small 12 volt power supplies.
Here is one sold on Amazon, but you don't have to buy this specific one. If you search for a "12v 6a power supply" you shouldn't have any trouble finding one from just about any online retailer.
https://www.amazon.com/100-240V-Switching-Supply-Adapter-Flexible/dp/B015G8E3X0
Alternatively, if you have a relatively new (manufactured in the last five or six years) ATX power supply laying around that has a six pin PCI-E connector. (the same connector that plugs into a video card) You can use that to power your Simple Metal. (may need to short together the black and green wires on the 24-pin connector to turn the power supply on) I use one with my Simple Metal and it works great! Also provides plenty of power for my heated bed.
The frayed wires on the positive terminal must have shorted to ground. The positive terminal is always on. The negative terminal is the switched with the MOSFET. Use wire ferrules and always make sure to you have strain relief for the wires. I use these adhesive cable mounts, that way the wires won't fray and short at the connector from moving back and forth.
Hey friend.
I got very excited when I saw your post. I've got a simple metal with a fried printrboard, and I've been looking to get it back up and running.
Have you got the new setup printing already? I'm not sure how the SKR board is set up but I'd imagine you have to load it with Printrbot specific settings. Would you be willing to share yours?
Would this be the board and drivers you are using?
Sorry for the late reply, the other guys responses below helped me out. Zero the x/y offset and then tell cura to up the build space to 152, I printed Feed Wheel from thingiverse which lets me prime the printer before printing on the sheer edge.
Thanks I'll try lowering the speed. So far it seems to be strong on most prints, I'm just having trouble when printing a cellphone case that has very narrow walls. see (http://www.thingiverse.com/thing:714570)
The print comes out quite strong in every way except that you can bend it along the layers and it tears off almost immediately. Objects with wider or double walls where there's room for substantial infill between them have come out quite strong so far.
I can't get this to extrude anymore... I did one test and it was OK. I printed this part: http://www.thingiverse.com/thing:403438/#files and it does a really good job stopping it from bunching up past the extruder... but no matter what temperature I choose (i've been testing from 195 up to 240) the extrusion is extremely slow/non-existant. If I hit the button to extrude 100mm, I get maybe 6-10mm at best, if anything. No idea what else I can do. We both have printrbots, same Ubis hot end? We both have the means to stop the filament from bunching up (shouldn't really matter that we are doing it different ways) If I could just get it to extrude with some consistency, I think I could make the rest work.
It'd be easier to print the test pieces from here:
http://www.thingiverse.com/thing:533472
And then you can use these guidelines to help tune it: http://makezine.com/2014/11/07/how-to-evaluate-the-2015-make-3dp-test-probes/ - Link fixed!
The problem with this mega test print is that you're chasing too many problems at once.
I've noticed that the stepper motor may start to skip steps (making clicking/clunking noises) if it overheats. This seems to happen when the motor struggle to extrude.
Try raising your temperatures (makes it easier to push the filament through) and add a cooling fan for the motor.
Here is a fan mount - http://www.thingiverse.com/thing:338806
I have had a lot of issues with the leveling on my maker as well. Currently I am using a mic6 bed, the 9-point firmware and replacement bed ends. I used to really believe that the 9-point helped, but I still get bad results if my bed isn't close to level to start with.
I use Jon Lawrence's replacement x-ends with a rubber washer in each corner of the bed to give me some ability to manually level the bed. It has been working ok.
I used google to keyword search your error message. One solution was a bad solder and another was bad slicing code. Here is just one link I found https://groups.google.com/forum/m/#!topic/deltabot/BX8RtAWyyrk
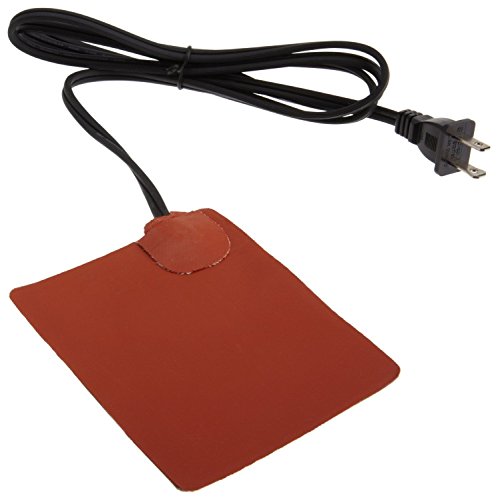
I'm looking at doing something very similar, but with using a SSR instead of a dedicated controller. Thinking this heater might do the trick.
I tried with both cura and slic3r.
In terms of calibration: I only calibrated the z-probe which I think is pretty solid. I've measured the filament in lots of places and all around and averaged the results and I've had good results with other prints, so I'm fairly sure that's spot on too. For the rest I'm trusting printrbot's settings, because I doubt I can things like get steps per millimeter better than they got as they designed the thing.
I've printed some of the make magazine tests (http://www.thingiverse.com/thing:533472) and so far all of those came out fine, although I'm not 100% happy with the bridging one as the first few strands of each bridge drop down pretty badly, but the bridge completes OK. My guess is that 208C might be too hot there.
What do you think I should check or improve?
I saw the wrenches in my box when I got my printer and threw them out. Then a week later I realized what they were for, so I printed these: http://www.thingiverse.com/thing:356910
A month later I remembered thinking about throwing out the wrenches but decided that would be stupid. I put them in my desk drawer :)
This is the base i'm using for my raspberry http://www.thingiverse.com/thing:641787/#files
And this is the camera mount
http://www.thingiverse.com/thing:442063
they go thogether, and they work really good
I've been through two rolls from them; one black, one glow in the dark. It's good filament, but nothing really special.
I'm currently using some stuff I got off of amazon and it's great.
The filament: http://www.amazon.com/gp/product/B00JQK4NTO
Something printed with that filament: http://www.thingiverse.com/make:112746
I have a jerry-rigged wooden Simpler Maker which can now print large ABS prints without lifting, but I had to do a few things:
- Get bed to at least 110C (on the bed), if you can't get there you probably need a new ATX power supply. I use a 500Watt that gets me to 110C in 15minutes.
- Put thermal grease or thermal adhesive between the heater PCB and the aluminium.
- Turn off the fan (yes for the whole print and anything else which is blowing on the print area, aircon?) and make sure you print one of these for large prints http://www.thingiverse.com/thing:314273 otherwise your head will get clogged by the high temp at the feeder part
- Clean the kapton tape with Acetone before each big print. Try replacing the tape, buy a 30ft roll off ebay for like $20.
- Make sure you have the codes for the auto leveling being run before the print (if print is too low in the middle it will bend up).
What is the ambient temperature?
I personally wouldn't sand the kapton, though if you are then go for the finest they have to simply buff off the shine. Otherwise you could try toothpaste on a rag to do the same.
This is my first design I have ever uploaded on Thingiverse so let me know if there are any issues or you have any additional questions I can address but it is pretty straight forward! http://www.thingiverse.com/thing:643475
This is what I have been using: http://www.thingiverse.com/thing:140926
The problem is that one of the holes for the bolts holding the hot end does not match up perfectly, so the hot end has been a little loose.
I did this one - http://www.thingiverse.com/thing:261122
And combined it with this to get rid of the original fan holder - http://www.thingiverse.com/thing:377597
It fits well, my only complaint is that it hits the binder clips holding my bed in place (ghetto heated bed setup).
My Printrbot Simple Metal works great except that Slicr doesn't fill in areas. So when I printed the cube, it came out great except it was a box.
Tonight I tried to print a leg extension for a multicopter: http://www.thingiverse.com/thing:94537
And, instead of it being solid, it came out like a shell of the leg and was too thin to work.
The photo I attached shows the problem.
If I use Curaengine, everything looks great but generally I think I prefer Slicr... except for this fill problem.
Anyone know how to fix it? I thought I was using the settings as recommended by Printrbot and I can't see what I did differently.
Which version of the simple? I have a highly modded 2014 simple that runs bowden.
http://www.thingiverse.com/thing:384390
Since the E3D v6 has an integrated coupling, I could probably easily modify my hotend mount to make it work.
Assuming you have the 1405 kit (the current shipping one I believe), you can print a bunch of upgraded parts.
You could buy the XL upgrade kit to increase your print area.
Put a fan on the extruder motor. I had the same problems as you are describing and playing around with the potentiometer did not help me either. I found and printed one of these http://www.thingiverse.com/thing:274200 and it has solved my problem completely. You could also ziptie the fan to the hole where the cables are ziptied (which is what I initially did to print the mount in the first place). My hypothesis is that the aluminum extruder was transferring the heat from the hot end to the motor and causing it to overheat. I think the hobbed gear might have also been absorbing heat as it often started to get clogged with PLA shavings.
Here is something I made. It works well with my spool when it overhangs on the side without the fan. Never had it tip over, but it is a little too short. Any tall prints means the arm bumps the spool. I don't think it would do well to extend it any longer since that would increase the chance of tipping.
I'm having trouble printing the first one due to needed support structures.
edit: cool, the creator posted his slicer settings, I think I'll try to duplicate them and try a print tonight.
This is correct, the answer is your nozzle is just a little too high off the platform. I use something along the lines of this: http://www.thingiverse.com/thing:13053 and adjust my platform as it slowly runs.
If you can move the y axis with the motors on but not moving then the current is too low.
I lowered my motor current to the point of failure, then raised it to the point that printing a throwing star half (http://www.thingiverse.com/thing:86231) at very high speed doesn't skip any steps. The thing shakes like nobody's business but doesn't drift at all.
So I decided that the answer had to start with some re-thinking. I haven't had any creeping/walking issues since upgrading my extruder components:
http://www.thingiverse.com/thing:285321
Basically, I redesigned the center wooden slat to include a proper, narrow filament guide. At the same time, I decided to get rid of the old, rickety bearing pivot by replacing it with a single solid piece.
My bearing pivot was never perfect, I blame my assembly skills (and imperfect design). The bearing was never perfectly parallel with the stepper pulley, and the bearing couldn't be held well between two flat pieces of wood and still be expected to spin properly! Making it a single piece solved the former, adding steps to hold the inner race of the bearing solved the latter.
Now, I'm much much happier, and have yet to have any more problems making parts. :-)
Yea, the Arduino/Atmel platform has a few idiosyncratic features/issues.
Good luck with the first prints! I recommend printing this to get the calibration down.
Got ate up almost right after the post.
There's a decent amount of info converting the printrboard to and SKR 1.3/1.4 with TMC2208 drivers. It's what I ended up doing to mine and have NO regrets whatsoever.
An alternative option would be a soldering iron and a replacement port and installing a new one.
u/WildCheese I used this one, and cut down the extra. That was quite easy for the magnetic sheet, a pair of scissors is more than enough. The actual sheet is a little tricky, I ended up using a Dremel.
Yep, some people are doing it. I've been playing around with a glass printbed on my Simple Metal with really great results.
Aside from the benefit of having multiple interchangeable beds, I also don't have to mess around with blue or kapton tape ever again :)
Yeah, 3D printing isn't "Enterprise" ready (for less than $10K). It's still a hobby tool that requires a lot of tweaking.
I like the kits because I know how it's put together and can take it apart. I've got the Printrbot Simple 1405 and I just built a Rostock MAX v2 last week.
I've only used the self leveling probe on my Simple, but the Rostock MAX has the XYZ-0 manually calibrated and saved in the EEPROM. I think you could do the same. Try MatterControl and see if you can find a manual for configuring a Cartesian printer.
If you can find a better automatic bed detection that doesn't interfere with the print, you'll be rich.
>Turn down your extrusion multiplier by 20-30 % during the first few calibrations, and also use a bigger calibration part to really fine tune.
I turned it down by 5% previously with no affect, but I can try using a larger percentage.
>Maybe try matter control http://www.mattercontrol.com/ & reviewing http://reprap.org/wiki/G-code - note that some of these commands are not for the simple.... just use the m501 & m500 command to get started with the calibration values. Look at what the console says with the m501.
I've never heard of Matter Control, but I'll look into it! Thanks!
>You maybe having problems with the stepper motors overheating & skipping. Check that the current is properly set and the motors are not hot after hours of running.
I don't think that's the issue, I had that problem with my CNC machine, so I know what to look for there. My steppers are a nice warm (not hot), and don't seem to be skipping steps.
It should be .4 mm, and I highly recommend using matter controller to avoid the learning curve of Repetier Host. When in doubt start with 20% less material, and make sure all of the axis are calibrated. I've gone though almost two spools of plastic before realizing 90% of failures were caused by over extruding.
>If you jog xyz it will automatically go back to where it needs to when resuming.
I tried that with Octoprint and it resumed without going to the right spot. Is that because going back to where it needs to be is a repetier host thing?
I had the same dilemma late last year, and then decided that I wanted to learn all the aspects of how a 3D printer works, and the best way to do that was to build from a kit. Plus, I want to be able to make a larger reprap model some day, and the experience gained from the Simple (not to mention some of the actual hardware itself) will come in handy.
It was only after I assembled my Simple that I discovered the vast wealth of upgrades available, both for purchase, and especially to print yourself:
http://www.thingiverse.com/search/page:1?q=printrbot+simple&sa=
Because Printrbot's are open-source, I would venture to say that there are a larger number of user-created modifications available for it than any other commercially available printer.
One last thing- don't forget about selection bias; people with problems are more likely to post to forums than people who are perfectly happy with their printer.
Good luck, no matter which you choose!
Thanks for posting the printrbottalk link; I need to start checking there on a daily basis for itdeas...
With as prevalent as the Simple upgrades are, I'm wondering why someone hasn't set up an eBay or Amazon drop-ship shop that sells printed pieces plus hardware for upgrade Simples. Yes, I know I can print the plastic pieces myself, but if you're upgrading, by definition you can always benefit from precision printed (or injection-molded) pieces. The Y-axis sag on mine is so bad now I have trouble printing anything at all, so I'm hard-pressed to print pieces for the Y-Axis No Sag mod.
I strongly suggest upgrading to belt drives, as the string drives can become frustrating to work with, and hard to keep the tension required. There are some great upgrades thingiverse.com
http://www.thingiverse.com/search?q=printrbot+simple+belt&sa=
I would suggest finding one you like / looks well recommended, and ordering the related hardware if you can.
>I got 8x400mm steel rods that allow you to use the entire width of your XL bed.
Not sure I understand you; I've got the Simple XL upgrade; which means my bed is about 270mm wide. You mean I should just go ahead and create a new bed with longer rods while I'm adding the belt?
>You lose a little bit of Y reach when you do that X-axis mod, due to the bed moving out ~10mm or so.
I read this, and immediately thought "hmm, maybe I shouldn't bother with the X-belt-mod then", as that's about 10% of our entire Y range...! But just yesterday I found this:
http://www.thingiverse.com/thing:242185
Ohhhh, yeah, baby. :-)
I had originally purchased a Simple with the intention of learning the ropes, and eventually selling it for whatever I could get, and then using that to defray the cost of a larger printer. But it's starting to look like I'll wind up having a bigger printer as time goes by, just because of all the upgrades I've done to it.
I shall name it... Franken-Simple!
Thanks for the heads-up about flashing the firmware, I was not aware of that.
This is the MXL mod; here. The bearings are the exact part he lists, from McMaster. I do have some slightly larger bearings that might work as well. Thanks for the suggestions! I'll try them out.
> moved the extruder motor off of the printrbot head and used a stiff tube to feel the filament through to the extruder
Now that's clever... Just looked for it, I found a few things, apparently an inner cable inside of a sheath is called a Bowden Cable:
http://www.thingiverse.com/thing:29834 http://www.thingiverse.com/thing:26963
Likewise, I don't see it would gain me much at the moment, but it's good to know it's out there. I might try to expand my Y-axis at some future point. I need to start a wiki page with "So you built a Printrbot! Here's all the things you need to upgrade on it now"
Ah, very cool! I just finished my XL Upgrade last night, so I've got a spiffy, wide metal bed, I'll need to make sure the belt ends will fit on it, but I can definitely see upgrading to this.
This intrigues me:
http://www.thingiverse.com/thing:229854
It requires a 250mm x bed to print though. And it extends the Y reach, which would necessitate getting a new bed, fitting it, calibrating, etc. So perhaps I'll just focus on accuracy for now. :-)
> I gave up on the string and am working on converting to a belt/gear drive system. (GT2 Belt/Gears from makerfarm.com)
Ooh, now you're talking. I didn't even know that was an option. I've seen lots of stuff on thingiverse for upgrading a Printrbot, but what I was finding was mostly bed-levelling thumbscrews, or other things to make life slightly easier, and not major changes.
I think I found what I need:
http://www.thingiverse.com/thing:194586
plus some timing belt from makerfarm.com? Does that sound about right? When I searched thingiverse last night, it looked like his mods only worked on a Simple created before the string-tensioner was included by default, which would exclude mine. But it appears that he's updated his files just in the last 12 hours to include both designs, sweet!
The ironic thing in this case is I need to tune and calibrate my existing Printrbot to be able to get good-quality prints, so I can print these plastic pieces and upgrade to a belt-and-gear system to get even better prints... :-)
I modified the above model into this when I first got my Simple:
http://www.thingiverse.com/thing:139688
If you print this with support material, but don't remove the material after printing, it will provide even more support in keeping the filament centered. I haven't had to touch my filament since I first fed the spool into my extruder.
The end bars are wider as mentioned. You can Download the STL here and have a 3rd parter printer make & send them to you -- at a commercial quality no less.
https://www.youmagine.com/designs/printrbot-play-y-bar-end-s
Printrbot favored Youmagine over Thingaverse. In fact all their stuff can be found there at https://www.youmagine.com/printrbot/designs
I found it easier to find other user's printrbot related STLs there too.
Cheers, M.
Most of their designs are on youmagine
https://www.youmagine.com/search/designs?utf8=%E2%9C%93&search=printrbot&state=17
As for the bed, it's pretty simple, any laser cutter could cut the plate for you, but if you want it perfectly flat, you'll need to get it surface ground.
umm, not really, it is straight forward.
just get one of these
and connect it it to the z-end on the printrboard (replacing the probe one)
wires goes to the extremes (1 and 3) in the end stop.
and then use something like this to keep it in place:
https://www.youmagine.com/designs/printrbot-metal-z-ends-stop-z-probe-replacement
If you do it, remember to remove the G29 from your Start Gcode. Also any Z adjustment on firmware (M212) will have no effect.
I had a very similar problem and, in cleaning it up, broke my old ceramic hot end. I replaced it with an E3D V6, as others have suggested. I ended up remixing the Gearhead extruder to create a better mount for the hot end. I just uploaded the files to https://www.youmagine.com/designs/e3d-printrbot-mount. It holds the hot end in place vertically without relying just on pressure, so it's a bit more rigid if you're cold-pulling filament or have a bed crash (ie, less need to worry about recalibrating). It also holds it at a level where the bed sensor doesn't need any changes to its mount.
I can second this. My prints have been consistently cleaner since upgrading mine to the metal ubis.
I am also using the experimental gear drive extruder. https://www.youmagine.com/designs/printrbot-gear-head-extruder Printrbot Gear Head V0.02.1 specifically is the one i'm using. I was able to print it in PLA and it's been working very well.
http://printrbot.com/shop/gear-head-extruder-v0-01/
There is a new version of the 3D-printable part (I'm printing with it now)... I don't know whether it prints flexible filaments though.
https://www.youmagine.com/designs/printrbot-gear-head-extruder
Edit: added link for 3D printed part.
Are you still printing with PLA or did you switch to ABS? I recently installed the heated bed with x-axis upgrade, and I have had fantastic results. Prints are coming out better than they ever have, but I'm still using PLA. One thing to note, I didn't put the kapton tape on the top of the print bed because I screwed up and needed it to hold the thermistor on the bottom. So I've just been continuing to use 3m blue tape on the bed. Everything I've read says that filament won't stick to blue tape with a heated bed, but I can't argue with the results I've had. I'm actually finding it difficult to remove my prints. Just printed these two Bender parts
Here's what I ordered around 2015 for my PB Simple Metal.
https://www.amazon.com/dp/B0013HKZTA/ref=pe_1763890_134303290_tnp_emaildp_1
Heat transfer is fine.
Being thin is a good thing, otherwise you'd run into issues with the induction sensor probe.
That said, my Z induction probe had already failed by then and I had already replaced it with one that can trigger from further, but you should really be fine with the stock one.
Just make sure to recalibrate your Z probe after installation (both physically as well as M212), because your bed will be a tad higher and the hotend will otherwise dig into the bed.
Considerations:
With PEI, I barely have to "squish" that first layer, unlike with other beds.
If you squish it down like you used to you might very well need a chisel and hammer to get your parts off. Not kidding here, I had to get a 1" chisel and a deadblow to get a large print out once or twice.
I just trimmed and glued mine down on it with 3M transfer tape.
FYI: The kapton, I hear, is great for ABS, but I'm personally not using that.
PS: Prusa, I think, is also making those removeable magnetic, spring steel, PEI coated bed surfaces which sounds absolutely magical, but my plain PEI sheet is still going strong after I installed it in 2015 so I haven't looked into them too much.
The removeable spring steel magic allows you to simply flex the surface to get your stuff off it.
It's an ideal printing surface, but I havent looked into retrofitting one on a printrbot.
DM me if you need a hand, gl.
Yes, they're a standard type, called LMF-12-LUU bearings. For $12 on Amazon, this set of 2 looks like it should fit, although I can't be positive about the quality. If you're looking for something more bulletproof, you can get 2 of these from Misumi, so long as paying $16.86 for each bearing is in your price range. If you want to look around for more, just make sure the dimensions match. These are a standard size, but not all LMF-12-LUU's have the same flange size and hole pattern on top.
The github page i linked in the other comment covers firmware and the inductive probe, you basically need to lower the voltage of the signal from the 12v probe to the 5v board. One of the Adaptrboards will resolve this once they are available as it has a voltage divider or you can copy the design with a few resistors. You can also use a optocoupler. https://www.amazon.com/dp/B07YJL3MQQ?ref=ppx_pop_mob_ap_share
The octocoupler allows the 12v probe to be isolated from the signal side.
Buy an ATX CPU Extension on Amazon or eBay, and then slice the female end off and wire the yellow into the 12V terminal block and the black into ground.
And then plug it into your printrboard
Sure, I got mine from amazon https://www.amazon.com/dp/B07CXRT1LP/ref=cm_sw_r_cp_apa_i_oDN2EbC3MJG8R My pulleys were out of round, so while printing it would tighten the belt itself causing little layer shifts and not letting me get the proper tension on my printer belt. Even if these don't fix your problem, it's a upgrade I'd recommend doing. Printrbot even offered an aluminum upgrade towards the end of its life because this was a known issue.
Power supply is brand new. 12v 6a power supply purchased from Amazon. https://www.amazon.com/dp/B003TUMDWG?ref=ppx_pop_mob_ap_share
Red light on sensor comes on when in close proximity to the bed (as it should), and the green light on the board comes on
I'm very close to making this work on my Simple Pro:
https://www.amazon.com/gp/product/B0777MCT94/ref=ppx_yo_dt_b_asin_title_o00_s00?ie=UTF8&psc=1
​
Same left-handed design.
you could always just buy a USBtinyISP and program the chip directly bypassing the bootloader. That would be a sure way to figure it out.
​
Here's something that you should check, did you correctly install the drivers for the printrboard when it's in bootloader mode? As far as I remember they don't install by default, you have to point the device at the Atmel FLIP folder in program files to install the drivers for DFU mode.
​
It's about ~150 watts for a 6x6in bed heater. I have this power supply (3 yrs so far) and it's been fine.
okay everything works now! well X and Y are working like they should be. I just have to connect the Z and solder the resistor. I have never soldered a resistor so is there a certain orientation I should be doing it? I bought this resistor: https://www.amazon.com/gp/product/B0185FHALI/ref=oh_aui_detailpage_o03_s00?ie=UTF8&psc=1
I am red-green colorblind so I may say the colors wrong so from left to right I see brown-black-green-gold. Should brown side or gold side be facing towards the wire from the Z-probe or does it not matter?
Hate to be a downer, but you really should find a coupler that works for your rod size. Using one too big will make the rod off center from the motor shaft.
Edit: if you're in the US you can grab one on Amazon: uxcell Motor Shaft 5mm to 6.35mm Joint Helical Beam Coupler Coupling D18L25 https://www.amazon.com/dp/B01B27QMJ2/
Is this the kit you bought? https://www.amazon.com/E3D-Lite6-Full-Kit-Universal/dp/B00W4E5ITI/ref=sr_1_1?ie=UTF8&qid=1472409967&sr=8-1&keywords=E3D+lite
And could you possibly show a picture of what it looks like in the simple metal?
Yellow = +12 Black = Gnd I would also recommend using the following relay and power the heated bed from the relay using the printrboard heated bed output to trigger the relay. https://www.amazon.com/gp/product/B00MKWACVI/ref=oh_aui_detailpage_o01_s00?ie=UTF8&psc=1
I find that 80 C is the max the printrboard can get my Simple Metal to heat and that takes a long time and is in an enclosure. I have the relay and am in the process of making a mount for it and connecting it to the 24 pin power connector on my ATX power supply so that I get access to the second rail. The relay was recommended to me in another post.
Be careful with the polarity to the Printrboard the earlier 4 pin versions were opposite the 6 pin. The reason then went to six pins is the amps were needed.
I contacted PrintrBot about this and while I didn't get an answer about repairing the 13, they are shipping me a 13S. So props to PrintrBot support! The 13S construction appears to be all-metal up into the extruder block (I guess transferring heat to the extruder turned out not to be a big deal?) which means that weak spot is eliminated. They also sell parts for the 13S, unlike the 13, so I can fix things going forward if need be. It uses the same tips, so my tip collection is safe. I'll lose about 35C of heating capability (270C max on the PTFE-lined 13S vs 305C max on the all-metal 13), but if it is compensated for by reliability it will be well worth it. I don't print any exotic or filled materials, but I do print PETG and Nylon on occasion which can get up around 250C depending on the blend. As an example, as the injection-molded plastic clamps holding the linear bearings on my Play have cracked, I've replaced them with more pliable and stronger nylon replacements that I printed myself. To compensate against meltdowns I think I'll move up to a more reliable 40mm fan on the heatsink. I'll probably print the below duct in PETG, since it is more heat-resistant than PLA:
https://www.thingiverse.com/thing:1640957
And I'll use the best 40mm fan I can find:
https://www.amazon.com/40x10mm-Bearing-Premium-Cooling-NF-A4x10/dp/B009NQLT0M
Still haven't figured out a lower fan solution that would work with the above on the Play, yet.
Sweet!
My next question is, do you know the name of the connectors? it almost looks like this (Dupont connectors)
Which I have a plethora of, but it doesn't seem to be the same. Have any insight?