
What are
/r/functionalprint's
favorite Products & Services?
From 3.5 billion Reddit comments
The most popular Products mentioned in /r/functionalprint:


The most popular Services mentioned in /r/functionalprint:
Cults.
Autodesk Tinkercad
Thingiverse
Youmagine
Onshape
SOLIDWORKS
Hackster
FreeCAD
Gofile.io
Banggood
Jet.com
Creative Commons
Blender
GeoGebra
Lifehacker
The most popular Android Apps mentioned in /r/functionalprint:

IP Webcam

NFC Tools

Wave FREE

Blynk - Arduino, ESP8266, RPi
The most popular reviews in /r/functionalprint:
I was going to make one so I could remotely reboot my router if my network went down.
Then I realized that I am not a clever man.
EDIT: While I appreciate your suggestions, I already solved my problem.
At 10 m/s we made 30.49 V and 1.03 A. The AC to DC rectifier we used was one off amazon . That DC goes into a adjustable load bank to find the load that gives you the most power. This generator was one stator and two rotor (10 poles and 9 coils).
I've seen many custodians just use huge rubber bands. They always seemed like a nice-looking solution, and the custodians can still cycle the bags in less than 10 seconds.
This is a device I keep plugged into a USB port in my car which automates opening and closing my garage door when I leave the house and again when I return. I'm using Home Assistant to control the garage door itself, this device is used to notify Home Assistant when I want the door opened and closed.
The STLs, source SketchUp model, Arduino sketch, and Home Assistant automations can be found in my GitHub here.
It wasn't bad before, but I also own an Anker TM137G mouse so I know what ergonomic really feels like.
But what this does is prop up the other half of the hand. And since I have a damaged right hand, that's not a bad thing whatsoever. Yeah, it's a good upgrade alright.
The metal-impregnated filaments are made to be finished with a patina, not really act as a replacement for the metal itself. They are more suited for decorative items, as unfinished, they don’t look the greatest.
Edit:
I looked them up. It’s less than $10 for 30 of those. Nice idea, but you are totally wasting time by trying to print these.
DD-life Office Library File Drawer Tag Frame Label Holder Pull Handle 30Pcs (Copper) https://www.amazon.com/dp/B01MDROWDI/ref=cm_sw_r_cp_api_cOIUBbV8VGMQZ
Eww, that's pretty shitty work on their part. At least here in the US, I think they'd traditionally use a asphalt compound to seal these up (traditionally reinforced with asbestos fibers, but newer stuff may have a more harmless filler.)
e.g. https://www.amazon.com/Sashco-Through-Sealant-Cartridge-Clear/dp/B001UHX85Q/ref=pd_lpo_vtph_60_tr_img_2?_encoding=UTF8&psc=1&refRID=WXM78VWVDS0Z2H07KGRD though obviously you might want to find something local.
Invest in a set of rollerblade casters and never look back: https://www.amazon.com/Office-Owl-Replacement-Rollerblade-Hardwood/dp/B01KET1PUA/ref=sr_1_9?keywords=chair+casters&qid=1555027098&s=gateway&sr=8-9
I have a similar setup where I have the filament in tubs that have rechargeable desiccant beads in them.
It looks like something Dr. Seuss would draw, but it works great!
Here is a link to the TinkerCAD model for it. Nothing too fancy.
If you haven't messed with TinkerCAD, it's pretty straightforward. You'll need to sign up for an account, but that's free and safe. Edit the big transparent block in the middle to fit your phone width and length. You can select all the parts then click "Group" to see the final product. I designed it around an iPhone 11 with a case, with a little space around it. Once you edit, you can download the final STL file by selecting Export.
Here is the charger I used.
You could also get wheels like these which are improved and have brakes. https://www.amazon.com/Locking-Rolling-Replacement-Casters-Universal/dp/B08L9JM4XW
I am a cheap printer person, so I bought a couple of spools of PLA filament from Amazon Basics. The purple looked fun. Picked up some of the yellow too but haven't used it yet.
I had the same question during a previous post about this setup. It's for special roller ball mice. Some people swear by them and they also are probably useful in slightly niche applications like CAD. For example https://www.amazon.com/Kensington-Orbit-Trackball-Scroll-K72337US/dp/B002OOWB3O
you're about to put these guys out of business XD
A+ for coming up with a good solution.
For anyone else that is looking to catch hair before it hits your pipes, I would recommend the TubShroom. I found it cheap in a Marshalls a few months ago, and it has been great for catching hair in a bathroom used by four people with long hair. I do have to clean it daily to keep the flow rate high (four people produce a lot of hair), but that just tells me that it's doing a good job catching the hair.
ESUPPORT 12V 20A Red Cover Rocker Toggle Switch SPST ON/Off Car Truck Boat 2Pin Pack of 5 https://www.amazon.com/dp/B0154JY8OA/ref=cm_sw_r_cp_api_i_0v0RDb8XB2S8T
https://rover.ebay.com/rover/0/0/0?mpre=https%3A%2F%2Fwww.ebay.com%2Fulk%2Fitm%2F352491845873
There ya go
FYI all, these are called feeler gauges. Machinists and car mechanics use them all the time, they come in thicknesses down to like .0015” (made of metal, obviously). 3D printing one is an interesting idea though, especially since it gives you an idea of what your particular printer will do given the settings you printed this at.
I am never one to pull the whole "why didn't you just buy one instead of print it" line (sort of defeats the point of the sub, right?), but I am curious as to why you weren't able to find one that wasn't "shockingly expensive"? These things are cheap as chips, and available all over. Literal 1-second amazon search, and I'm sure they can be had for less. Were you using a weird search term, maybe? I just searched "coax distribution panel" and that was the second result.
Edit: BTW, invest in compression fittings and a tool. The twist/crimp on f-connectors are super unreliable.
I'm gonna print these for all the guys in the shop. Brilliant!
After some googling, since I've only ever used the normal ring stops with a set-screw, I think you might actually have a marketable product in this design. Seriously, closest thing I could find is this, and I like your design better.
You just need an adapter with an adjustable aperture.
Lens Mount Adapter, K&F Concept Nikon G Mount Lens to Sony E-mount / NEX Camera Lens Mount Adapter https://www.amazon.com/dp/B06WVNLVC1/ref=cm_sw_r_cp_apa_6XetAbW4ER0AT
You inspired me to look at the website. Looks like a meaningless corporate splash page with a lot of buzzwords that doesn't actually say anything.
The Play Store link is more helpful though. It's an app that interfaces with Arduinos and other microcontrollers. You can use to create interfaces to easily interact with them e.g. smart home profile to work with DIY smart devices.
Get yourself a pair of these (if you don't already):
Then you just measure and model. Look at the basic shape first and model the basic shape. Then add (and subtract) as necessary.
I find using OpenSCAD a little easier for duplicating a real world part because you can use variables and fine tune with variable values rather than having to redraw something. (in OpenSCAD you write code instead of click-to-draw).
3D scanning would also be an option if you have that setup (been meaning to print a 3d scanning rig...couple of good options on thingiverse)
I made this cordless drill attachment to enable smoothie-making in the event of a power outage. It's come in handy twice in the past year.
Help yourself to the STL here.
TIL that this exists https://www.amazon.com/Shomer-Tec-SHPR-Reverse-Peephole-Viewer/dp/B00ABV7LJQ, now I am printing one.
You just put some felt furniture pads attached to the bottom side of the concrete and you'd be fine.
Those are really the best.
Him: "Daddy, this broke."
Me: "Where's the piece that fell out?"
Him: "I don't know"
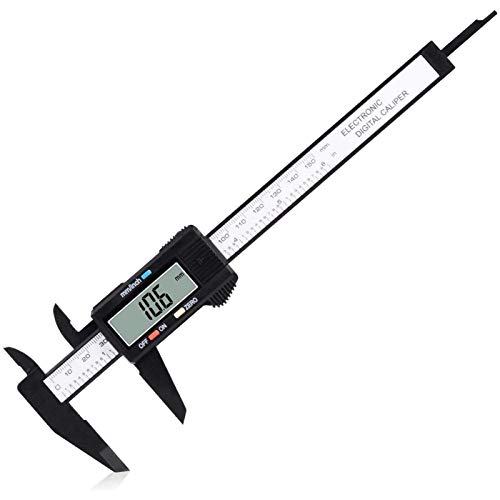
grabs calipers
I can fix this.
Of course, I'm not a monster.
All kidding aside, I have an inexpensive pair of Bluetooth noise canceling headphones. They're not great, but they are good enough to block most jet engine and screaming baby sounds.
This is a cupholder liner for the Tesla Model 3. If printed in a semi-flexible material, like TPU or Ninjaflex, the side blades will bend to firmly hold the inserted item.
(If printed in a non-flexible material, the side blades will break or prevent you from using the thing. Or, they'll securely hold a very weirdly shaped other thing.)
Also, the shape of this may be useful to other modelers, since (after a ludicrous number of attempts) it is a fairly precise fit for the interior of the cupholder area. If folks are interested and let me know, I'll throw the core dimensions together on a drawing, or in a STEP, or some such.
If you are printing this for yourself, great. If you are considering having this commercially printed, it may be more cost-effective to just order this very similar commercial product.
I may tweak this to add anti-suction dimples in the bottom, or to adjust the fin geometry, but I want to live with it for a few days before tweaking. I appreciate feedback from users/makers.
And finally, if you've read this far, you may be interested in my other Tesla (or non-Tesla) designs.
It's shared here https://www.youmagine.com/designs/ground-bait-ball-maker
I use this to make perfect little spheres of my ground bait and then catapult them next to where my hook bait is. May 2017 be a fish full year
You should have a method for overflow. The barrel bung hole is 2" fine thread and they make many adapters for that thread. You would want something like this to divert to barrel.
This is OP karma farming and the mods let it happen. It's not printed, it's not his image, and it's not "functional." It's just a lie to get karma, and it works.
Literally the first result on Amazon for "phone stand" is this exact item:
https://amazon.com/Lamicall-Cell-Phone-Stand-Dock/dp/B01HPI5AM2/
This is about $3, but it's still cheap: https://www.amazon.com/gp/product/B015MGHH6Q/ . I have about 10 of these for various small gadgets.
The atto is about 5 times more expensive for being 3x smaller.
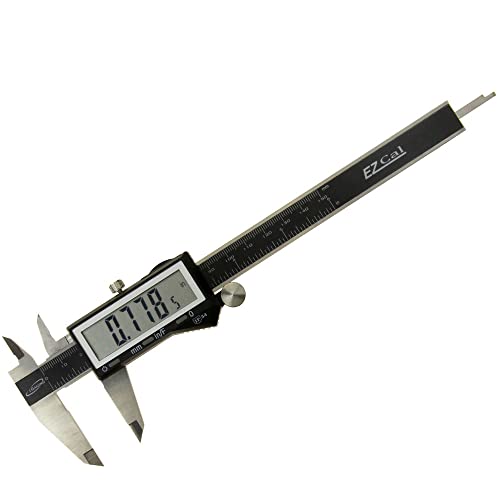
I cant' speak for other people, but in my case, I have an interest in building and making things outside of work, so I have invested time into learning how to use Fusion 360, and also purchased calipers (specifically this one) to get accurate measurements.
For this particular model, I had the broken part, and could measure everything using the pieces I had and the calipers. Using those measurements I could use Fusion 360 to model the part.
If you want to get started with making your own things, I would suggest first learning a program like Fusion. Tinkercad is a great starting point for people with no 3D modeling experience because it's free and is easier than a CAD program. Once you are comfortable with that, I would start tinkering with Fusion 360. Maker's Muse has a playlist that was helpful for me.
From there, it's whatever you think of to create.
Stl link here! https://www.thingiverse.com/thing:3134995
I made the base design in solidworks, exported as STL. Imported the STL in MeshLab to create the voronoi pattern.
Printed on my Zortrax M200 using these settings:
Material: Z-ABS, black
Layer height: 0,29 mm
Support: 10 degrees (20 degrees would probably have given a cleaner print, but that would have been a real pain to remove). I used support lite.
Total print time: a bit under 20 hours
The height of the stand is about 20 cm and it is about 11 cm deep so the ear pads of my headphone fit.
Edit: STL available: http://www.thingiverse.com/thing:641301
The driver's side seatbelt guide on my car was broken when I bought it, and reaching way behind me to grab the seatbelt was getting annoying.
But not $125 annoying. Designing this piece, I found the limits of Tinkercad, so if you have any suggestions for CAD software that doesn't take a ton of time to learn, I'd love to hear them.
Edit: if you also happen to need a seatbelt guide for a MK3 Supra, here ya go
These are how you normally do it -- to keep the switch from being used, but keeping it a functional switch:
https://www.amazon.com/Switch-Protects-Lights-Circuits-Accidentally/dp/B06XP9M2FT/ref=sr_1_7?keywords=switch+guard Easy to 3D print, I suppose, but also dirt cheap to buy.
Full files and details here:
https://www.youmagine.com/designs/block-tackle-608-bearings-550-paracord
We lifted 100lbs with it easily. Printed in PLA at 25% infill.
Thanks
you can probably figure this out yourself on tinkercad in less than 15 min tbh.
but I just made this because I'm bored https://www.tinkercad.com/things/6c8uoTXGFdO
it's 9mm diameter w/ 8mm hole, which is 1mm thickness and 30mm high (3cm).
Better yet, get the non-stick chapstick. The kind that is already semi-liquid. It won't run and when cool reforms just fine. Slightly better than that in tins, as the tins can leak if turned sideways. These have a screw top.
Now when it is hot it comes out very quickly and flows like water. So, put a dab on your finger and use your finger to apply it to your mouth. If you apply it directly (when hot) you'll squirt too much out and make a mess.
ELEGOO Mars Pro 3D Printer with Air Purifier, MSLA UV Photocuring LCD 3D Printer, Front USB Port Matrix UV LED Light Source 2K LCD Screen, Off-Line Print, 4.53 x 2.56 x 5.9in Printing Size https://www.amazon.com/dp/B08L8SRS4J/ref=cm_sw_r_cp_api_glc_fabc_X.s-FbE0HNYKX?_encoding=UTF8&psc=1
I bought a cheap food dehydrator on amazon and didn't want to cut out the trays in order to use it for drying filament. Thingiverse to the rescue: Dehydrator Extension. I glued the pieces with superglue and it has held up for a week with no issues so far.
Yeah that's not going to stop anything.
https://www.amazon.com/USA-Pumice-1-25-Dry-Quarts/dp/B07JNFWTJG/
https://www.amazon.com/Horticultural-Additive-Conditioner-Drainage-Ventilation/dp/B08ZBBD3TY/
bonsai pumice or white perlite, 1/2" or thicker layer on top of the soil, blocks gnats and flys from laying eggs in your soil. They don't like the texture, plus it looks really nice. Make sure you water from the bottom too.
If you find yourself breaking more chrome colored things and REALLY want to go the extra mile to make printed parts look chrome, these are awesome
Is that the Peugeot Paris u'Select pepper mill? I have that exact same one in the 9 inch size; it's one of the best pepper grinders around!
I normally use a funnel that is wildly too small or big to refill it, or if I am being lazy I use my fingers to make a ring around the top to act as a kind of funnel to prevent spilling peppercorns.
This is a great print, this pepper mill can be kind of annoying to refill, especially if you use it everyday like I do and have to refill frequently. Nice job!
I always really loved those Brydge/Hengge vertical style docks on Amazon, but couldn’t justify spending over $100 on one of them.
So instead I modeled and printed one myself! I found a right angle Thunderbolt 3 adapter on Amazon and now it works better than I imagined it would!
I’m still putting some finishing touches on the designs, but I’m super happy with the first functional prototype.
Fair enough! I picked up this TPU on sale a few weeks ago and have been happy with it on my Ender 3. No mods needed, prints fairly well through the Bowden tube.
40Watt CO2 laser. It can cut plastic, and engrave metal
Edit: here it is on amazon for just under $400. It’s cheaper on ebay. https://www.amazon.com/VEVOR-Engraving-Machine-Exhaust-Stepping/dp/B06Y2PB3RX/ref=asc_df_B06Y2PB3RX/
Fusion 360 and STL files are here: https://cults3d.com/en/3d-model/game/gamesphere-for-nintendo-gamecube
Most of my STLs are free, but this one is $3. I spent more hours than I'd like to admit on this design. Actually, if you look at my Fusion 360 timeline you'll see the pain, haha.
I'll do it in a few days. Have to clean up the code since I wrote it midnight and it's very messy. Until than you can get some ws2812/neopixels. I used this, (can I share such links here?) but it works with 4 leds cut off a neopixel strip too.
The laser-cut and CNC crowds have good ideas that are adaptable to 3D printing, but they're most often large-scale as designed for pieces of plywood. Make Magazine issue 33 has "CNC Panel Joinery" for example.
Connecting techniques will differ between printing technologies. I assume you're using plastic deposition printing in ABS or PLA. You can take advantage of plastic's flexibility. You can make a clip that's relatively thin and have a clip slide across a surface and latch into a notch on something else. You see similar clips on commercially-produced computer cooling fans, for example.
I've only had a Flashforge for a month or so, and so far the most vexing problem I've experienced is what I see as problems with tolerances. This will certainly confound any situation with closely-mated parts.
I've tried to print and assemble Theo Jansen-style "brabeast" walking machines. Maybe I need to more carefully calibrate my printer, but printing this object from Thingiverse gives me 8.20 mm posts that are supposed to press into a 7.60 mm hole.
I used Moment of Inspiration which can be found over at http://moi3d.com . I originally intended to print it with ABS but I actually printed it with PLA. The bulb is a CFL so I don't plan having any problems with heat.
I made a simple bracket to wall mount my network tuner. It has to be close to the antenna so it’s not a good fit for my equipment rack. I made the holes generous enough to easily mount with drywall screws. I’m posting the Tinkercad link so you can easily edit to your heart’s content. Printed in PLA.
$14.99 on amazon You can look at youtube tutorials for installing smart switches. It's not hard. Same for smart outlets or outlets with extra USB ports.
It’s a color changing filament . It was supposed to be more rainbow like, but this spool was mostly these nice “fall camo” colors. The guy I made it for picked the colors. He chose very well.
Not sure if this is the peg board, but it looks close to OPs
Due to the spacing between the "coils" in the hose, it shouldn't be too much of an issue, but if any leaks it would be a very miniscule amount.
HOWEVER, THEY DO make special hose clamps, called bridge clamps, that have offsets exactly for this reason.
This may work, from amazon:
https://www.amazon.com/Keyed-Bridge-Hose-Clamps-Pack/dp/B004PPROOG
Yeah, why would a person with a 3D printer want a way to remove the prints from their 3D printer? Clearly they should have spent $5 buying one from Amazon instead of making this one for free (3D Print Removal Tool https://www.amazon.com/dp/B00VB1U886/ref=cm_sw_r_cp_apa_TK4yBbACA0EC4).
Maybe if you buy precision sealed bearings for industrial use, but you can buy cheap ones for $0.17 each on amazon, or get them free from old skateboards or roller blades.
I use a free Android app called IP Webcam. https://play.google.com/store/apps/details?id=com.pas.webcam&hl=en
By default it will broadcast live video over the network, but you can configure it to broadcast over the internet too. I really like it so I bought the ad free version, but it has full functionality without that.
Super easy to print and fun to build!
See build instructions and photos if you want to print it in 2 colors. (But it also looks great all white!)
Free to download here: https://cults3d.com/en/3d-model/home/cable-car-clothespin-carrier
The idea is that you fold a tissue paper in half a couple times, and clip it onto the front plate. Everything clips together.
There's lots of room for improvement, so please let me know if you have any suggestions.
The design on thingiverse: http://www.thingiverse.com/thing:707759
I'd first made this a few years ago, but the PLA version cracked this weekend, so I reprinted it in PETG. I had grossly underestimated the difficulty of removing supports from PETG.
Tinkercad link: https://www.tinkercad.com/things/3dSeOWIurP2-dyson-hair-dryer-mount-draft
Ha. The only part that’s animated is actually the URL line. I just have the other things appearing after the smack.
I bought Peter McKinnon’s motion graphic pack for $30 a while back. He uses them a lot better than I do but they do spiff things up a bit even when used in basic ways. https://sellfy.com/petermckinnon/p/pgY5/
I’m sorry do you have a Burris fast fire red dot sight on the side of your telescope?
edit: Burris FastFire Reflex Red Dot Sight for Rifles, Pistols and Shotguns https://www.amazon.com/dp/B007I9D8QE/ref=cm_sw_r_cp_api_glt_fabc_8E9DV8FWBXM5NR7Q1X37
That’s exactly what that is, but it’s a Burris digiscope ive now realized. Really funny that they just slap a fastfire on the side and call it a day
Nice print! May want to add a little padding to the arms—after sometime hanging they can leave divots on the headstock. I bought Hercules Hangers a while back that have arms that close around the neck with the weight of the guitar and can lock as well. Earthquake proof, essentially.
An oscillating saw with the carpet hook attachment works just as fast. I use that to break down boxes all the time and it rips thru boxes like a hot knife thru butter.
https://www.amazon.com/dp/B07R1MLX84 That’s the blade I use
Meat tumble marination is a thing: https://www.amazon.com/STX-International-STX-1000-CE-Vegetable-Tenderizer/dp/B0115CGX4I
I had one similar to the above that I found at a thrift store. It has a jar that can be placed under vacuum as well. I mainly used it when making beef jerky but I can tell you that the results were almost identical to beating your meat (hehehe) with a mallet or even the bottom of a pot or pan and marinating it in a vacuum sealed bag.
If you have the money, I'd recommend a vacuum sealer instead of this meat tumbler. This meat tumbler is an expensive "uni-tasker" unlike the vacuum sealer machines.
Yep, it just drives the screws into and out of the large table play set. The screws came with the set. We got it second hand so it’s missing a few things.
I'm waiting to get my print settings perfect and then I will print this monstrosity.
http://www.thingiverse.com/thing:631541
Of course, by that time winter will be over in Georgia, not that we get any snow anyways.
Consumer reports claims that manual trannys offer increased fuel efficiency
What is your stance on longevity? From a mechanical standpoint; manual transmissions are cheaper, easier to maintain, and have a greater lifespan. I think that automatics are getting there, but I don't think that they offer the same dependability yet.
Edit: While we're rustlin' jimmies, I should ask - if you're worked up over people driving manuals as a weeny-measuring contest, then why is your first point "faster performance" from autos? What's the benefit of being faster? Just curious; because every manual transmission I've had can keep up with traffic, and I have no desire to improve upon the top speed or acceleration. After all I'm just trying to get from point A to point B... not measuring weenys.
Check out the parts list here https://cults3d.com/en/3d-model/gadget/camera-boom-mount-for-3d-printer-rail-and-cart
Different material. Turns out I got the orientation of the knob slightly off... I'll redo it at some point.
This is the model I used. http://www.thingiverse.com/thing:164865 Slightly modified it using Tinkercad, Meshmixer and Netfab.
Here's the part on Tikercad. Nothing special, but if you dissect it you can see an easy way to make your own parts quickly when you don't need high-precision parts. I love this sub, it's so cool to see what people make and post.
https://www.tinkercad.com/things/51MUiQRRgJV-card-table-wall-hanger/
I bought a roll of this tinting film for $6 a couple years ago and just cut off whatever size I need. Still have most of it left too.
I bought a pack of these for my tap handles. I just gently heat it on the stove and then press it into a slightly undersized hole in the print and it holds really well. It sure beat printing threads, which I could never seem to get right.
If your headlights are turning yellow & hazing that can be UV light exposure. Also, if the washer contains what I believe they add is methyl alcohol (methanol...antifreeze functionality) if I remember correctly the methanol can degrade the acrylic lens material and make it more prone to weathering. What I have done and it probably lasts 3-4 months is use what's called "Future Wax" an acrylic floor sealant. If you wash & clean your lens really well and then apply the "Future Wax", it seems to seal, de-yellow & clarify your lens.
i have done the same. i have a nice pair but i bought this one just on a whim cause i needed a second one and this is the best screwdriver handle i have ever used. if i ever need to replace my good ones, it will be with these
https://www.amazon.com/gp/product/B001IDF8MS/ref=ppx_yo_dt_b_search_asin_title?ie=UTF8&psc=1
It can be found many places, but prices are similar. This is the stuff. Beware, it sticks so hard it will never come off. Trace a rough grid before you start!
Aspect Peel and Stick Backsplash 11in x 4in Honeycomb Champagne Matted Metal Tile for Kitchen and Bathrooms (3-Pack) https://www.amazon.com/dp/B00NWZV9K0/ref=cm_sw_r_cp_api_glt_fabc_Z3YJG0KNXDYXA1DY4KNM?_encoding=UTF8&psc=1
They’re basically little bit holders for helping get in odd spots. The exact set is
Titan 11218 Finger Grip Drivers (3 Piece) https://www.amazon.com/dp/B013GK9I3A/ref=cm_sw_r_cp_api_glt_fabc_HVHNB0QKAMEV3T91QJWB
No problem ask away :)
I would definitely recommend making some sort of prototype before making a PCB. It will help you work out any design issues before you make a potentially costly mistake.
One thing to consider if you are planning to use a pro micro chip is that they only come in surface-mount packages, which are harder to solder by hand. You could use an assembly service, but it'll be more expensive. Instead, you could just treat the Arduino like a component and solder the whole module onto your board.
You can use the Arduino IDE to program the chips. If you are buying just the chips, they most likely will not come with a bootloader, which allows them to be programmed over USB. In that case, you would use an ISP to flash the firmware. I like these because they are cheap and mine has lasted forever.
I hope that helps!
No worries mate :)
Also: Lithium grease that doesn't come in a spray can is certainly a thing. https://www.amazon.com/CRC-SL3660-Multi-Purpose-Lithium-Grease/dp/B000M8Q248
Just squeeze it out and brush it on.
I am a big fan of Boeshield T-9. I use it on all my cast iron beds and uncoated steel tool parts. For smaller things or precision tools, I like to use Camellia oil. All that said, your solution is the best (just get rid of the moisture) if it is practical. As mentioned in another comment, this would not work where I live, as the beads would need to be changed/charged multiple times a week.
The ergodox ones were okay but a bit too low and shallow. Also I sold the ergodox.
The printed one that I did was a big no-go. The shape felt weird to me.
I’m using these rests from graffiti right now : https://smile.amazon.com/dp/B01HQXD5OG/ They are a bit too wide and short, but they are better than nothing. Wish they were 40% taller and smaller foot print.
The best height support I found was using my chairs arm rests which put my hands at the perfect height with no compression on the wrist/palm. Unfortunately the extra height needed for the keyboard caused the desk to press down on my legs and it was difficult positioning when playing FPS games.
Good luck and let me know if you do find a good solution :)
Sewell Direct AirStick... https://www.amazon.com/dp/B00ITX9OU2?ref=ppx_pop_mob_ap_share
Put some of this onthe bottom. Will keep it stable. It will come off with some pressure and then can be reseated somewhere else.
Marble PLA Filament 1.75mm, PLA 3D Printer Filament 1KG, Marble Colored Filament https://www.amazon.com/dp/B0837QJL5T/ref=cm_sw_r_cp_api_glt_fabc_9V9GT4NXSD8ZRHBRZBS5?_encoding=UTF8&psc=1
good and cheap
hell, they'd be great for just making good office chair wheels or replacement wheels for furniture dollies. Also rollers for drawers/shelves or sliding doors.
I also kinda want to turn one into a computer control knob for volume/scroll wheel. like one of these
You invented a version of this https://www.amazon.com/P-flector-Deflector-Prevents-Training-Through/dp/B07HY57YYB We had to get one when our nephew stayed with us for a month while his mom recovered from surgery. Otherwise he would pee right between the seat and the toilet and it would run onto the floor.
From their FAQ, the pen uses PLA (low temp setting) and ABS (high temp setting). Hatchbox filament on Amazon is a good place to start, comes in both ABS and PLA. Looks like those are much cheaper than from the 3Doodler store.
I suspect that you could do other materials too, but they'll have to be in a similar temp range to ABS or PLA, since those are what the 3Doodler is designed for. Be careful with exotics like metal/wood fill or elastic materials, they usually require different nozzles or special settings.
Sorry Reddit didn't show me any notifications, just came across this on my feed (mobile... ffs) As the other reply says though, Amazon for the win! Got it on Amazon Canada, Just looked for the widest I could find
Scotch-Blue Painter's Tape, Multi-Surface, 2.83-Inch by 60-Yard https://www.amazon.ca/dp/B001EJMS4M/ref=cm_sw_r_cp_apa_-.fWAbJ8PXT9M
This Hakko iron is super nice and of higher build quality than a Weller.
Hakko FX888D-23BY Digital Soldering Station FX-888D FX-888 (blue & yellow) https://www.amazon.com/dp/B00ANZRT4M/ref=cm_sw_r_cp_api_i_ANKyFb520E67W
I am. And I think it's a really cool part. Those are just thoughts for tweaks I would make if updating it.
I don't know how comfortable this is when it's heavy. Making the handle a "D" shape might be more comfortable when it's really heavy, as you wouldn't have the shaft sticking down between your fingers.
You'd be holding one large straight handle, then the hooks could extend off the outer surface of that "D". Where what you're grabbing would be more like this shape: https://www.amazon.com/dp/B0046UOB14/ref=cm_sw_r_cp_apa_i_EFasFbB8HTFHC
My wife has one of those black boards with little white plastic letters that stick in between folds in the board (sorta like this) that she changes the message on every week or so.
One of my first projects was printing a dickbutt the exact right scale and with the proper little tabs on the back and sticking it up there one night after she'd already gone to bed.
Then I waited.
I did, it tops out at 15v (and I tried it as well). However, I have another similar device I made for this USB charger, and it does not need a buck converter.
what's your motor/gear set up on that thing? I'm running a small stepper motor with a 4:1 gearbox on my printed cat feeder (a customized version of this design). The arduino backs it off in a random pattern to clear kibble jams as they come up, so it always feeds, but I was wondering what you've got set up in case it's a more reliable design?
Here: http://www.alibaba.com/product-detail/Kossel-delta-3d-printer-kit-LCD_60083857849.html I will waarn you though, it's tedious to but it together, me (13 years old) and my dad did it in about 24 hours total. But it took two weeks to get the software to work. So try to find good tutorials on everything so you know what to follow. But after all the calibrating it prints amazingly, have fun, good luck!
If you want to make one and test it out: https://cults3d.com/en/3d-model/tool/fiskars-micro-tip-scissors-lock
Included STP, F3D, STL so you can modify as needed.