
What are
/r/3Dprintmything's
favorite Products & Services?
From 3.5 billion Reddit comments
The most popular Products mentioned in /r/3Dprintmything:


The most popular Services mentioned in /r/3Dprintmything:
Cults.
Thingiverse
Autodesk Tinkercad
Gofile.io
Microsoft OneDrive
FreeCAD
HackADay
Sketchfab
Youmagine
Gumroad
WeTransfer
Ivideon
The most popular Android Apps mentioned in /r/3Dprintmything:


The most popular reviews in /r/3Dprintmything:
I was poking around on Thingiverse yesterday and found this gear with a very similar shape. I may pop open a clock later this week and get proper dimensions. I would happily pay $10-20 for a prototype. This is a very common failure and I'd be interested in printing a couple hundred of these if they work.
They said they would send me the STL files for the remaining parts, pretty sure this is the model they used but I don't really want to buy the 3D model if I don't have to. Hoping somewhere out there has printed this before.
Thanks, signed up for both and downloading the Siemens Free 2 GB package.
PS: I just did an estimate for a simple PET bottle thread item via 3DHub and it was pennies on the dollar i.e. came to 4 $ due to being a small PET thread converter.
https://cults3d.com/en/3d-model/tool/pet-bottle-to-sparkling-machine-adapter
So I might try to piece together something like this. Are there Reddit/ other groups where one could seek advise on going through such an exercise? 1 - Find existing samples 2 - Pull pieces stuff from existing projects into mine 3 - Get help / advise/ guidance on shaping and finalizing mine 4 - Put it up for others to use
Plus if you don't need the official, this one is $8. Link
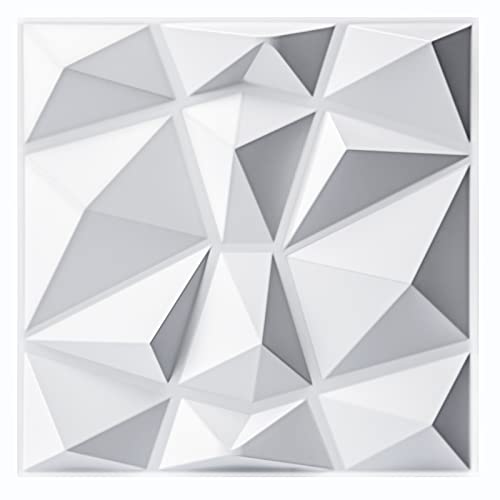
I'm trying to print these two shelves, but they're 12.5 inches long. Will they work?
Yea, you would be better off just buying one. Search for your model and replacement parts or go on amazon and look for food pusher - https://www.amazon.com/Cuisinart-DLC-2014SPT-1-Pusher-Small/dp/B015RDCYUS - just an example. Hopefully can find one thats fits and would be a lot safer for you in the long run.
Oh okay thank you, I just ordered a metal one from Amazon here hopefully it goes well! Sorry for my lack of understanding
I don't know why you would bother trying to print this when you can find dozens of them on Amazon
Ex: Universal Car Seat Belt Clips Alarm Stoppers,Alarm Stoppers for Car Seats Belt Buckles, Car Styling Chosen Car Auto Supplies Seat Belt Clip Safety Belts Buckle-A(2PCS) https://www.amazon.ca/dp/B098N77N1K/ref=cm_sw_r_apan_i_X8KAVSYHQ3ADRW6S0AZJ
Google for Buffalo or Bison 3D Model stl. I found several. Go to tinkercad.com, import the stl file then use the torus (donut) tool to add a link for a chain post. Get a couple of short lengths of chain with a jump ring on each end. Done!
Works really well and overall I’m really happy with it.
Only issues: - Screws aren’t recessed enough so it scratched the top of my Moto M4 a little. Probably could be fixed with different screws. - Can slide out if unplugging something from the front and not careful. Not an issue for me though since I don’t unplug anything.
Bought this too so it’s super low profile now. There’s a small gap in between the mount and the Motu so I was able to route the cable through there. Looks really clean.
I see. In those cases I cut the tube at the top and save the fitting.
https://www.amazon.com/gp/product/B088GYZ34D
Is a good value
I would also be interesting in combining it with this design if possible: https://cults3d.com/en/3d-model/art/bmo-with-show-accurate-internal-parts
I like the faceplate variations and the limbs mainly.
I did a quick test using TinkerCAD. It was able to load the STL that /u/FurryMonkeyUK posted, and then export the object for lasecutting as an SVG.
It took a minute and a half to cut this out of 1/16" cardboard, so less than five minutes out of 3mm MDF I'd expect. I didn't do any updates to the cut file for the laser kerf, just cut it as is.
Good luck!
This is something that 100% doesn’t need to be printed.
20x Small White 28mm Curtain Rod Rings, Fits 25mm Pole/Rail https://www.amazon.co.uk/dp/B08TMYSV1J/ref=cm_sw_r_cp_api_glt_fabc_F1J10HTT3Z6XBQBCD301
just so you know, there is already a model available\
https://cults3d.com/en/3d-model/art/dean-winchester-3d-printing-ready-stl-obj-formats
Blunderbuss Pete has to be my favorite but that is mainly nostagia because it was one of my first successful bronze casts.
Also, what is the purpose of your website?
I'm looking for the large box to be printed and can adjust the design if you have a large enough printer.
I also need 24 of these insert boxes printed.
I'm located in Florida.
No strict color preferences but if it's a simple option for you to change and isn't a large upcharge i would like to discuss it. Otherwise just simple black or whatever is the least expensive.
https://www.tinkercad.com/things/aqe45vexLr8-jumpstart-pack-wlid
Hey.
That sounds great! Im working on printing them right now. The file seems to be sized wrong, so I contacted the creator about that (http://www.thingiverse.com/thing:232439/#comments) and I will try to get it done soon. If you could get me the length that the thing needs to be, and the diameter of the strings (both in millimeters) I might be able to bypass the wait-time of the creator getting back to me.
Cheers! -qubist
That's my first instinct, it looks like the edges are touching with very little overlap. I mean it'll print as one piece because the plastic will fuse together, but I'm assuming you want it to last through handling. I would make that overlap at least 1-2mm thick just to be sure. I think you're covered on quotes for this one, but shoot me a PM if you have any prop ideas, cosplay props can be used for short/indie films right?
Decides to make one post which hopeful is a good enough answer for those who had questions/input :)
​
To make a bit more specific post to what I’m trying to do. I’m making a side marker for which we use for document which sides scans are done (i.e. we scanned left foot; this is ex. to prevent they cut off the right one in case we fucked something up).
Basically there are products that already do this, however they are quite expensive (as in stupidly expensive, as in more than 1000 USD cheaper) and well… the health budget is being cut a lot.
​
To the product part: The cylinder is marked as a solid object. The letter R (Right) is non-solid. Due to hygiene the airgap (in the shape of a “R”) must be contained so we don’t stand in a infection nightmare. 1mm on top/buttom (doesn’t matter) I’ve put a solid R, so people know that they’re using the cylinder which is the sign for R, if this makes sense?
​
But for this prototype I just need to see if the airgap will present with the contrast in the image as I need. I saw that I didn’t group the two figures together in the last one I did, so now I have.
Sent it to the printer guy, let’s see what he says. https://www.tinkercad.com/things/8YMpPllH2gl-daring-vihelmo/edit?&sharecode=q8hQ4zP358esALx2veFxByGcvk_bLDD3fq-p5hsxqjA= for people to see the “design” (if you can call it that) – link expires in 336 hours and I have saved the work, so no worries if somebody decides to trash it :)
Here you go: https://www.tinkercad.com/things/hiCSR9iapAS
I made the inner diameter 17.5mm, which should make a nice tight fit with that 17.13mm part in your image link. Feel free to adjust as necessary on tinkercad.
I expect /u/That3DPrinter will do a much nicer job, but I knocked this out during my lunch break. Not quite the same as your model, but should print flat on the print bed without a problem. Scale as desired, and feel free to edit if you want to try out TinkerCAD.
​
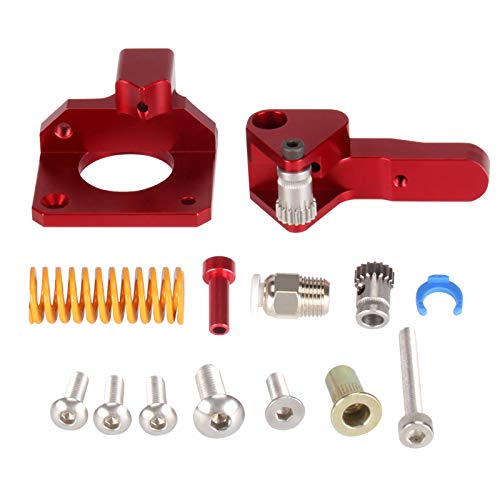
Used a free program called freeCAD. My first time using it too. watched a couple youtube tutorials and was able to make this without too many complications.
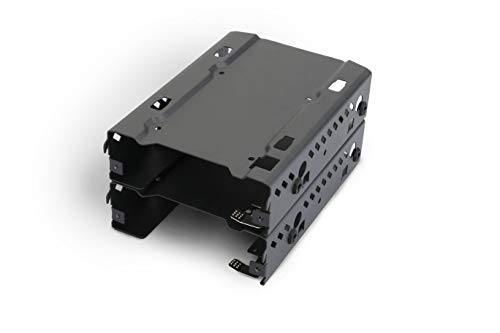
That crappy 3d printed bracket design is likely to fail (and damage drive) when it gets hot. Pictures have already been posted of 3d printed PLA drive racks that failed during the heat wave. High end of drive operating btw moments is also very close to softening temperature. Sitting in hot car is another risk. Unsound mechanical designs fail when PLA gets warm. Other filaments may also be affected.
Pick a better design and have it printed in a higher softening point plastic. At least add some plastic to make that one a U channel that is less likely to bend instead of flat and connect to all the holes.
A commercial bracket may be less expensive and safer. On logic AKHDR-MK15X is one random one.
Another. https://www.amazon.com/Phanteks-Stackable-Bracket-Cases-PH-HDDKT_03/dp/B07GY2B3WP/
Honestly this is a pretty large job (assuming you want about as many in the picture) Here is an Amazon link for I believe an 8 pi rack cluster with 120mm fans. https://www.amazon.com/GeeekPi-Raspberry-Cluster-Stackable-8-Layers/dp/B085XSPV7G/ref=mp_s_a_1_1_sspa?dchild=1&keywords=raspberry+pi+rack&qid=1630981447&sr=8-1-spons&psc=1&spLa=ZW5jcnlwdGVkUXVhbGlmaWVyPUEyNDk2Rlg4U1hYT0ZQJmVuY3...
I’m sure you can even find something cheaper. However if this is what you want and you also want to support the 3d printer community I totally understand that, feel free to dm me and I’ll give you a fair quote!
Honestly for custom modeling work and printing it's probably easier to just buy a new microwave. Easily shipping original, modeling and printing and shipping back replacement is gonna cost you >$65-70 https://www.amazon.com/dp/B01EIZSF6I/ref=cm_sw_r_cp_apa_glt_fabc_RNEH9XN0SVG5Z9BXAQVW?_encoding=UTF8&psc=1
If you want to ship to me (I'm in Arkansas), I can model and print and ship back to you. Custom modeling will be ~1 hours @$45/hour and $10 for print plus cost to ship back. DM me if you still want help.
This set includes 7mm https://www.amazon.com/Neiko-10074A-Socket-Metric-13-Piece/dp/B000GYLGU8
A 3d printed plastic part likely wouldn't survive for very long. The drill end is typically 1/4" in the US.
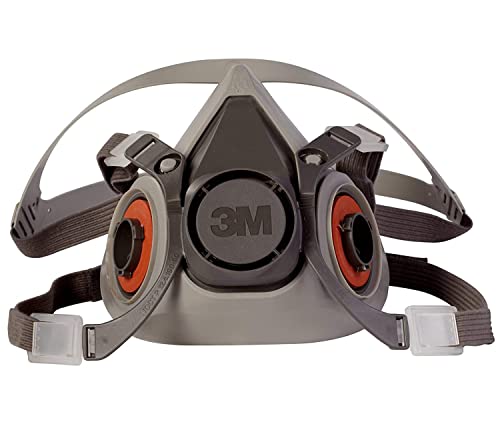
Go to your local auto store and grab some car vacuum line caps as they are exactly what are being used here for protection. Amazon has them also, just need the size of the legs width😉. Vacuum line caps
Hey i think you can buy these, they actually go next to each other not seperated but still looks nice tho, also 3d printing them might be better Theyre too expensive imo
I could make the file but the boards are cheap on amazon. Cribbage – Traditional Wooden Board Game, Classic 3-Track Layout & Plastic Pegs with Free Deck of Playing Cards by Brybelly https://www.amazon.com/dp/B00FU1CHP0/ref=cm_sw_r_cp_api_Dc7yAbCF1V01P
That... isn't a coin, nor is it "hollow" in the sense that someone would immediately assume when you talk about a "hollow coin".
I wouldn't have them all ready today, as I'm trying to edit in bases for the models using blender(first shot using it). That being said I'm not sure if it's in the right format or if there is any other editing I have to do before it's 'printable'. I'm not super worried about detail because the models I wish to print are quite old. My plan was to use something like this to iron out details by hand.
I think this model is ready for printing. If not let me know, and I'll try to fix anything that needs fixing. My plan was to get 10-30 ones very similar to that one. If that ones good to go, I will probably have all the ones I want printed good to go by Monday or Tuesday.