
What are
/r/projectcar's
favorite Products & Services?
From 3.5 billion Reddit comments
The most popular Products mentioned in /r/projectcar:


The most popular Services mentioned in /r/projectcar:
Facebook Marketplace
IFTTT
Gumtree
Google Photos
BitChute
Uncyclopedia
IGTV
TinyPic
Wikimedia Commons
Autodesk Tinkercad
picinfinity
Youmagine
TeeSpring
MobyGames
WordPress
The most popular Android Apps mentioned in /r/projectcar:

The most popular reviews in /r/projectcar:
So i work for a vehicle wrapping and signage business, and usually we deal this sort of stuff in the regular and my go-to liguid for jobs like this is called "rapid remover", Amazon link below And this stuff works wonders, all you need is to spray this on liberally, then give it about 5 minutes and then use some type of plastic squeegy to remove the thick glue off the door, and finally spray again and use paper towel to remove the remaining residue.
(RAPID REMOVER Adhesive Remover for Vinyl Wraps Graphics Decals Stripes 32oz Sprayer https://www.amazon.com/dp/B006RUJ2D8/ref=cm_sw_r_cp_apa_ETBTyb6CCX87A)
When I had my first beetle I was a big fan of How to Keep you VW Alive - Step by step for the complete idiot. Mostly because I was an idiot mechanically back then.
Whaaaaaaaaaaaaaaaaaaaaaaaaaaaaaaaaaaaaaat?????
It took two seconds to Google it. (Amazon link)
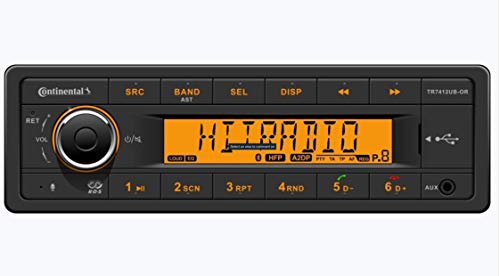
Personslly I wouldn't buy it. For $180 you can do a lot better than this hot garbage. It's missing the most basic of features that $35 units have, and it has an LCD straight out of the 80s FFS! If all you want to do is listen to FM and stream Bluetooth (which is all this stereo can do), you don't need to spend $180.
well for everywhere that isnt dented (like you got above the door there, thats gonna need to be pinned and pulled) id just use 220 on an 18 inch block. always try to use the longest board you can, this is the kit i use.
also you dont have to remove the old paint completely just sand it smooth to look for waves and make it a consistent finish then go over it with 320 before scuffing
There is a big weight difference between the foam and tar for sure. I probably added 60lbs+ with the tar, where as the foam is like 10 lbs total. The pic is tar install only, foam goes in tomorrow.
The foam is stated as the better heat insulator. Good for the roof to keep the car cool on sunny days, or on a v8 where the headers and downpipe are almost touching the floor.
But the tar is better for vibration which was so bad I couldn't hear the person next to me. I needed padding under the new carpet, it didn't com with jute padding so I am using the foam to replace that and give it a more pleasant feel with the benefit of heat blocking and sound dampening.
AUTOSAVER88 Headlight Assembly
The headlights alone might not be enough, but if you get 9007 LED headlights they fit in the assembly 👍🏼
dakota odor bomb’s work great also I had a really bad urine smell in a car I bought Used one can and the smell was gone
Odor Bomb Odor Eliminator 5 Ounces each - 3 Pack https://www.amazon.com/dp/B008LUT6XS/ref=cm_sw_r_cp_api_glt_fabc_MEXJKCYNC3FESB8CGF7Q
A bit less expensive than top quality, but the locking pin eliminates the issue that HF keeps getting recalled over : Pro-LifT T-6906D Double Pin Jack... https://www.amazon.com/dp/B074R17GL4?ref=ppx_pop_mob_ap_share
I was wearing Uvex goggles while grinding some welds beneath a car and still managed to get hot shmutz in my eyball that required a trip to an optometrist with a medical grade dremel.
I picked up one of these shields off of amazon and it's been awesome.
Set-up an IFTTT recipie to scour ebay and local craigslists. And like Mo0pie said, check out vehicle-specific forums.
I know most rental places rent cherry-pickers (engine hoist), but you might have to call around for a while to find a table-lift. What do you need it for? (Also keep in mind that for a lot of tools like these, it becomes cheaper to just buy one second hand rather quickly if it's not just a one-time one-day rental)
Use IFTTT to keep an eye on your local craigslists etc.
Offline, check out your local tow yards. I've got three in town that regularly have swingin' deals on classic steel. Usually lean title cars so make sure the back reg isn't too insane.
Not exactly, but I rewired my car with a heavily modified hotrod universal harness. I definitely would have been better off with a good marine fuse block and bulk wire when all was said and done. Buy higher end connectors if you can, marine stuff is nice. Get proper crimpers too. Biggest tip is invest in a label maker that can print on heat shrink tubing and a ton of the proper tubing. I have this https://www.amazon.com/dp/B005MR516Y/ref=cm_sw_r_cp_api_glt_fabc_EP2PZY890EYB9QX1HXYZ and really like it. The one thing that annoys me is how much tubing it wastes making a cut, so I just make a ton of labels all at once, print it as a single label, and cut it with scissors.
Use a raD without a filler. Find a coolant overflow bottle and mount it higher than the highest point of coolant. Maybe firewall. Needs to be a pressurized bottle style with flow through .. at least two hoses.
Most manufacturers have been doing this awhile.
Late 80s VWs have some compact easily mounted ones. Any Chevy from this century.
Aftermarket will have shiny compact versions as well.
This is the one i used , youll need a powered drill for it . any kits you get that dont involve sanding are NOT going to work so dont waste your money . you need to sand down the top "yellow" layer , then buff and polish the underlayer and it will literally look like brand new headlights.
I used these on my 2010 M3 and you could swear they were brand new headlights. it lasts about 2 years or so before you have to re-do them.
https://www.amazon.com/3M-39195-Headlight-Restoration-Heavy-Duty/dp/B08745K56G
I just use wrapped my two harnesses in this: Tesa Wire Loom Harness Tape Used By Mercedes BMW VW Audi https://www.amazon.com/dp/B00EH6IZ6Y/ref=cm_sw_r_cp_api_glt_fabc_4F8RMT37N80VFV103Y5D?_encoding=UTF8&psc=1
It held up great for five years and wasn’t too bad to take off when I upgraded to a new engine.
Get a brake flaring tool like this. After getting one line absolutely perfect and messing up the flare with a split vise type tool, you won't regret it.
AUTOSAVER88 Headlight Assembly
The original headlights have the turn signal and headlamp separated. This single style looks better, but to replace turn signal bulbs, you have to remove the whole assembly
I’m not sure what you have in Finland, but I use this in the US. It’s a pumice and citrus based cleaner that usually gets off most of not all the oil on my hands. https://www.amazon.com/NATURAL-ORANGE-Pumice-Industrial-Cleaner/dp/B000CCOK6Q/ref=mp_s_a_1_3?dchild=1&keywords=Gojo&qid=1598125389&sr=8-3
You might be interested in the Diamond brand automatic gas leak detector.
/s
The rating is 8000lbs, this one was actually purchased through Amazon, but I had to pick it up at the closest shipping depot. Luckily I have a 1 ton pickup with an 8ft bed that I carted it home with. I carefully pulled it out of the truck with an engine hoist and put it together myself.
It doesn't need to be attached to the floor, and actually comes with a caster system that allows you to roll it (mostly) around. I put a ladder on it, and used it to finish the drywall on my ceiling. It's already gotten plenty of use.
LOL I actually just linked that one too. I went looking through my wishlist on Steam as I thought I had added a few in there too. Gearcity looks like a newer version of Detroit, which I played way back in the day.
Thanks. Tidy inside, small patches of rust in doors, bonnet and sills. Runs and drives fine.. mostly just cosmetic fixes and a bit of a tune up.. here's some more photos: https://photos.google.com/share/AF1QipOm8QX6OCzwA2k90z8yqOE6qUARPu8qGJnfGHgS8g17U3GzokdoV7Q7PHQkUnM_Ng?key=SU9iX1BtRW1RQzZ4cEtPdTIwb0gwaVM4ZkFqLVlB
Sourcing parts for a classic car can be more time consuming than the actual restoration. If you need a lot to complete the car, it's usually best to find a parts car (though, not everyone has room for a parts car). Other than that, lots of ebay, craigslist, and swap meet scouring.
I use ifttt for finding parts on craigslist and ebay. That way I don't have to constantly be checking for parts; it does it for me.
You can get newly stamped sheetmetal for a '67 t-bird. Just google for it. Repoped parts usually need some "massaging" to get to fit right, but it's a bit of work replacing body panels no matter when the parts were made.
- Where should you start?
Personally, I prefer to get all the mechanical stuff out of the way before doing any aesthetic work. So engine, drivetrain, suspension/brakes; then body, paint, and interior last. This way you don't worry about bessing up paint and interior when you're doing the dirty work, and you save the interior for last because it all has to come out for paint anyway.
- How do you do interior work?
For broken/missing parts; scrap yards, swap meets, ebay. I use IFTTT to keep an eye on ebay and craigslist for parts.
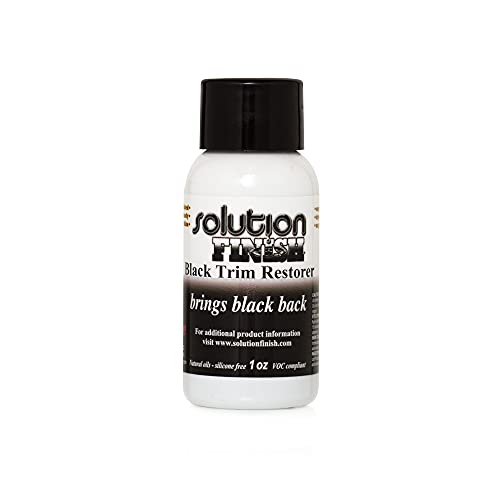
There are a few ways to restore plastic parts. For heavily oxidated plastic (like when black plastic trim turns grey), you can use a heat gun. Other times, I've gone to town with some armorall sprayed on a scotchbrite pad. Then there's also paints and dye, but I try to steer clear of those as they always seem to either not look right, or the finish doesn't last long.
- Resources?
Two seconds on google and this looks like a good start VolvoForums. Youtube is also great for learning to do a specific thing.
- How to learn?
I just figure it out as I go. When I need to do something I haven't done before, I do a bunch of research and then do it. In my experience, troubleshooting gets easier the more stuff you do. (There's also resources for troubleshooting but even then, it helps to know what's going on, ya know?)
Mophorn Exhaust Header Set 1 3/4" Exhaust Turbo Headers, Stainless Steel Exhaust Manifold Headers, Shorty Engine Conversion LS Swap Exhaust Headers fo https://www.amazon.com/dp/B07DC6VMJP/ref=cm_sw_r_cp_apip_6itDxayN9bWkv
It was a bit finicky but it’s worked well for me lol. It also had some type of adhesive on the suction cup.
seems like a lot of people do. I don't mind it, but can be time consuming to do it right. I have 3 drawers in my 56" tool chest dedicated to 12v wiring. Once you get your system setup, it isn't too bad. These are my preferred wire strippers https://www.amazon.com/dp/B01018CX46/ref=cm_sw_r_cp_apa_glt_fabc_K5KBEHAD3Z4QKQVAJ6T8?_encoding=UTF8&psc=1 I have other styles too, but these do 98% of my stripping. home depot has a pretty good selection of tools in the electrical aisle. my preferred crimper are Milwaukee end cutter/crimper combo. I just use the Chinese crimp w/ heat shrink connectors for most my automotive stuff. and a cheap multimeter to test continuity can save ALOT of time.
https://www.amazon.com/dp/B00EKLU5QY/ref=cm_sw_r_cp_apa_glt_fabc_B7D6CNN4PSJ2JNS78PYE
This is micro mesh and I've used it with perfect results before. Usually lasts about two years unless you put a clear coat on them after you're done. Its used for aircraft acrylic, windshields and windows. It's a tedious process and I'd recommend taking the headlight assemblies out before doing it. You can probably find it cheaper elsewhere.
I had a similar problem with my 122s. I ended up just getting a generic blower motor made for an American car. The holes matched up and I just had to find a blower fan that fit the shaft and heater box housing. Splicing the wiring is pretty easy. I am not sure exactly what the difference between the 140 and 122 heater assemblies are but this could be a start.
https://www.amazon.com/gp/product/B000C2M9HS/ref=ppx_yo_dt_b_search_asin_title?ie=UTF8&psc=1
It was $35 when I bought it.
Edit: Found it for $46 https://shop.advanceautoparts.com/p/carquest-single-shaft-vented-cw-ccw-blower-motor-w-o-wheel-35593/3910652-p?c3ch=PLA&c3nid=3910652-P
That's a broken stock guide. This link is what the whole set up looks like. I know it's not an exact fit but you should get the idea.
https://www.amazon.ca/TK10050-Timing-Nissan-Altima-Frontier/dp/B00WAMO3FO
If the chain is riding on aluminum instead of plastic, the hard steel chain will cut into the aluminum and all of that metal goes back into the oil, through the oil pump, into the filter, eventually clogs the filter, filter bypasses, and into your bearings, killing the entire engine.
You might have some luck that way, but overall I've found stock replacement designs (even cheap import ones like TYC or Spectra) to be both more reliable and more powerful. You can grab a new one of those off Amazon in about two days tops.
This is the V8 one from that year, and probably available by Friday for you:
https://www.amazon.com/Spectra-Premium-CF15010-Radiator-Assembly/dp/B00Q64R94Y
That actually moves a smidge more sure than the V6 one. You'd need to adapt the wiring a bit more vs the V6, but it's quickly available.
Of course, if there's a local one at a yard, that may be your fastest bet for one just to test.
Spraymax 2k clearcoat. It's a two part clearcoat in a unique spray can. You take the lid off and push it into the bottom of the can and it releases a hardener. You then have 45 minutes or something to spray. It's an extremely durable clearcoat. Only costs about $20 per can.
https://www.amazon.com/SprayMax-Glamour-Gloss-Aerosol-Clear/dp/B0082LJMC6/
Clearcoat tends to go everywhere so you have to tape everything off really well.
If you're working on turbo engines and you want to modify them, try reading this;
It's very simple, accessible and will give you more than you'll need to know for a long time.
Get yourself some of this and long sanding block and get back to work. If you're already this far in, might as well do a bit more to make sure it's straight.
So bit of a tip here to save you some money. There is a well known company that sells the paintable tow mirrors with external flashers and LED rear light. Somewhere in the 250-300 range depending on the options.
https://boostautoparts.com/products/2003-2007-classic-gm-tow-mirrors
In reality, they simply buy another product from Spyder and modify it. I cross referenced the part numbers for the super expensive mirrors and found their part number matched the part number from Spyder auto. Then I looked up that part number on Amazon and found these.
https://www.amazon.com/gp/product/B071KGJ554/ref=ppx_yo_dt_b_search_asin_title?ie=UTF8&psc=1
So it's the same mirror. Identical. I got the GM Summit white spray paint and some two part Clear coat, painted them myself. My 07 mirrors were plug and play into my friends 04. Plugs were exactly the same. On the 01 they are different from the 04 and up, but cross reference the Boost part number and get the ones from Spyder. They are the same mirror and half the price. You may have to wire them up yourself but it's honestly not that hard. I wired the rear super bright LED's into rear facing flashers, and they are brighter than the fucking sun at night. No one has any doubt I am getting over a lane.
The Amazon has 4 for $40, free shipping. I'm assuming they're crap, but it's an option. Looks like about a week away from where I'm at.
https://www.amazon.com/IWP006-198499-Injector-CITROEN-PEUGEOT/dp/B079DNF5YR
I've seen Megan's pop up in my search. You think they will do for a car that sees minimal usage?
Thanks! I just got them off Amazon. Hella 700ff driving lights. Comes with everything needed for install. Rn I just have them mounted to the bumper as I'm trying to fab some sturdyier mounts the mount to the bumper support.
As shared in r/Miata, here's a link to an album with every picture that i've taken: click me!
​
​
Crimps are generally preferred but I've never had a issue with soldering.
The garbage red, yellow, and blue crimps at the parts stores are shit and shouldn't be used, these are much better
Scotch locks are fucking cancer and should be banned. They are legitimately junk and anyone who uses them is stupid.
If you have access from the bottom, I really like the kind that clamp around the filter and dig in. They will have a 3/8 socket attachment.
​
https://www.amazon.com/gp/product/B0002SR4Q8/ref=ppx_yo_dt_b_search_asin_title?ie=UTF8&psc=1
The best tool I’ve ever had for filters is a strap style wrench that goes on a 3/8’s extension.
Like this - Filter strap wrench
I’ve used one on everything from a car to a road tractor. If you’ve ever done filters on a Detroit 60 series, you’d know how much of a pain they are. A strap wrench like this has never let me down.
I rattle canned it, but spent the money on the nicer products. Had our local parts store mix up the color match, bought the adhesion promoter and bought the clear coat with the hardener cartridge inside. The clear came out AMAZING. It was 40/ can, but it looks like real clear, opposed to most rattle can clears that give a half-ass shiny finish. I think that's really what gives you the edge in making it look like a real paint job. https://www.amazon.com/Spraymax-Clear-Coat-Spray-Can/dp/B08CJYRY3D?pd_rd_w=P49Cj&content-id=amzn1.sym.09f43eeb-bc70-4127-87ce-a8ae28ec8c15&pf_rd_p=09f43eeb-bc70-4127-87ce-a8ae28ec8c15&pf_rd_r=7SN4J9CT13538YS3P2WE&pd_rd_wg=r04Sk&...
265 hp probably a lot more fun than I thought at first. So here is what you do - best of both worlds, 3 step electric exhaust cut outs. Open 'em a little or all the way!
Then close them when you have to take your Mom to the store. $600 you should be able to buy these and get them installed if you shop around a bit.
I've replaced my alternator three times
I removed the dashboard cigarette lighter outlet and installed one of those round USB port things with a voltage readout on the front. I ain't taking no chances lol.
Mine is similar to this one, for anyone who isn't familiar with what I'm talking about.
Its electroluminescent wire like this random cheap amazon kit with example pic used in an interior, basically plug it in and it glows. If it melts on the valve cover maybe somewhere around hood inner frame edges instead, etc?
If I had to guess, something like this: https://www.amazon.com/Inkbird-Temperature-Controller-Thermostat-ITC-106RH/dp/B01N0UK0R3/ref=mp_s_a_1_7?crid=1L20Z1N4HKK5&keywords=din+thermostat&qid=1659052670&sprefix=din+thermot%2Caps%2C84&sr=8-7
Currently using a DIN PID thermostat on my bakery oven
Cold Air Intakes designed for a 2001-2005 Civic are all over eBay and Amazon... most for like $40, which is pretty freaking cheap man.
WORKPRO 20-Pack Flap Discs, 4-1/2-inch, Arbor Size 7/8-inch, T29 Zirconia Abrasive Grinding Wheel and Flap Sanding Disc, Includes 40/60/80/120 Grits https://www.amazon.com/dp/B07M6XN561/ref=cm_sw_r_awdo_ZWYS3XX40JCH5Y7QN3DD?psc=1
I would start with the 40 and move to the 120. I've never used dry ice before. The t29 would be best as the cone shape can get into grooves easier. Wear eye protection and gloves though.
I have a set like these: https://www.amzn.com/dp/B000TG80SY
They are switchable with a lever from internal to external, and have replaceable tips, for different sizes, or for when you bend the fuck out of them. Not the best ones ever, but I think a good medium between HF and SO.
If you use HF ones, don't go for fancy. Their dumb, non switchable ones will work much better.
Four-Stroke Performance Tuning https://www.amazon.com/dp/0857331256/ref=cm_sw_r_apan_i_A8MHK4D89KNMK1ZAXQ3M
If you can find this book, read it. This is an excellent practical guide to the variety of ways you can add power with enough detail to understand why the modification adds power.
Ooops…and sorry!
Thanks for the info….Should I use the Eagle One Etching Mag Wheel to scrub it with a [scotch bright pad like this?] or just any old rag? (https://www.amazon.com/dp/B002CQTXBC/ref=cm_sw_r_awdo_J0PCG5922CQFDVXGTJWZ)
Actual undercoating?
https://lovediy.com/dp/183289/johnstones-aqua-water-based-undercoat-funky-frog-1ltr
I'm not sure if you can buy universal keys somewhere, hopefully someone else will chime in with info. I've always used damaged lug nut removal sockets when I buy a vehicle that doesn't have a lug key. These here... https://www.amazon.com/Eastwood-Pieces-Rounded-Damaged-Removal/dp/B07Q2D7L44
Panel bond adhesive. Clean it up real good and panel bond a patch over the hole.
​
That stuff is stronger than most welds. Then seam sealer to cover the seam and a touch of paint.
​
Something like this:
https://www.amazon.com/3M-08115-Panel-Bonding-Adhesive/dp/B000PEW4MI
This is popular in the vintage German car scene and looks like it might match your gauge cluster:
VDO Continental TR7412UB-OR European Style 12v Radio Orange Display Bluetooth https://smile.amazon.com/dp/B08D2R48HZ/ref=cm_sw_r_cp_api_i_7MG7HA384GWA52TD7SV6
73 dart owner here, I think there are clips that go on pins on the backside. I think you need something like this https://www.amazon.com/Emblem-Retainers-Charger-Challenger-Polara/dp/B07GKY3ZM8
But, I would find some with measurements and measure your pins on the emblem. Now there is a couple emblems that just glue on, I think the dodge emblem on my hood just glues on. Hope this helps a bit.
Whatever you do, just don't get these Halo headlights with the black reflectors. They're dim as hell and fit like crap
YLT AUTO Front 7" Inch Universal White LED Halo Headlights Pair of Round Chrome Housing Black Lens Diamond Cut Projector Headlights https://www.amazon.com/dp/B09M3WXCHW/ref=cm_sw_r_apan_i_52M0S2SDEKZ6RQ07T514?psc=1
These ones are rebranded quite a bit
Making new lines is super easy. Do most of your bending by hand - you only need the specialized tools for the super tight bends so you don't kink the line. If you need to re-flare the line ends, I highly recommend this tool. It's 10x better than the traditional flaring kits you can buy.
Facepalm. You can add a UV dye and use a UV light to see where the leak is from. Saves you polluting the atmosphere with a bunch of r134. https://www.amazon.com/MASTERCOOL-53451-110-Black-Rechargeable-Detection/dp/B00I3GNKF0/ref=mp_s_a_1_4
my guy it is literally a set of sound deadening mats for cars. they worked great too. https://www.amazon.com/dp/B07BLSP8JV?psc=1&ref=ppx_yo2_dt_b_product_details
I’m pretty sure this is the kit I used. The instructions were pretty good but if there is anything you don’t understand it’s easy to google.
Same here. I kept the #5 heads and had them fitted with larger valves designed for a set of BB heads. I’m also going with an Edelbrock Pro intake and I had the crank ground and journaled for aftermarket Chevy rods and custom pistons since there are no aftermarket rods available for Olds engines.
The shop working on it is real old school and familiar with building performance Rocket Olds engines, and most of my suggestions came out of Bill Trovato’s book on rebuilding Oldsmobile V8 engines.
Oh my lord. Please tell me this is a joke? Why would you think this was an appropriate place for a remote mount? Every time you drive in the rain, you're gonna crack the manifolds. The filter is way too small. Matter of fact, the turbo is way too small. Oil drain will not work because you expect it to go up. I'm sure you will either reply with excuses for all the points I've raised or you will ignore, I just want to know why, with all the ingenuity to place it here, could you not place it somewhere better? I think you should read a great book https://www.amazon.com/Turbo-High-Performance-Turbocharger-Systems-S/dp/1932494294
I have a copy of it in pdf format if you want it PM me.
Have a look for Gorilla lug nuts for cragar rims. Found some on amazon listing head size as well. But I didn't see any 7/8s
Gorilla Automotive 73177CRB Cragar Mag Lug Nuts (7/16-Inch Thread Size) https://www.amazon.ca/dp/B001LEPQ76/ref=cm_sw_r_apan_glt_i_E66DM2T699HE7RP1XV2R?psc=1
If you don't have access to a bender, buy a universal exhaust system kit. Cut the bends as needed, then weld them together.
Here is what I ordered. I have them in my garage but Im waiting until everything is working right before I put cosmetics on
ACANII - For 1999-2006 GMC Sierra 1500 2500 Yukon Denali XL Black LED Tube Projector Headlights Headlamps Set Left+Right, Onyx Black V2 https://www.amazon.com/dp/B08XN5LN7S/ref=cm_sw_r_apan_glt_i_NB9DFX1ZJDT6NMPCYQP2
The vintage pieces give a great touch. Great, clean engine bay that still shows its age. Ok in my book.
Whenever I pull my engines out, I do a clean, scuff, spray, and tidy up the wires. Detailed engines. Then, I just drive the ever loving shit out of them, and never clean them again. 🤷♂️ They stay nice until it rains. Then they just look like this. I’d probably paint the radiator so it just blends in. Also, if you have the time for a little project, spray graphite makes your cast exhaust manifold and brake cylinder have a freshly cleaned cast iron look that will stay black for a few years. It won’t burn off cause it’s graphite, and takes a few years to rust again. Then you can just spray more on a rag, and wipe it back on. I recently finished an engine and posted it - you can check out what it looks like when it’s fresh. It does get your arms black when working near it, but just washes off easier than the grease that you’re already covered in. Bonus, is you can recoat all the fasteners with antisieze, and get new exhaust gaskets too.
I have a 65 mustang, and I messed up one of the front brake lines. They are 3/16 , and I plan on getting nickel copper lines since those seem to be the best.
Brake line cutters and line benders/pliers seem to be fairly inexpensive at ~10 and $45. Apparently a high quality flare tool is like $200... I'd rather not spend that much for something I'll only use a few times. I heard that $40 ones are a hit or a miss and often you have to retry multiple times.
- Anybody recommend an inexpensive flare tool that gets the job done?
- What brand of brake line is good? On amazon I see 4LIFETIMELINES and The Stop Shop
Thanks in advance, cheers
you need foam, put it on the back of every interior piece as you reinstall
Siless Liner 157 mil (4 mm) 36 sqft Sound Deadening mat - Sound Deadener Mat - Car Sound Dampening Material - Sound dampener - Sound deadening Material Sound Insulation - Car Sound deadening https://www.amazon.com/dp/B07B75PD8B/ref=cm_sw_r_apan_glt_i_VNZWNT609QCC85MY7C4R?_encoding=UTF8&psc=1
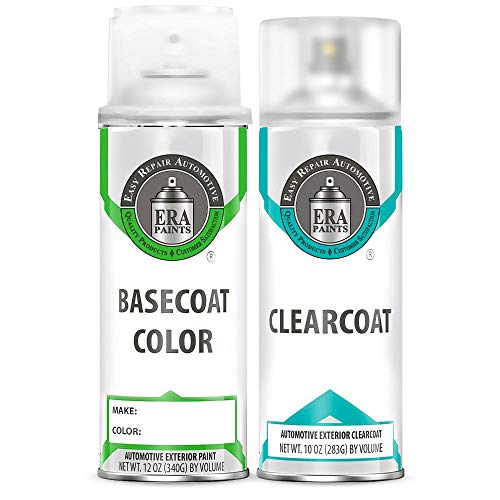
The one I bought came with a kit. I’ll link it. It says it’s glossy but I’m not too sure
ERA Paints (NH731P - Crystal Black Pearl) Compatible/Replacement for ACURA Exact Match Touch Up Spray Paint & Clearcoat - Pick Your Color https://www.amazon.com/dp/B07DP4PBKV/ref=cm_sw_r_cp_api_glt_i_JF4KX2AH8BFY2NCP88VY
This isn’t the same brand but they are the same. DNA Motoring TL-C10-LED-3D-BK-SM Pair of 3D LED Smoked Lens Tail Brake Lights Compatible with 99-00 Escalade / 92-94 Blazer Full Size / 88-99 C1500 K1500 C2500 K2500 K3500 https://www.amazon.com/dp/B01JPCBBXI/ref=cm_sw_r_cp_api_glt_i_NMQ3BYJ9KBDEGZEZ75WS?psc=1
I used an aerosol clearcoat that came with the paint. I bought it off of Amazon. Here is the link:
ERA Paints (NH731P - Crystal Black Pearl) Compatible/Replacement for ACURA Exact Match Touch Up Spray Paint & Clearcoat - Pick Your Color https://www.amazon.com/dp/B07DP4PBKV/ref=cm_sw_r_cp_api_glt_i_JF4KX2AH8BFY2NCP88VY
When I was painting airplanes we used this stuff to remove overspray on day old base paint. It’s a bit pricey but you don’t need a lot. It can also be used for getting those really stubborn dried on bugs off. As long as you use a soft towel, it’s almost impossible to hurt the surface you’re working on.
3M 06097 Perfect-ItEX Ultrafine Machine Polish, 8 oz https://www.amazon.com/dp/B015S8S57S/ref=cm_sw_r_cp_api_glt_i_D6TE5DS72ZKNX6TG9MRP?_encoding=UTF8&psc=1
This is what I use in my car. Just needs one cigarette lighter outlet, gives you a USB port, and needs no other wiring in the car. I've been using this setup for years.
Casette https://www.amzn.com/dp/B0052FCRPY
Bluetooth https://www.amzn.com/dp/B009NLTW60
Yes...but to retro in a hydroponic clutch, or a cable for the passenger side clutch fork on a T-5 5.0, I have a T-5 that came out of a 2.3 Mustang circa 1987..input is wrong, output is wrong...and the 302 might rip it to shreds
so we go this way
Had to drop the fuel tank to repair the bed of the Jeepster, found lots of sugar in the fuel tank when I emptied it, its one thing after another with this thing.
I use something basically Identical to this ( though it's taotronics)
I put the doodle near my stick shift and I can start stop go forward and back and volume up down.
It also has a mic so you can answer calls.
If you can fix it or find a replacement that works on the cheap, I used something like this for a few years and it worked great. Accidentally sold it with a car though and then eventually swapped in a Bluetooth headunit
Looks like part number 20545780 for right side lower control arm:
https://www.amazon.ca/dp/B00GU8RMXO/ref=cm_sw_r_cp_api_glt_i_80GS9ZZEQS9X7HHX96TP
7 inch LED Headlight Round 6024 led headlight with Amber White DRL DOT E-MARK Approved Hi/lo Beam and 6000K/3500K DRL lamp, UNI-SHINE J004A-pair https://www.amazon.com/dp/B08FCLJ1WR/ref=cm_sw_r_apan_glt_fabc_SN5HTSFCVE7DEPDXK9AF?_encoding=UTF8&psc=1
Dealer / Detailer tip for the bumpers
Pig Spit PSO Spit Original for Use on Motors, Transmissions, Vinyl and Black Plastic Trim Components and Tires, 9 oz, Single https://www.amazon.com/dp/B000VJR3GO/ref=cm_sw_r_apan_glt_fabc_TDAFQYAQ73EKX34PWD8G
I always recommend Secondskin Luxury Liner Pro under the carpet. If you can do 100% floor and back wall coverage, it will make an incredible difference!
I wonder if using a vacuum block such as https://www.amazon.com/Vibrante-2691-colector-aluminio-anodizado/dp/B0018033OQ/ref=mp_s_a_1_3?keywords=vacuum%20manifold&language=en_US&qid=1641322872&sr=8-3 would save you any trouble/time/headaches, hell it might even be cheaper than replacing every hose
This one's free
https://www.tbucketplans.com/product/free-t-bucket-plans/
You're not going to find instructions for exactly what you want to build... So do what I did and read as much as you can about how everyone else has done it, mix n match.
Read about frame design, front axle setup, rear suspension design etc. Akermann angles, steering geometry. Maybe build a go kart first...
Cars have gone down the road with some awful designs and they were ok. I'm partial to mustang II stuff and miata subframes, ford 8.8s with 3 links are easy to use.
Bought a Depstech Borescope a few months ago to check the cylinder walls of my SR20DET before installing it. I find new uses for it almost weekly!
As someone living in the UK, it always astonishes me just how cheap your muscle cars are...https://www.gumtree.com/cars/uk/ford/mustang
Edit: Also, looks great!
Check this, there are some variables to take into account when calculating the compression ratio, this site will hopefully make it easier for you. Without knowing exactly what numbers you are working with I would hazard a guess and say that your set up is probably in the 9.75:1 range, but you really are going to have to crunch the numbers to figure it out. Hope this helps.
Thanks! Now that I've got it running and driving, I plan to try and do something with the body. I paid a guy to straighten out the cab once already, but it really didn't turn out like I wanted it. So I've been thinking about trying to throw a patinapaint job on it to at least try and give it a look to it. We'll see how it turns out.
Nah, i'm more of an OBDII and up kind of guy.
Linky, and it's apparently gone down to $1.5k. Oklahoma, so no bodyrot if it's spent it's whole life down here, but i'd expect it needs some mechanical TLC.
Well, it looks like the nice green one has sold. Here's a red one in similar condition. https://www.facebook.com/marketplace/item/502792893806966/
And this grey one has been on the market for a couple months now. https://www.facebook.com/marketplace/item/357074438557259/
IFTTT is awesome for finding projects on CL or ebay.
I have a "recipe" that keeps an eye out for parts for my Dart. Lets me know as soon as something is listed that meets my search criteria.
Use a dc to dc power supply. Something like this: https://www.amazon.ca/Adjustable-Converter-DROK-Regulator-Transformer/dp/B078Q1624B/ref=pd_sbs_7/140-5452737-0481841?pd_rd_w=T3m1Z&pf_rd_p=01fdeee8-dd76-431b-910b-f00bfed49bd2&pf_rd_r=YXDFXZ8VEDC0Q60E80J8&pd_rd_r=9ebc6d06-90e1-441d-9a2...