
What are
/r/Gameboy's
favorite Products & Services?
From 3.5 billion Reddit comments
The most popular Products mentioned in /r/Gameboy:


The most popular Services mentioned in /r/Gameboy:
GB Studio
Aliexpress
Cults.
itch.io
mGBA
Instructables
Roms Mania
Game Jolt
HackADay
Retropie
SourceForge
Autodesk Tinkercad
Facebook Marketplace
MobyGames
BGB
The most popular Android Apps mentioned in /r/Gameboy:
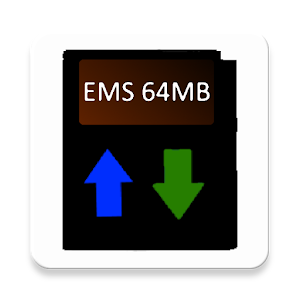
Gameboy Cart Tool (lsdj, EMS)
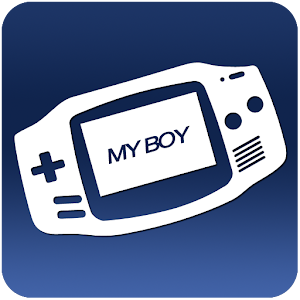
My Boy! - GBA Emulator
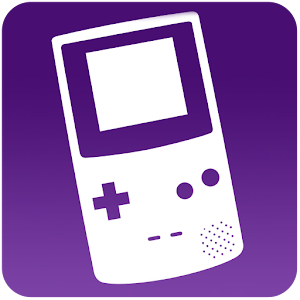
My OldBoy! - GBC Emulator

My OldBoy! Free - GBC Emulator

KLWP Live Wallpaper Pro Key
ZXTune - Chiptunes player
The most popular reviews in /r/Gameboy:
Batteries are still kicking in my Red, Blue, Yellow, and Silver. Just worried now since I’m using my Yellow cart to play through for Pokémon Stadium.
I had to swap my battery in my Sapphire cart, but it’s just for time events, no save data. I soldered it myself and it was super easy to learn. 12 bucks for the one I bought off of Amazon. It’s a cheaper one, but it comes with everything you need and works well.
Batteries I got off of eBay, a 5 pack for like 10 bucks. It’s a useful skill to learn even with a cheapo solder iron.
Gameboy printer thermal paper, even the rolls that are still sealed, are all degraded by this point in time and will print like that.
I suggest you get new paper so you get a better print, here's an alternative that works according to comments i've read:
Over time, those will fade too but you can at least scan them after getting a crisp and clear print, instead of what you have now.
Where did you get the book?
EDIT: I found the ISBN for the just gameboy version, here is an amazon link to that version:
ゲームボーイコンプリートガイド https://www.amazon.com/dp/4074336154/ref=cm_sw_r_cp_apa_i_pf6RDbBGJHNTV
My goodness, I apologise everyone for the spam. I made my post and it didn't show up in my history and I couldn't find it on the subreddit so I figured it didn't post, it seems like they all had gotten delayed or something. Regardless here is the link!
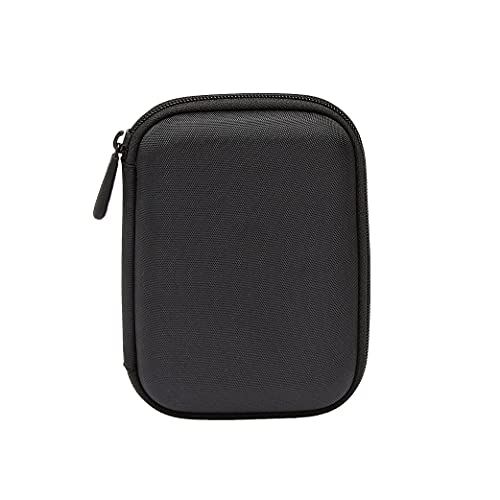
Drive Logic DL-64-BK Portable EVA Hard Drive Carrying Case Pouch, Black https://www.amazon.com/dp/B003VVH8Y6?ref=yo_pop_ma_swf
There were some with 2, 3, or 4 cartoon episodes, 3 full-length movies (Shrek, Shrek 2, and Shark Tale), and a couple that actually included 2 movies on one cart (Shrek/Shrek2 and Shrek/Shark Tale, I think?
Soldering for the 101 mod is super simple, got it right on first try when it was my first time soldering.
Repro screen in my unit works great, some people swear by the originals but I can't stomach the idea of ripping apart a perfectly good SP. Bought mine here. https://www.amazon.com/dp/B00L42ZIOQ/ref=cm_sw_r_cp_apa_i_p0y-AbNPMV7S0
Previous experience shouldn't be too much of an issue, GBA internals are very simple and this mod is a fairly good first project in my opinion.
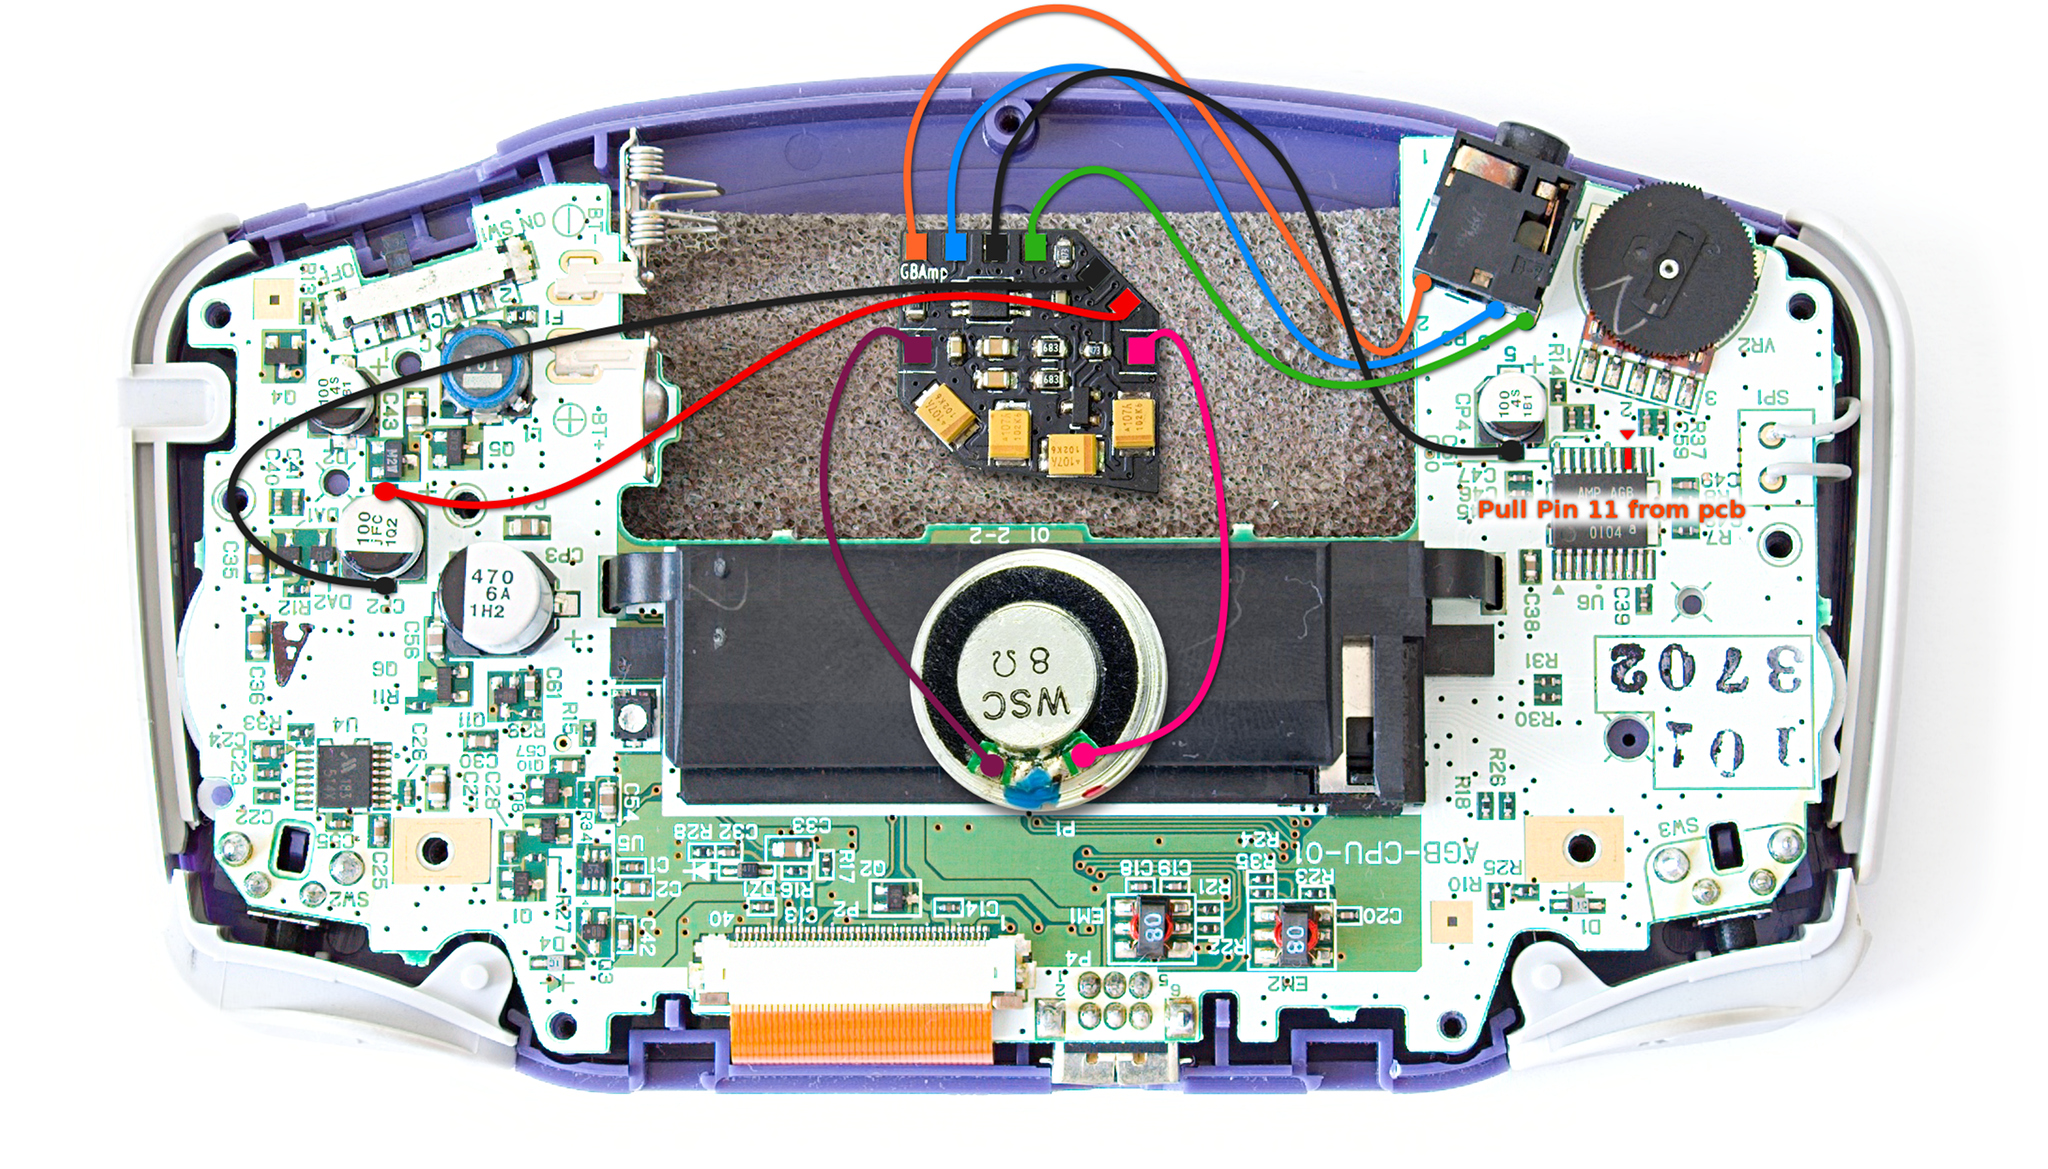
I've done it, it's quite simple when you figure how to wire everything. First of all, here's the button pinout, you can use any of them or the ones BennVenn uses. Next you'll need a power source. I used the same as the GBAmp3 uses, the rightmost capacitor on the back of the motherboard. Finally, you'll need to solder to the back of the screen, just like for the GBC backlight mod
It's ctually a set of fridge magnets. They sell them on Amazon, though they may be cheaper elsewhere; I didn't check beyond whether or not they existed.
Looks like its had a little bit of a refurb job done to it with an after market screen cover. Serial should start with LP100.
I used this cheap one here for $20 https://www.amazon.com/ANBES-Soldering-Iron-Kit-Electronics/dp/B06XZ31W3M/ref=sr_1_5?dchild=1&keywords=Soldering+kit&qid=1626612718&sr=8-5
The kit has everything you need including solder and a solder sucker. It’s not the best quality but it worked great for me. I didn’t want to spend a ton on something I wouldn’t use a lot. I did get a backlight mod for my original screen. However after soldering the speaker I think I will wait till I have more experience. It’s much more involved and I don’t think my skills are good enough for that yet. I was able to use the soldering iron to fix the original screens vertical lines easily in a few minutes.
One thing I do suggest is to have another person or one of those helping hand clips for soldering. My solder job didn’t turn out that good. If I had waited for my spouse to help hold the wires or got the helping hand it would have gone better.
The speaker wires are very forgiving. You can do a really bad job and it still works.
You can use thermal receipt paper, found at staples and amazon. I just don't remember what the length of it is right now.
Nvm, found it on amazon.
https://www.amazon.com/PMC05228-Thermal-Calculator-Paper-Rolls/dp/B0000DBMGL
Here are instructions on how to replace it for the Link's Awakening. The same procedure can be applied to Metroid. The batteries aren't expensive and I just replaced mine in PK Silver so it does work. If I had an extra of either of those games I would totally send you one and save you the trouble but alas...
Just a demo at the moment, but hoping to have much more features!
Wouldn't have been possible without GB Studio: https://www.gbstudio.dev/
You can download the demo rom here: https://kazy.itch.io/ffxi-adventure
Yes, u can find through hole and smt practice boards on ebay https://www.amazon.com/Gikfun-Beginner-Components-Practice-Soldering/dp/B01HPSRXJ0 the neat thing is there absolutely cheap and atrociously thin substraight, so if you can sucsesfully install without lifting a pad then you should be good as likely nintendo boards will have way thicker copper pads and just be higher quality, also dont forget, as its always best to remeber to keep a filter/ have the room your in be very well ventelated, as you are melting rosin and the vapors can scar and cause long term damage if not carefull
Remember to 🙂stay safe!
Please don’t use steel wool. It leaves little conducive fibers and can kill the cart of not cleaned properly. Use a product called brasso brass polish. Use a little dab on a microfiber cloth and buff with your finger they will look brand new. Then wipe clean with iso. I’ve done hundreds and it works great.
Edit added link.
The one with black and white kanji is "天神庭戦", which translates to something like "heavenly garden game" sells on amazon for like 50 bucks
EDIT: I got one of the kanji wrong, but amazon lists it as "heavenly monster fight" instead. Curse grainy pics!
I use the Amazon Basics HDD case along with a a cheap bulk microfiber sunglasses pouch.
they fit: MGB GBC AGB GBASP GBMicro DSlite
i haven't tried anything else.
Here's an album showing what it's like
You also dont have to use the strap. there's some wiggle room on the SP so I use it there.
Edit:formatting
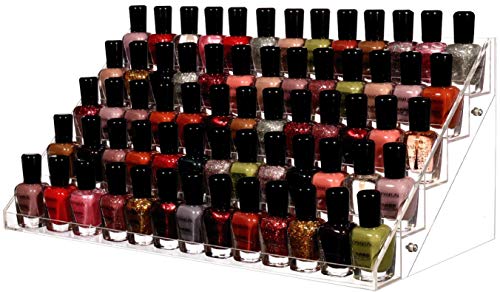
I got these from Amazon. They look ok, but I might try building a wooden stand or something. If you touch these, they tend to fall off the stand and cause a domino effect. If they're going on a shelf and you won't touch them often, it's probably a good buy. If they're within reach of a 6 year old, I'd recommend something sturdier.
For anyone who's still curious, this is the shell made by the company BASSTOP, and it comes in a wide range of colors and (optionally) a d-pad.
You can buy them on Amazon here
EDIT: DO NOT SOLDER THE NEW BATTERY! ABSOLUTELY NOT.
There's no way to regain your old save. The battery is dead. Replacing it isn't that hard, IF you can open up the cover. That shit has driven me absolutely mad after doing it 5 times. Jesus fucking christ. Pliers, scissors, nail scissors, molten pens..
If you finally do manage to get it open, very calmly but with enough force, remove the top connector (it's glued, so it takes a lot of getting it under the connector and forcing it upwards). After that one is loose (it's okay if it's messed up, as long as it is still connected to the game), the bottom one is next. Same method, only this time it'll be harder to reach. Again, if it's bend: no biggie, should still be connected to the game.
Once you've done that, take a good look at how the battery is seated. Rough side should be up. Take the battery out and then throw it away. Get a replacement battery, I use CR2025's, but I've heard that CR2032's work as well. Get about 1½ to 2 inches of tape (I use this one, I think), and place it with the end on the game.
Then, put the bottom connector on the tape. Place the battery on top of the connector, rough side up, press the top connector on the battery, and wrap the tape around it. Shove the cover over the game again, place the screw, and you're all done!
edit: wow, this guy explains it better. Ignore the soldering though.
Yes, the label is totally wrong: http://www.mobygames.com/images/covers/large/1198685380-00.jpg
All nintendo cartridges have a serial number on the front and gba cartridges also have a number stamped into them, so this is a very bad fake.
The backside also is not real, here's a genuine gba cartridge, most notable is the dot that replace the (R) in nintendo's logo: http://i38.photobucket.com/albums/e140/Vipershark/IMG_6800.png
They changed the pictures on their aliexpress webpage (and raised price!). It's $50 now; I paid $31 shipped. Maybe they are raising prices for the holidays?
Just standard card sleeves. Something like:
https://www.amazon.ca/dp/B005HIOVOG/ref=cm_sw_r_cp_awdb_imm_ZKD61RS479JBANCM0WWQ
They fit Game Boy and Color games perfect. Main thing to look for is a binder that is big enough to handle the extra thickness of GB games (compared to cards) and ideally has a pocket of so sort for games that don't fit (like Pokémon Pinball you see in the video).
Thanks! It wasn't too hard, hardest part was cutting the shell haha. this is the part I used, and then I had a spare battery laying around for a baby monitor lol this is the battery
Inside painted shells are my favorite. Next time get Liquid Mask for the edges and tight parts to make life easier. It goes on like a glue and you just peel it off very easily when your done. https://www.amazon.com/dp/B001DKJNKE/ref=cm_sw_r_cp_apa_glt_fabc_6YMRVRJM5EDD38N8ZYQY
Fisher-Price Laugh & Learn Lil’ Gamer, Educational Musical Activity Toy for Baby and Toddlers Ages 6-36 Months https://www.amazon.com/dp/B08HRDND11/ref=cm_sw_r_cp_api_glc_fabc_3E79TTHB2EG4SPBNBY05?_encoding=UTF8&psc=1 This is the Amazon listing I found of one.
I just charge mine with a USB charger. There are a couple of sellers on Amazon offering Gameboy Micro USB charge cables with prime shipping. Here's one:
https://www.amazon.com/dp/B01K7D0CTI/ref=cm_sw_r_cp_api_WFQjyb7AVKPXN
Not related to 1.0 but I've run into two NA carts have different labels / PCB layout
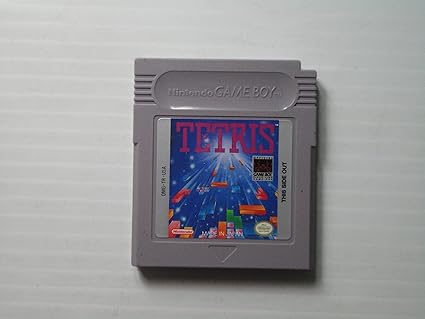
The first variant seems to be the pack in version that came with the original DMG release (Tetris, link cable, ear buds, batteries etc.) - the label has Tetris in red block letters with a blue outline and the PCB has a rom under a blob of epoxy.
Whats interesting about the pack in release is it has a black and white manual, I own two of the original DMG bundles and both have the same label / manual.
See this picture http://ecx.images-amazon.com/images/I/81YGrbXwX0L._SX425_.jpg
Second variant is what I think was included in retail boxes (what was in my retail box and matches the box's art work with a color manual) and likely came a little later in the Game Boy's life - the label has Tetris in red block letters with a white outline and then a blue shadow effect outline and the PCB has what a traditional rom chip with no epoxy.
See this picture http://www.mobygames.com/images/covers/l/39237-tetris-game-boy-media.jpg
I made a screw hole, but you obviously can't 3D print a screw that small. If I was going to sell these on the Shapeways store, I might find a specialty screw online to recommend to customers.
They already do 3D print other GB battery covers, but Micro is so niche and I saw some on eBay sold AS-IS without the cover. Got me thinking.
Is it possible to use the Palm Treo 650 screen?
​
https://www.gsmarena.com/palm_treo_650-907.php
​
Which has the same image size as the stock GBC (44 mm width), and 320 * 320 resolution, 2x of the GBC's 160 * 144, leaving some pixels unused. This would be the perfect size for a backlit GBC if possible.
​
Oracle VM Virtual Box ( https://www.virtualbox.org/ ) has a slightly steeper learning curve but is free. You can then pull down a pre made Windows browser testing VM in virtual box format. They let you install stuff and are great for throwaway tasks.
For debugging your best bet is http://bgb.bircd.org/ and for programing using c you best bet is http://gbdk.sourceforge.net/ but as killing_buddhas said Gameboy programign is no walk in the park and if you want to achieve any sort of optimization you will need to learn to write in ASM.
It certainly looks like a new design. The LCD flex cable seems to be wider and goes behind the LCD (not seeing it through the clear back shots), not below it like the other models. The IR diodes also seem to exist.
I do hope that someone who knows Chinese can contact them for more real pics, as the sellers that I found use the same images.
CHINA TAOBAO CENTER with Katya Li as a contact. (Oddly has a second listing)
Mount Everest Suppliers with Sunny Sun as contact.
Speaking of sellers, in the future when discussing the GB Boy Colour please write down who people bought them from.
I'd get it if you worried about the ribbon touching the board and messing things up. Kapton tape is for everything electronic so just get it. You won't regret it.
Careful with that cheap iron. Too cold and the connections would look spiky and break things. Too hot and you'd be destroying some stuff. A $10 iron kit has caused me more destruction than I care to admit. You are going to be using it at least one time on the ribbon so this is your call but I would go for an adjustable temperature on. I got this one for $28 and still good to this day (set to 5). At least let it reach 300 degrees without falling apart. Good Luck.
Also who the heck is going on around downvoting everything in the subreddit. You just asked a question and some sweaty dudes coming around downvoting without commenting what they think.
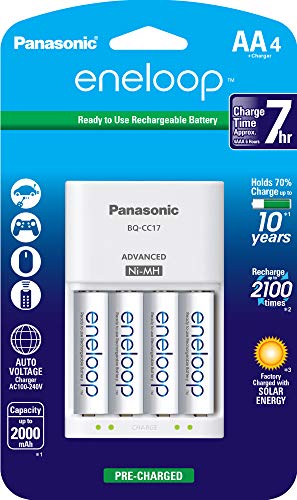
Looks elegant enough to me. However I'm confused. It says "High Capacity 1200mAh" on the amazon listing. Is it just me or is that actually incredibly low capacity when compared to just using two 1900mAh eneloops? More expensive, too. Is the USB charging port worth having less than half the battery capacity? Or does each of these have two 12000mAh cells inside?
Seconded. Just from personal experience, I killed a lot of pads using a weak iron. Buy nice or buy twice. I actually used this before I upgraded (set to 5 for 300 Celsius).
Anyways, if it still doesn't turn on but everything looks fine, roll the batteries in place before turning it on. It would snap into place. The new funnyplaying shell doesn't have a battery seperator so the batteries sometimes tend to not make contact with the contacts. It also confused the hell out of me when mine didn't turn on.
If that doesn't work then you would need a multimeter to check the fuse and see if it blew up. A multimeter is going to be your most valuable tool if you wanna keep doing this kind of hobby.
Also would you mind showing the pictures of the flux all cleaned up? You used isopropyl alcohol right?
Hey sorry for the late response! This is the one I got cause JoeyDoesTech suggested it in one of his videos. It’s actually really good! https://www.amazon.com/Precision-Screwdriver-Magnetic-Computer-Electronics/dp/B07TNS3D4X
They have some on Amazon too Link
Edit: Also if you get it from Ebay it usually comes from China and it take like a month to arrive
I bought a cheap soldering kit from Amazon for $17 https://www.amazon.com/dp/B06XZ31W3M/ref=cm_sw_r_cp_apa_oedEzb5K4TWS4 Also a Dremel tool for sanding surfaces and cutting plastic https://www.amazon.com/dp/B003BYRFH8/ref=cm_sw_r_cp_apa_NfdEzbEYCCFER
OP seems to be right. I searched "nintendo ds buttons -lite -dsi -3ds -2ds" to weed out the other consoles and was left with just that one result.
A similar search on Amazon revealed a white shell with white buttons: https://www.amazon.com/Vivi-Audio-Housing-Replacement-Nintendo/dp/B073QM4QSM/
Check Ebay and Amazon for just the empty cases. You can get them decently priced if you know where exactly where and what to search.
I found this listing on Amazon which isn't too bad: https://www.amazon.com/dp/B01L9VBC4Q/ref=cm_sw_r_cp_awdb_t1_Wk7NAbPC9BHVF
Product on Amazon: FreezerBoy Refrigerator Magnets
Amazon reviews seem overwhelmingly positive, and some specifically mention using it with the Game Boy Player: https://www.amazon.com/GCHD-Gamecube-HDMI-Adapter-Nintendo/dp/B078ZLMQH9#customerReviews
Oh nice! :)
The lens came with my shell, I got this one on Amazon: https://www.amazon.com/EXSEK-Limited-Luminous-Housing-Nintendo/dp/B07DPP82NZ/ref=mp_s_a_1_2?ie=UTF8&qid=1532037864&sr=8-2&pi=AC_SX236_SY340_FMwebp_QL65&keywords=gba%2Bshell&dpPl=1&dpID=41YDp4YrjsL&ref=plSrch&th=1&am...
And everything felt great once I was done. I will admit some of the screw holes were a little off, and so was the on off switch. But the shell comes with screws, and I used the original on off switch. So in the end it came out all good :)
I'd go to a well known retro site and order from them.
By coincidence, I ordered the same battery through Amazon. I haven't seriously put it through its paces though, so I don't have numbers for run-time and such.
It may have gone up a little in price but it is still under $20.
ORIA Precision Screwdriver Kit, 60 in 1 with 56 Bits Screwdriver Set, Magnetic Driver Kit with Flexible Shaft, Extension Rod for Mobile Phone, Smartphone, Game Console, Tablet, PC, Blue https://www.amazon.com/dp/B01E16J6RQ/ref=cm_sw_r_other_apa_i_NWmiFbKMCY2AR
Looks similar to the EMS USB 64M. I would try with any of the programs compatible with that cartridge, such this android app. If reading/writing to the first page fails, try with the 2nd (the 64M cartridge has 2 32M pages).
I use this kit and was pleasantly surprised. I needed something cheap for getting into repair of some vintage audio equipment and I also did a Gameboy color repair as well as many others. Although inexpensive, it seems to hold up well and nothing has malfunctioned or broken. Also, I am still using the solder spool they provided after many projects. One other thing I would add is a good solder wick
Just be patient, I watched the video twice to make sure I was doing everything right. Don’t be intimidated, worst part is trying to connect the screen back but with the right leverage even cheap helping hands that can be a cinch
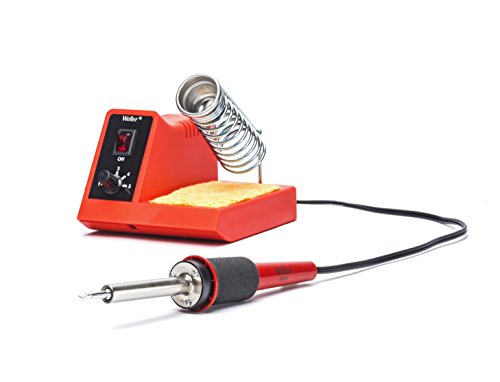
Buy a speaker. Buy a little triwing screwdriver. Buy a soldering iron and a bit of thin rosin-core solder.
It's a straightforward repair, and pretty easy as far as soldering goes, but it might make some sense to buy a small section of protoboard and some segments of wire to get used to the feel of soldering, before attacking your childhood Game Boy.
Excellent pic, OP
Here's mine: https://imgur.com/bLrcXQf
Doom GBA is a fantastic port. It's based off the Jaguar Port, which means it's actually a port of the Doom engine. As such, it's possible to import .wad files and play them. (although this does require some extra steps.) Check out this set of maps:
https://www.moddb.com/mods/gba-doom-the-lost-levels
Ports of major titles are always interesting: what compromises must be made, how well can the port be adapted to the handheld, and what is the core of the game experience that remains.
I am really enjoying it, flashed on a cart and playing it on my GBA. Room 16 Boss is giving me hard times!
If you accept suggestions, I have a couple:
- I see our hero moves his eyes towards the direction he's moving. I think it would be helpful if he keeps looking to the direction he's facing, so we know where he's going to throw his punches.
- When pausing the game, the only thing that make you notice it's paused is the lower volume of the music. A "bing" and an on screen PAUSE are really missing here.
- Speaking of music, it gets repetitive after 20 seconds. I don't know if you're lacking memory to fit more music, but the need to turn down the volume wheel is huge.
I supported your work with a small donation on itch.io. Nothing mindblowing though (money is tight) but I think you deserve every single cent.
Keep up the good work.
I've just started getting into the Micro scene, but I haven't seen battery door replacements.
Your best bet is probably to have one 3D printed. Of course, that requires you have one to measure and the skill to model it.
I live in Boston, so I think if I bring a file for a 3D model down to the MakerBot store, they can print it out for a fee.
Probaby similar to this.
It's 30 USD on Aliexpress.
The good ones that are easy to use are expensive and the cheap ones are a pain in the ass. I think I am gonna pass on a cart.
Works on VaporBoy, if you are looking for a web option to run your game :) Or if you know your way around modern JS WebDev, you could probably build a quick embed of your game on itch.io using VaporBoy's underlying library, WasmBoy :)
​
Disclaimer: I made WasmBoy/VaporBoy
I did not do the revc to ground fix. The only thing I did besides just using the adapter with the new LCD was solder the wire from P1 to the left leg of DA1. My motherboard is a 40 pin "03 5-2".
Not an expert, but would this not work as well? Minimum order is 10 pieces, which seems much more achievable/easily manageable.
http://www.alibaba.com/product-detail/backlight-LCD-Screen-Replacement-For-Gameboy_1886914880.html
100% is great if you can find it. For electronic components, I use contact cleaner. I bought a can a while back to clean 40 year-old potentiometers in some old electronics, but it's come in handy for quite a few other things.
montana gold is I believe considered the go to console modding paint. I have heard of krylon being used. In theory it should be the same as this SP tutorial. he mentions primer and a finish which should be considered and used
So in Magic you play down 1 Land per turn, the land is universal like they can be used for everything you play down. In Pokemon the Energy cards are attatched to each Pokemon and when that Poke faints, the Energy cards go with it. Can only play 1 Energy card per turn as well. You can attach Energy cards to your benched Poke's as well as what's in play. So you'll end up going through plenty of Energy cards. The farthest I got in TCG I was close to beating all 8 gyms, when I play Pokemon I usually have different types for my 6 main. In the TCG I tried to only have 2 or 3 different types so I wasn't having to scramble trying to use moves n such. There are a few good GBA emulators on the Play Store for Android and the main website for getting ROMs on my phone was
And they do have a bunch of ROMs, not just GBA and GBC roms. I don't think romsmania has the hacked versions of Pokemon games. Like the Clear Crystal Romhack is a good one to play. When you start a new game you get to choose your sprite, Youngster, Bug Catcher, a Team Rocket Grunt, etc and also what color you want your character. They have a ton of different starters. For example I was a girl TR Grunt amd started with a Houndour in Clear Crystal file that i played on. Also can choose between Kanto or Johto to start the game, also a bunch of things added or change for convience of playing.
There are a ton of different ROM hacks you could choose from to spice things up instead of playing the same game over and over. Yellow and Crystal are the 2 games I can honestly say I've played the most of out of any game I've ever played.
Check this out when ya have some free time to look at the different Emerald and FireRed ROM hacks. I've played a little bit of Glazed or Blazed Glazed.
https://www.pokemoncoders.com/pokemon-emerald-rom-hacks/
Edit --- Spelling
It uses a form of bank switching, since it requires way more than the maximum 32MB of ROM the GBA maps into memory. I believe endrift studied this stuff years ago. The tool on that page should work, but I haven't tested it myself.
This is how I get everything. I combine it with researching the average price for completed listings, then setting snipe to <5 seconds and using a strange number (like $9.37 instead of $9).
Shipped today: Ghost Recon Shadow Wars Like New/CIB $6 shipped.
Got the shell and buttons from Aliexpress. Here's the listing. You can message them and specify button colours.
While there were movies for the GBA I don't think there's more material than 30 minutes tops fitting on the 32 MByte a cartridge holds. There were tons of feature length movies released for the GBA Movie Player, but that required playing the movies from CF (and later SD) card.
I doubt that particular picture is real, though. The grain surrounding the Dunkirk label looks different than on the label itself (there's little grain on the label). Also Error level analysis shows different compression artifacts on the label. I'm pretty convinced this particular picture is manipulated.
this is the project, but it's a little further on than shown, just not been worth updating the hackster page till I work out the kinks in the software. (can read single bank games fine, but bank switching is currently broken) https://www.hackster.io/abrugsch/mameboypi
It does not matter. Only the voltage and type of battery are important. My indicator is made for a lithium polymer battery.
Scheme, firmware, gerber file: https://yadi.sk/d/e6h7vEIBCHLT0A
My story about the assembly (Russian language):
I definitely recommend Amazing Adventures of Spinning Van.
Hope you enjoy Philip.
First I'd try cleaning the button out with a toothbrush and some IPA. There's probably just some dirt blocking contacts somewhere in there
If that doesn't help, you can get these on Amazon for cheap
Solder is solder. I use this but to tell you the truth, it's all the same to me. It's more important to cleanup afterwards with IPA. Go with whatever you feel comfortable with.
I didn't even know about LSD/Hybrid batteries and it's good to know they don't lose much charge not in use. I got this a few months ago because I heard Eneloops are the best, glad I got the right ones!
I’ve seen some people use these stands. Might be worth giving them a shot: Box of 20 BCW 2-Piece Card Display Stands for Top Loaders, Magnetics, or Screwdowns https://www.amazon.com/dp/B00ZZ103S8/ref=cm_sw_r_cp_api_glt_fabc_J25Q6H9GR0JH7KJTDHXY
Kaisi Heat Insulation Silicone Repair Mat with Scale Ruler and Screw Position for Soldering Iron, Phone and Computer Repair Size: 13.7 x 9.8 Inches https://www.amazon.com/dp/B07DGVJ17H/ref=cm_sw_r_cp_api_glt_fabc_PVAW63KZFK5WJ8EBWJYK?_encoding=UTF8&psc=1
I have seen a similar one on Amazon: https://www.amazon.com/Black-Protective-Gameboy-Advance-Console/dp/B073QN2M8S/
Was hoping for something a little slimmer and less bulky, but this might be as good as it gets.
No. You want an iron that you can control the temp on. Those plug and play ones are horrible.
That's a decent starter.
Looks very similar to the extremerate shell however theirs has Nintendo stamped into it on the front and this one does not. Ok wait I take that back. Apparently they’ve updated their shells to be IPS ready. When I went to find a link for the one I bought off Amazon all I could find was this newer version without Nintendo stamped in the front and has less plastic supports to hold the LCD to make installing backlit displays easier. Check it out: GBC wood grain shell -ExtremeRate
Here’s is the Amazon listing supposing you wanted to get the official cart. Hopefully that’s enough information for you to do what you need. https://www.amazon.com/dp/B0001ZZNME/ref=cm_sw_r_cp_api_glt_fabc_ZN6J0DPMG40S6BZ1E8B8
I purchased the battery off amazon, here is the direct link: https://www.amazon.com/gp/product/B003BW0Q6C/ref=ppx_yo_dt_b_asin_title_o00_s00?ie=UTF8&psc=1 .
Game Boy Advance SP Replacement Battery Pack for GBA SP (packaging may vary) https://www.amazon.com/dp/B000QJ1NS8/ref=cm_sw_r_cp_api_glt_fabc_QNAAJS3B29F2H9Y40JQV
It’s just odd because I have identical GBAs and it works well in one but not in the new one. I also have a good DS battery I used in the pink one but it also dies quick. Works great in my old one. I guess the water mark isn’t triggered looking at other photos of GBAs, as all the red dots are intact. No issues charging either with an OEM charger.
Another great alternative is to use enamel copper wire. its very flexible and can be bough very thing. 24awg is great because its thin and can be bent to shape, and it retains shape. While 30awg is very thing and literality create 0 bulge. I recommend this brand BNTECHGO have both https://www.amazon.com/gp/product/B00UWCXRK6/ref=ppx_yo_dt_b_search_asin_title?ie=UTF8&psc=1
First off, $200 australian is not $200 american. The USA isn't the only nation that uses a dollar sign and the internet is decentralised for a reason.
This GBA Everdrive on amazon is literally $200 AUD.
https://www.amazon.com/EverDrive-GBA-X5-MINI/dp/B07CT2D7MF/ref=ex_alt_wg_d?_encoding=UTF8&pd_rd_i=B07CT2D7MF&psc=1&pd_rd_w=T896M&pf_rd_p=4e1b46a8-daf9-4433-b97e-d6df97cf3699&pf_rd_r=27AD1J9EXAWECC562QJ6&pd_rd_r=b83e5585-c87c-443b-b67c-1570db099223&pd_rd_wg=JWFo4
Reproduction cart? $5-15 depending on the game. Not even counting 'X in 1' carts. i have NEVER had a reproduction cart just up and fail on me. I suspect that many of the chatter about them comes from the same people as well. a few bum carts make it out there and into the hands of a vocal redditor and they'll bring it up anytime that conversation arises, meaning the same commenter can be responsible for dozens of threads about it. It's a minority number and not all reproduction carts are garbage tier either.
I own an EZflash Junior and it's great, but im in the minority of people who actually play these games quite regularly. Many who engage with this hobby are just refurbing as a hobby and to get a nostalgia kick from their childhood and will most often turn on these consoles when a friend comes over to show off the mods.
Claiming that reproductions aren't necessary or are in anyway bad is completely counterproductive to any sort of preservationist agenda.
Thanks man I appreciate it! And it's an adjustable card stand but works well for this. I'll post the link but if it doesn't work let me know and I'll message it.
I got this one from Amazon:
https://www.amazon.com/gp/product/B07VFP5319/ref=ppx_yo_dt_b_asin_title_o03_s00?ie=UTF8&psc=1
For some reason, the other colors don't have the d-pad, but I wanted the teal color anyway.
The d-pad feels really good! Here's my switch:
It a repurposed make up stand I got off Amazon. Something similar to these Clear Nail Polish Display Holder, Yebeauty Acrylic Organizer Storage Tray Rack Stand Holder for Cosmetic Eyeglasses Lash Display (2X3Tiers) https://smile.amazon.com/dp/B07YD142CD/ref=cm_sw_r_cp_api_glt_fabc_BQ8QH7FGQHCP1VK4SPNG
Amazon of all places. I was fearful at first because I only buy resin buttons that are molded correctly but these are very good quality and they look stunning in motion.
https://www.amazon.com/gp/product/B08VVYJ5B3/ref=ppx_yo_dt_b_asin_title_o02_s00?ie=UTF8&psc=1
Awesome, thanks for the insight! I'll be needing a smaller gauge for things like pins and pads then? Would this be more of what I'd be looking for?
since I do see a bit of pad left over you could also, buy a circuit pen like this one and redraw you circuit:
https://www.amazon.com/dp/B00OZATJ3A/ref=cm_sw_em_r_mt_dp_SJ1BQQFVHWS5959NVCE3
If you’re referring to the bezel that’s filling in the charger slot, you can get your own here! https://www.amazon.com/dp/B08L72TZWD?ref=ppx_pop_mob_ap_share I wanted to ditch the proprietary charger but didn’t like how USB C mods looks so out of place in the shell, so this makes it look so slick
​
The keyboard does come in white, but I didn't like the feel or look of the stock keycaps!
My favorite is the Gamester Bodyguard case. I got a black one and a blue one of these. However they are somewhat hard to get these days and the GBA will fit fine inside cases made for the DS Lite or original 3DS like this one. I bought about 20 of those (but made by hama) in bulk for under 2 bucks each from somebody who was clearing stock and they fit the GBC and GBP as well. Maybe external hard drive cases work, too.
The links are just examples. Get it wherever you can get them cheap.
If you are doing vintage gaming, you might as well pick up the skills to do it yourself. It's a really painless process and very well documented, plus a decent quality but basic soldiering iron is not expensive.
You could potentially take it off yeah. Better option would be to order one of these - https://www.amazon.com/dp/B08L72TZWD. Alternatively you can build it yourself https://github.com/rorosaurus/gba-sp-usb-c
Its a 1450mAh 802563 3.7 Li-po off of Amazon, and it looks like someone snatched up the last one from this seller between this morning and now 😅
Here’s a cheap soldering iron for small projects like this only 13$ on amazon
QY 8W 5V USB Powered Soldering Iron Mini Professional Electronic Soldering Pen with Metal Stand https://www.amazon.com/dp/B07ZYXYX1F/ref=cm_sw_r_cp_api_fabt1_xd-WFbAGQWS3F?_encoding=UTF8&psc=1
Yeah I would second that - Just order a new shell on Amazon/Ebay (does not have to be Pikachu). I just re-shelled an SP today and it's way easier than a DS I can tell you that.
Here's what you'll want - https://www.amazon.com/Replacement-Nintendo-Advance-included-Game-Boy/dp/B00B5QP54E/ref=sr_1_3?s=videogames&ie=UTF8&qid=1468802410&sr=1-3&keywords=gameboy+advance+sp+shell