
What are
/r/RASPBERRY_PI_PROJECTS's
favorite Products & Services?
From 3.5 billion Reddit comments
The most popular Products mentioned in /r/RASPBERRY_PI_PROJECTS:


![for Raspberry Pi 3 B+ 3.5 inch Touch Screen with Case, 320x480 Pixel Monitor TFT LCD Game Display [Support Raspbian, Ubuntu, Kali, RetroPie System]](https://m.media-amazon.com/images/I/41VFDo7L2NL._SL500_.jpg)


The most popular Services mentioned in /r/RASPBERRY_PI_PROJECTS:
Hackster
motionEyeOS
Retropie
Pi-hole
DietPi
Mycroft
SourceForge
DAKboard
OSMC
Yodeck
ZeroTier
Lifehacker
Nextcloud
IFTTT
balenaEtcher
The most popular Android Apps mentioned in /r/RASPBERRY_PI_PROJECTS:

BubbleUPnP for DLNA/Chromecast

Raspicast

Roku
Pi SD Card Imager

Telegram

DNS Changer (no root 3G/WiFi)

Graphing Calculator
BlueTerm

MyMQTT

Bluetooth GPS Output

Microsoft Remote Desktop

Yatse: Kodi remote control and cast

RasPi Check
The most popular VPNs mentioned in /r/RASPBERRY_PI_PROJECTS:
The most popular reviews in /r/RASPBERRY_PI_PROJECTS:
Where to begin? There's so much...
I suggest you think of some of your other hobbies and interests or things you do, and then a project that would apply to those other parts of your life, or is something you'd thought you'd like to have before, or just something that makes your life easier... If you start on a project that pays off personally in that way, you're more likely to enjoy it and actually use it. Not to mention actually finish it...
That being said, if you're brand new to raspberry pi's there's probably lots of projects that you haven't thought about before, or that are good ones for other reasons. Not necessarily "build" projects, but things that are interesting or things that your pi can do for you... Like pi-hole for online ad-blocking on all your devices, or maybe an ADSB receiver for seeing what aircraft are flying around your home. Maybe set up a home media server, or your own cloud storage solution. Of course home automation is a popular (and never-ending) project.
But the best projects are ones that don't have tutorials or ready-made code, and are completely customized solutions to very specific issues or use cases that apply to you. Yes they are usually the hardest, but those are also where you learn the most. And the pi lets you do them all! Before you know it, you'll be ordering yourself another one lol!
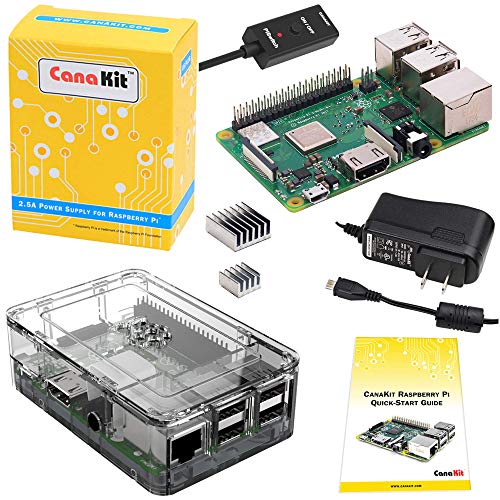
I would definitely recommend a cana kit. They come with the board, a case and a power supply for around $50. You can get it on Amazon. Other than that all you need is a micro SD memory card.
Here's a link.
CanaKit Raspberry Pi 3 Kit with Premium Clear Case and 2.5A Power Supply (UL Listed) https://www.amazon.com/dp/B01C6EQNNK/ref=cm_sw_r_cp_apa_i_bSK6DbR7BPP8G
Perhaps there is a low power heating element that can be added to the case? Evertech Security Surveillance Outdoor Camera Housing with Bracket and Build in 12V DC Heater-Blower Weatherproof Heavy Duty Aluminum https://www.amazon.com/dp/B00LU2NLIA/ref=cm_sw_r_cp_tai_bBZbEbHKPAQFP
This project very likely emulates keyboard key presses.
I made something similar for my daughter for homeschooling a few weeks ago. a very basic mute/unmute button.
I used a tiny Arduino and followed an online tutorial.
I believe that newer versions of Retropie come with a desktop and media player option as well. Personally, I use berryboot to triple-boot my pi 3 into either raspbian or openELEC or retropie - I suggest you give it a look if you're wanting to have more of a swiss-army-knife approach to your pi's OS's. It also makes it a breeze to back up your OS installation(s) as snapshots, so if something bad happens (like a corrupted SD card), you can easily restore your OS to exactly the way it was.
If you already have a Raspberry Pi 3/4, this project costs around 30-40USD depending. You end up having an internet-controlled robot that you can drive around or let your friends and family "visit" you from anywhere in the world.
See the guide on Hackster.io - https://www.hackster.io/surrogatetv/affordable-teleoperation-robot-using-raspberry-pi-4-9fe78f
Right in the first paragraph on the images download page "These images have a default login/password of “<strong><em>kali/kali</em></strong>” and may have pre-generated SSH host keys."
And again under the Kali Linux for ARM Devices section - "These images have a default login/password of “<strong><em>kali/kali</em></strong>” and may have pre-generated SSH host keys."
So there's a few things here:
- You need to be a part of the microsoft insider program to get a proper version for 3B+ right now specifically - for the love of god don't just download a client from somewhere, causes more hassle than it's worth.
- You need to access the download here: https://www.microsoft.com/en-us/software-download/windowsiot the site will prompt you if you're not an insider.
- Once you have the package downloaded, you can use a program like Etcher: https://www.balena.io/etcher/ to properly flash a SD card or USB to boot from.
As a side, you won't get an insider providing you with a link. It doesn't work like that as you get a unique download link while logged in, which then needs to match up with the Microsoft ID you use when logging into the client itself.
Just as a quick edit, going into the page there's currently this build:
"RaspberryPi 3B+ Technical Preview Build 17661"
However, it's an unsupported technical preview, so they have it as a build but it's not gone through much in the way of checks. For context, current main IoT build is marked version 1809 (Jan 2019), so the 3B+ build is a few versions back development wise.
You'll find you can't really use the main builds that are generally easier to access, just as Microsoft makes them compatible only really for Raspberry Pi 2/3 boards, not B+.
> "The Raspberry Pi 3B+ has limited compatability with Windows 10 IoT Core. Please view the release notes for more information. For a more complete Windows 10 IoT Core experience, please use a Raspberry Pi 3B, DragonBoard, Up2 Board or NXP device."
It would be very possible, and not very difficult. The easiest way that comes to mind is to just use an IR motion detector. They are cheap and easy to use. Here is 5 of them for $10 on Amazon. The output is already 3.3V, so you could wire it directly to a GPIO pin. Write a short script to detect the pin being pulled high, and tell it to send you an email when this happens. If email is not the best solution you could always just use a buzzer, light, or some other form of notification. Let me know if you need any assistance getting it up and running.
tl;dr - Don't use a RPi to mine crypto :)
But I did put together a Monero miner using a PiJuice HAT, 42W solar array, and a cloud dashboard. It "worked" and you can find the full tutorial on Hackster: https://www.hackster.io/rob-lauer/solar-powered-crypto-mining-with-raspberry-pi-64adee
Looks good - can you provide a link to the Open Source aspect of the project please?
​
Being able to run something like mycroft.ai on a small device like this would be a really cool project for my kids...
It's a small photography "tent" like these.
I've had one for years, and love everything about it, except that I really wish it had a mouse button on the left side of the keyboard, so I could move with my right thumb and click with my left. Having to move my right thumb off the pad to click each time is really cumbersome and awkward (and "tap pad to click" is unreliable).
I have a full-size wireless Logitech keyboard with the touchpad on the right, and it's too big to easily keep by the couch and pick up as needed (like the Rii), but it has a mouse button on the upper left corner, and it makes a world of difference.
What I've settled on is something like this: https://www.amazon.com/AuviPal-Universal-Keyboard-Programmable-Raspberry/dp/B07LD5DPNR. Point it at the screen and use like a Wiimote for mouse, and flip it over for keyboard.
It's possible. Also, unrelated to this. It's most likely Miracast. It uses WiFi Direct. You can look up more details on it online. To turn off that notification look up "how to turn off screen casting <insert phone here>".
Bonus: This is your neighbor's TV
Are you manually setting the DNS on your phone? If so, are you including an IPV6 address if that's what your home network runs on? Try this if you're on Android, I used it before I changed the DNS server in my router.
Something along the lines of THIS "Logic Level Converter" is usually what I'd reach for to get the 3.3v GPIO pins to work with 5v things like this.
Why? Because I could!
It ended up being a pretty fun "retrofit" exercise that involved some data collection up front and the use fo Edge Impulse to build and iterate on an image classification model. Full writeup is here: https://www.hackster.io/brandonsatrom/monitor-the-analog-world-with-tinyml-fd59c4
As a random FYI, if you wanted to quickly try out Linux you could try the DistroTest website. https://distrotest.net/index.php It allows you to try out almost any main distribution on a server using a web browser (no installation needed). However, it’s quite slow and limited. I think installing Linux on your own device is the best way to learn more about Linux and have a better experience on it.
You’re looking for Kerberos.io
From their site:
> The core product, backbone of the entire Kerberos.io ecosystem, completely free and open source. Deploy your own video surveillance system in a few minutes anywhere you want – using Raspberry Pi, Docker or Balena Cloud.
How are you liking the os? I've been using it for about a week and a half and it works great on my pi 3 b, but doesn't want to configure correctly for my zero w.
Also for anyone interested here is the actual github code of the creator; https://github.com/ccrisan/motioneyeos
If you want to use your own OS, you can download the program only; https://github.com/ccrisan/motioneye
In my experience, one of the cool aspects of learning on a Raspberry Pi is that it doesn't really matter if you mess up. You just re-image your SD card. I may be oversimplifying but the point is that that learning on a Pi is great. The risk is lower than on other devices. Pis were designed for teaching. So don't worry too much.
My first Pi project was pretty simple. I made a media centre (OSMC, I think) and then added some add-ons including plexbmc. I also tried NOOBS to install Raspbian.
I literally just set this up with Zabbix a few weeks ago!! It works perfectly and allows me to monitor other things as well. I have mine on a Pi 4 so performance may vary on a Pi zero
https://www.zabbix.com/documentation/4.4/manual/installation/install_from_packages/debian_ubuntu
You can more or less use any linux distro for the pi out there as long as it has (or you can install) sshd on it. When installed, simply create a user and add your ssh key to /home/<user>/.ssh/authorized_keys file and you should be able to use putty to ssh to the box. If you only need a http proxy you can install squid (http://www.squid-cache.org/) of look for alternatives on google. If you want your pi to act as a full proxy you need to have a look at iptables (https://help.ubuntu.com/community/IptablesHowTo) and echo "1" > /proc/sys/net/ip_forward. You can use terms like NAT and proxy in google to get more information on the topic.
Should you need any additional help feel free to ask.
It has a web interface of some kind; https://play.google.com/store/apps/details?id=com.roku.remote
If I owned one, I could rig something up pretty quickly.
There's either a (local) web interface hidden on the Roku, a cloud interface to the Roku, or something.
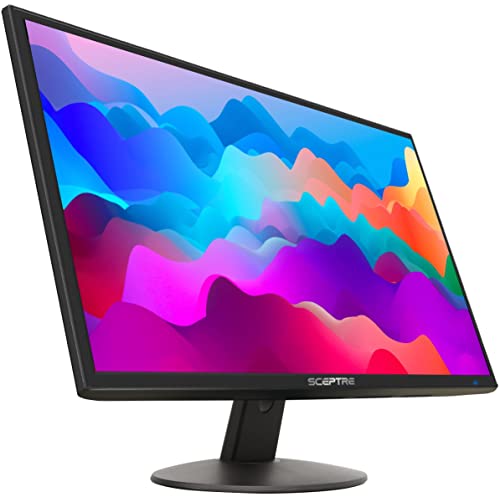
I like Sceptre, that have a good price to performance ratio.
Here's a $66 monitor from them in Amazon
Sceptre E205W-16003R 20" 75Hz Ultra Thin Frameless LED Monitor 2x HDMI VGA Build-in Speakers, Metallic Black 2018 https://www.amazon.com/dp/B07743412C/ref=cm_sw_r_cp_apa_i_p1e4CbSTF363V
use paranoid linux. to put it simply it assumes that you are under constant surveillance so it encrypts all your traffic and adds white noise so you are untraceable. if you want to know more I found out about it in the book little brother by Cory doctrow. https://sourceforge.net/projects/paranoid-linux/
Thanks. Are you referring to piece of code or the second? In the first piece of code there is a line that starts with GPIO.add_event_detect and one of it's arguments is callback=initiate_shutdown. This line acts similar to an interrupt, but it actually calls the function initiate_shutdown in a separate thread, so it runs at the same time as the while loop. If you want to work with the Pis GPIO pins using Python, RPi.GPIO is a great module. You can learn more about it here.
I made a hardware controller for my chicken coop lights and doors (all on wifi plugs) using a pi zero and some tactile buttons and a python script. Not sure how handy you are or how many devices you intend to control but it may be easier to just use buttons as opposed to a touch screen. No need for a GUI that way.
If you're set on a touch screen, I would recommend making a simple web page with links/buttons that call out to an IFTTT webhook.
Edit: If you choose the second route, make sure that you restrict your web page to local users only and block public access
Why not just use Raspbian (go w/ lite if you don't need a GUI) and lock it down? Here is a link to the Securing Debian Manual: https://www.debian.org/doc/manuals/securing-debian-howto/index.en.html
You can run TOR on Raspbian apparently (I've never used it), just can't install the TOR browser (doesn't stop you from using the TOR protocol via a browser you choose): https://www.reddit.com/r/TOR/comments/43abai/tor_browser_on_raspberry_pi_raspbian/
You can also use a VPN service w/ Raspbian.
Edit: a word
By converting the neural network model I built into TensorFlow Lite or Micro, you can create a handheld device with microcontrollers such as Arduino BLE Sense.
You can inspect my model here.
If interested, there is a project tutorial including code files, Gerber files, and instructions:
https://www.hackster.io/kutluhan-aktar/darth-vader-iot-cryptocurrency-tracker-and-display-w-pico-d3a822
I googled this for you:
There are many challenges to installing a Raspberry Pi in a car, and/or using it like an appliance. Adding GPS and the appropriate software is probably least of your worries.
You'll have to consider how to power the thing, start and gracefully stop it, whtether battery abckup is required, how you'll interface with it, etc.
This is all doable, and not a great mystery, but you'll have some work to do and things to study about!
For home automation, look into MyCroft, it's an open-source voice assistance similar to Alexa that you can host on a Pi. You'll probably want that separate though, as the Pi is relatively low-powered.
For project development, why not look into hosting a git server? You can either run your own spin of it, which will be more barebones and lightweght, or look into GitLab which includes things like automated DevOps pipelines and CI/CD. That way you can write code, and it will automatically be tested, built, and deployed if you so choose.
Last note, with a Raspberry Pi why not just use Raspbian Lite? It's very barebones and you don't have to strip anything down, just remove the standard pi user and you're good to go.
So, there's a couple of different ways they can be compared. One is the number of Skills / Intents available, and the other is how well the Intents are 'matched' (slot-matching). We haven't benchmarked agains Snips.AI (yet), but you can see our Skills here: https://mycroft.ai/documentation/skills
The thing with Linux is that you can easily do it step by step. I would do the 'access from outside' to last, as that will require some serious security knowledge. I do not say that because of you. I do not care if your machine gets hacked and all your d*ck pics get posted online. What I care about is not receiving extra spam, because your machine was insecure.
The Pi is to learn. So learn. If all you want is a NAS/Cloud server, buy one that does that. The price might sound expensive compared to a RPi, but understand that the RPi only does part of the job, so you need some sort of storage. So would still need to buy a NAS for that storage.
So play and learn. Use https://osmc.tv/ and/or https://libreelec.tv/ and break things often. Reinstall and break it again a few times. Your data will be lost a few times in the process of learning, so it should be kept elsewhere.
Then you learn you can do PiHole and next you are trying other things. Soon you will understand why there is no need to leave your moms basement.
The thing is that you can not break that much, so just delve in. And if you are not willing to learn (no shame there): buy a solution that is better for you.
First if you want a "Kodi box" I would suggest the OSMC distro (https://osmc.tv/). For the VPN, I use OpenVPN running as a service. I don't have any guide to recommend. I just searched the web and followed some instruction. OSMC is Debian based so you don't have to search for OSMC-specific instructions.
What you are looking to do is definitely possible. Come back and share what you build.
This looks like a good start for the aquarium - https://www.hackster.io/CraigHissett/aquariumatic-adb6db
And here's one for the garden. https://tutorials-raspberrypi.com/build-your-own-automatic-raspberry-pi-greenhouse/
here's two, i haven't tried either of them yet... but i want to.
http://www.projects.privateeyepi.com/home/home-alarm-system-project
I know there's an app on Android that is basically a Roku Remote. It works as long as your phone and TV are connected to the same network.
https://play.google.com/store/apps/details?id=com.roku.remote
https://www.amazon.com/dp/B06X8Z255M/ref=cm_sw_r_cp_apa_glt_fabc_KGHXW523N5KNPMZB2J24
This one takes a 24-volt input voltage and the load side is 240 volt 2-pole, there are many combinations just pick the one that will work best for you. You can get them with different input voltages, you will just run the input side of the contactor through your relay that is controlled by your raspberry pi.
Something like a Freenove Starter Kit I think might be a good place to start. It will have all the parts to do multiple basic projects like this, as well as instructions.
https://www.amazon.com/gp/product/B07VSD52J6/ref=ppx_yo_dt_b_search_asin_title?ie=UTF8&psc=1
Running this with 4 HDDs for the 18 months with no issues.
If you use a grow light it will give off a fair amount of heat already, you may not need additional heat. But if you do need extra, is there any reason why can’t use a traditional heat mat something like this:
https://www.amazon.com/dp/B00Y27FJ1C/ref=twister_B083QGY94C?_encoding=UTF8&psc=1
You may end up with too much heat, so you might want to consider adding an exhaust fan to the setup.
Don't over think it. If you hookup a light sensor that plays music is all you really would need.
https://www.amazon.com/Icstation-Light-Module-Music-Player/dp/B01IUHQJ3G
RetroPi handheld.
I have one that controls my ceiling lights/fans that have proprietary RF controls
With this: HiLetgo 315Mhz RF transmitter and receiver link kit for Arduino/ARM/MCU WL https://www.amazon.com/dp/B00LNADJS6/
Lol, here for Raspberry Pi 3 B+ 3.5 inch Touch Screen with Case, 320x480 Pixel Monitor TFT LCD Game Display [Support Raspbian, Ubuntu, Kali, RetroPie System] https://www.amazon.com/dp/B07N38B86S/ref=cm_sw_r_cp_api_glc_fabc_LnFaGbV5RXXB2?_encoding=UTF8&psc=1 There is also one for the raspberry pi 4
Well... as of now I’m getting the node monitoring GUI looking sexy. But I’m building nodejs applications. I’m gonna add a NVIDIA Jetson https://www.amazon.com/gp/product/B086874Q5R/ref=ox_sc_saved_title_1?smid=ATVPDKIKX0DER&psc=1 as the last node for awhile... I’m gonna learn and hopefully deploy some machine learning in tensor js without git commit sewie-side
I used this CanaKit from Amazon for my Dad's retropie last year for Christmas. Comes with everything you need and also leaves some room in your budget for the controller you are looking for.
>...would the wifi count as a relay?
No. A relay in this context is an electric switch used to control high voltages (such as 120v ac from a wall outlet) with low voltages (usually 3v or 5v dc).
Your Raspberry Pi or arduino would send a 5 volt signal to pull the relay control pin high or low to activate or deactivate the relay. The relay would then turn a mains voltage device, like your heater, on or off.
Here is a link to a relay board on Amazon. https://smile.amazon.com/SainSmart-101-70-102-8-Channel-Relay-Module/dp/B0057OC5WK
(not an endorsement, just the first one that came up when I searched for "eight channel relay")
You definitely don't want to poll the GPIO pins if you are trying to capture a signal that fast. I agree with /u/pigdead that setting up a callback on edge detection would be the way to go, but I was going to suggest using the RPi.GPIO module in Python to do it. Either way should work, it just depends on your preference. Here is a link if you want to learn more about RPi.GPIO. Take a look at the "Threaded Callback" section.
>Also my other 4 buttons changing the min and max values up and down seems to work weirdly, they supposed to add or subtract 0.1 to/from the variable, but sometimes it changes with 0.100000000002 (still after I was adding resistors and capacitor), but at least the buttons react on push as the should.
That part is probably just the way floating-point arithmetic works. See, e.g., here for some examples.
I do this all the time but no need for RPi. Install a smart socket and make sure your computer turn on on power (search that on Google).
For the files, there tons of apps that do this. Free TeamViewer would work;
Use your smart socket to turn the computer on remotely
Wait to 3 minutes until the computer has turned down in use TeamViewer from your phone to access and control your computer
Use TeamViewer to exchange files from your phone in the computer
Remotely shutdown the computer.
Added fun.... Look here
https://ifttt.com/p/assistantcomputercontrol
install this following instructions and then you can even use your voice on your phone with Google assistant to turn off your computer. The same way you can configure IFTTT to turn it on from your smart socket.
Avoid cheap SSDs.. but even the "good" ones will eventually fail, and some sooner than later. I've had good success with the Sandisk ones. The Samsung ones are ok too though I personlly tend to avoid anything Samsung like the plague.. Only ~2 of the ~20 I use failed on me prematurely. The others are being hammered daily and are still going ~2 years on.
​
Edit: Backup... backup backup backup... No excuse for not doing that ^_^ Here's an example: https://retropie.org.uk/docs/Updating-RetroPie/#making-a-backup-option-1
And have a few scripts or commands handy to copy/paste, so you can rebuild with ease and minimal time.
thanks for the idea, i remember seeing a pic in an article but never read it. now i have a project for my daughters room.
i found this one project with arduino that seems real interesting
There's a way to get Visual Studio Code to run on the Pi. I haven't personally tried to edit HTML with it, but it's great with other code.
Another option with a different approach to connecting to wemo would be using IFTTT's maker channel (https://ifttt.com/maker_webhooks). Essentially this means you just need to make a POST request to a specified URL. See this article for some support (http://www.makeuseof.com/tag/ifttt-connect-anything-maker-channel/).
Then you could write some short python code to make the request when the temperature on your sensor reaches your desired temperature.
I feel that SSL is an essential and CloudFlare simplifies the process a lot. I guess I didn't say it on this thread but I'm super new to this and from what I gathered up until this point, just making a website use https meant that it was "secure" I now realize that that isn't correct and I still have a way to go (probably gonna add these https://www.digitalocean.com/community/tutorials/7-security-measures-to-protect-your-servers) but if you have any suggestions, that's what I'm really looking for, because I want to make this process easier for others
Remember the bottleneck will be on the pi connecting to the hard drive. Ssd will be the way to go.
Will be your friend here. USB 3 will also help. But I'm not sure of the if there is a way for the SSD directly connect with the raspberry pi other than USB.
Git is a very powerful version control system mainly used for developing software. I use it to organize files for all of my personal projects. The git server hosts the files for upload and download, basically. I prefer to just use the built in git server, although there are other options like gitea and gitlab.
Check the links given here for more info: https://retropie.org.uk/download/#Debian_Ubuntu_on_a_PC
Specifically: https://retropie.org.uk/docs/Debian/
Yes, as above you can run it over Ubuntu just like you can install it over Jessie/Raspbian on the Pi. I have Raspbian installed on my Pi so I can run the full Pixel GUI or I can start up into Emulation Station. You can turn on Autostart if you like, I have that shut off as I use mine as a light web browser as much or more than I use it for games.
The Weather Underground has a huge network of weather stations that you can connect to remotely, and you can add your own station to the network using a pretty wide variety of hardware. I didn't see a Raspberry Pi hardware option listed on their website, but the API is open, so I'm sure you could make something compatible yourself, and then just use the Weather Underground app to connect to your own station.
I fully believe that someone could design and build a stable and safe home automation controller from a Raspberry Pi.
You can look inside a commercial PLC or home controller, and there's nothing really special: basically just a microcontroller and whatever "glue" components are needed to interface to the inputs and outputs. Like anything though, the devil is in the details. To be honest, OPs setup looks pretty well-built: circuit breaker for the AC components, opto-isolators for the relays. Maybe there should be overcurrent protection on the DC side too, but it's not a huge deal.
The thing is, you can build something utterly perfect, but if there was any inkling that the device was involved in an electrical accident, insurance is going to create a major headache.
The bar for UL certification is not really that high. It essentially asks, "does this device perform the way it's supposed to," "does it conform to basic electrical safety," and "is it made from decent quality components." There are plenty of consumer electrical products that are doing the bare minimum to gain that certification: a well-reasoned DIY project could easily do better. Of course, the cost of that UL sticker is unreasonable if it's a one-off DIY project.
To me, the "safe" way to accomplish this kind of automation would be to use commercial switches (e.g. the many "Zigbee" products), but then an open source automation controller (like home-assistant.io) running on the Pi. That way you get the best of both worlds: fine-grained control over the project, but the security of knowing that the actual mains-power hardware is solid.
The code you showed implies you know the ip address of another car. In real life this is t going to work, but let’s assume you can get that info some other way.
1). Run a Python Flask based server and make rest calls to post information to the other car. http://flask.pocoo.org 2). Switch to multicast and don’t worry about the IP address. https://pymotw.com/2/socket/multicast.html
Emulation system is one of the most popular uses of the Pi. Take a look at RetroPie. https://retropie.org.uk/
As for running terraria, I don't think that is going to work out as I am unaware of a variant of terraria built for the ARM arch.
https://dietpi.com/phpbb/viewtopic.php?t=9
>For experienced users who want to skip this guide and dig straight in.
Here are the login details:
>
>username = root
>
>password = dietpi
You don't need a subscription but the phone app does have a one-time purchase. But once you buy it it's yours. It runs for free from other devices like PC/laptops or assorted tv boxes (I use it primarily through Roku.)
I don't have my server set up with music (though now I'm thinking I might) so I can't speak from experience here but it should work just fine once you get it dialed in. Not sure how well Plex works with Amazon Echo but a quick Googling shows there is a skill out there for it.
As for setting up Plex on a Pi, I have mine running on a 3B+ in a case with a fan and a 4TB external USB HD (on Ethernet for better connectivity than WiFi.) Set it up using DietPi with the Plex plug-in and it works perfectly.
I would use Parrot OS as the operating system
You need a NIC that can do injection. This is the one I use
You need a battery supply.
Other than those things you should be off to a good start
I'm pretty sure Mycroft has Jarvis as a Wake Word.
It's not Alexa but it is a voice controlled digital assistant that
- is More customisable
- is open source
- less privacy invasive
- has "Picroft" which is readily packeged to work on. Raspberry pi 3 or 4
It makes your Nextcloud instance easily accessible from outside networks via a domain name you control. Plus you can install and run other apps like Bitwarden or Wordpress to be increasingly self-sovereign https://yunohost.org
Raspberry Pi is not an amplifier, so it won't replace an old amplifier.
What it can definitely do, is turn your old setup into a "Smart" connected setup with your TV as a hub.
Check out LibreElec to start.
Sorry read too fast, thought your problem was camera working.
I'd reimage the SD card and put the supplicant file back in boot. Keep in mind the boot location is only good for the first boot after that you need to edit in etc.
https://github.com/ccrisan/motioneyeos/wiki/Wifi-Preconfiguration
MotionEyeOS is a live distro that will motion detect video and text or email the video or jpg. There might be a way to tweet alerts, too, but I haven't tried.
Feature rich and easy to use. Supports muktie USB cameras or the rPi camera.
Hope that helps.
Well, considering the Pi is a (full) computer itself, you are talking about plugging in a computer into your computer. If you were able to do that with any other computer then this would be easy to do. Since you can't (that I know of) then what you want to do is going to be rather difficult.
What you CAN do with multiple computers is run them simultaneously and share their resources using things like synergy (mentioned already - instead of a KVM) and possibly WinSwitch - although I don't know if winswitch has all the components required for Arm/Pi.
Anyway - having the Pi plugged into your PC to delegate activity to is is probably not possible in the short run. Doing it over the network is more likely.
You might be able to do what he wants without Grafana. Influx has a query language that you might be able to invoke via D3.js (about which I know ZERO!). The neat thing about Influx is that it is time sequenced automatically plus it is “schema free” ie you don’t have to define a schema in advance and can change/add as you go.
I don’t imagine your DB content is very complicated so the relevant query to get the barchart data should not be too hard.
https://www.influxdata.com/blog/data-visualizations-with-influxdb-integrating-plotly-js/
But I now stray dangerously into going beyond helpful to seeming to tell you what to do!
Hang a couple cheap USB drives on it and use it for:
A big Archive Box https://archivebox.io — you can spread the crawling and indexing load across different PI’s, some crawling, some youtube-dl’ing, etc.
You can also use it as a NAS to back up your desktops and mobile devices through things like Timemachine, rdiff-backup, etc.
Yeah, I'd try a desktop install, I use nx desktop for remoting in. I'm pretty sure vlc will stream to the local net. Could even use a native app to grab the stream instead of a web browser. Like I said, I use nx desktop on all my Pi's, you could then use nomachine and just bring up the camera on the remote desktop.
I don't use apple so I'm not entirely sure that nomachine is available.
I'm not affiliated.
The simplest would be to run sudo python -m SimpleHTTPServer 80 where the web pages are. Without the 80 (and even without sudo) it runs on port 8000.
The next is to install eitther Apache or nginx. I have no experience with nginx. You can also add php. Add MariaDB as well and you should be able to install Wordpress. do not forget to run mysql_secure_installation after installing MySQL.
When you install a webserver, you best run it with ssl by using certbot if you want it visible to the outside world.
Just installing apache is sudo apt install apache php and you have a php enabled webserver running. Add the following file in /var/www/html/info.php
<?php phpinfo(); ?>
And then, with a browser go to http://ip.of.the.pi/info.php The ip can also be localhost if the browser is on the local machine.
OK but once again, you are giving zero context. A solution that works for others may not be the best solution for you. If you want to automate file transfers using file transfer protocols, then just use SCP's built-in functionality to automate file transfers, there is absolutely zero reason to use Python in this scenario.
You could use a bidirectional syncthing folder. This would also allow you to share the data automatically with computers that are not on your home network, if desired, without forwarding a port. If you chose this route, I would recommend setting up a simple version control with syncthing. This is straight forward and well documented and can prevent possible data loss.
You can also use the Pi to control things and stream live video. As an example, you can build a rover with live video that you can control from your phone: https://www.hackster.io/LimitOS/iot-rover-toy-car-via-raspberry-pi-5fcfc5 .
Have you checked signal strength in your garage? I did a similar project here: https://www.hackster.io/silicon-override-15/photon-garage-opener-775152?ref=user&ref_id=31374&offset=0
And I would trigger it and it wouldn't work. The worst part was it would connect randomly and trigger if I didn't unplug the project so my garage was opening randomly throughout the day.
I ended up upgrading my router to ubiquiti and I haven't had a problem since. knock on wood
I haven't really explored what you are looking at, but I wanted to throw out there that these things exist and things like them:
https://www.amazon.com/dp/B07W7YCFS1/ref=cm_sw_r_cp_apa_glt_fabc_MM0M2M3SRWTPXE9WXHZ7
I mainly bring them up because I saw them for the first time about a week or so ago and you reminded me of them :-)
Decent night vision needs IR illumination. You could consider this by Makerhawk…
Because you can either control the IR filter by software or let it do so automatically this may do what you want.
If you use a NOIR camera or one like the above with a the IR filter “off” you need to set white balance to “greyworld” to be sure of getting monochrome images under IR lighting.
Range of vision depends on the power of the IR lights used.
YT is, often, a waste of time, just try Google and look for text write ups.
You might want to look at RPi_Cam_Web_Interface as well as Motioneye. General experience is that one can get better video frame rates with that. But you can still use Motioneye as a “hub” to consolidate multiple cameras for viewing.
I'm powering the pico and the relay board off of the same "breadboard" power supply (https://www.amazon.com/MELIFE-Breadboard-Supply-Arduino-Solderless/dp/B07X3S4B1W/ref=sr_1_5?crid=M9S7KC4QFBXC&dchild=1&keywords=arduino+power+supply&qid=1619577090&sprefix=arduino+pow%2Caps%2C233&sr=8-5)
But I'm powering the pico off of the 3.3v side and the relay board off of the 5v side. I'm not reallly sure about when it's appropriate to power from the JDVCC on the relay and if a common ground is necessary, your guidance would be appreciated.
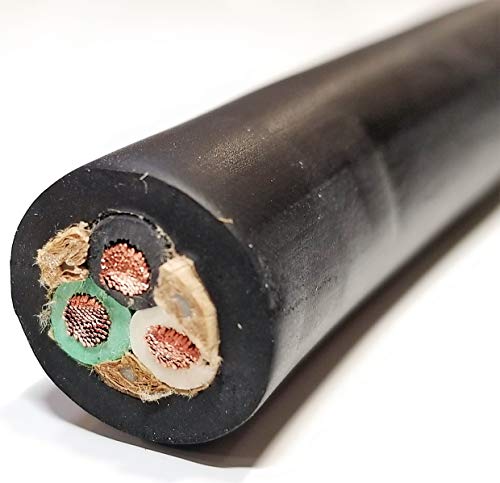
# Here is something like the plug for the 12V port
Then you need to connect the wires to something like this to bring the 12v to 5V usb
This is probably the best bet for someone who doesn’t know what they’re doing.
Buy a project kit, like this one. It includes lessons and code for all sorts of input and output devices
Freenove Ultimate Starter Kit for Raspberry Pi 4 B 3 B+ 400, 434-Page Detailed Tutorials, Python C Java Code, 223 Items, 57 Projects, Solderless Breadboard https://www.amazon.com/dp/B06W54L7B5/ref=cm_sw_r_cp_api_glt_fabc_0S399AXC0PWJ8S39Z17M
Depends on the Pi, really. I run a Pi3B+ 24/7 attached to an official 7" screen with no cooling and it's never been a problem.
In my work shed, I have a Pi 4 that runs 24/7 and has a fan on it (using a GeeekPi Powerboard) and it ran in temps over 110F over the summer with no ill effects.
I don't recommend running a Pi 4 24/7 without a fan or a fairly large heatsink (or a case that functions as a heatsink, like the Argon One, Argon Neo or Flirc) since they tend to run pretty warm as it is. If you're going to put it in a kiosk, I'd suggest the Argon Fan Hat.
There are a couple of Pi UPS hats out there that should work for this. Just search Pi UPS hat on amazon and it'll turn up a few different parts that should do the trick.
This one seems to have all the features you'd want and runs off a couple of 18560 lithium cells: https://www.amazon.com/Geekworm-Raspberry-Management-Detection-Shutdown/dp/B087FXLZZH
I was planning on using something like this. There are different sizes depending on the size of your cabinet and or screen
https://www.amazon.com/dp/B01CZ35XWY/ref=cm_sw_r_cp_apa_fabc_BMx3Fb1MJXG4T
I got a 30X30X7 mm fan. Fits my Canakit case perfectly. Yours would be too big and fat for my case.
This works well for me Logitech. c270 https://www.amazon.co.uk/Logitech-Widescreen-Noise-Reducing-Automatic-Correction/dp/B01BGBJ8Y0/ref=sxts_sxwds-bia-wc-p13n1_0
There are many types of VPNs. The majority of VPNs you hear about on the internet are like NordVPN, expressvpn, private internet access, etc. Allow for getting a new IP address among other privacy/security things. This can be used at your house or when you are out. The VPN in this video does not "hide" your house IP or allow you to pirate things or make it look like you are in another country. The purpose of the VPN in this video is to allow for remote access to things that are on your home network in addition to being slightly more safe when you are using the internet at a cafe or something. In this video you are creating your own VPN server like how NordVPN or whatever has a VPN server on their server.
Hopefully this makes sense.
These 5V relays are under $6 for a pair. They are only single channel relays, though.
You can also get 4-channel or 8-channel 5V relays if you want to switch a bunch of circuits with your Pi.
Not sure if a pi can do this. Most people use a keyboard encoder to make arcade sticks and buttons work for windows and retropie. One of the popular ones is the ipac
https://smile.amazon.com/dp/B01N6TKDDH/ref=cm_sw_r_cp_apa_i_cR.wFbQ4Y1KHN
If you wanted to do more research on if the pi can be used the technical term for a keyboard mouse etc... Is HID (human interface device)
Oh I didn't build these from scratch, I bought it online, the controller is called 8bitdo:
It is a bit expensive, but I think its due to the frequent firmware updates to make the controller as broadly compatible as possible. For a bluetooth controller this thing is amazing, no lag or missed inputs unlike many other bluetooth gamepads
Thanks for reading! One idea a friend suggested but I haven't yet tested is to connect a TinyPilot to a basic, non-networked multi-port KVM (like this one) that supports switching target computers via hotkeys. Then you could connect something like this:
TinyPilot | Legacy 4-Port KVM | ---------------------------------------- | | | | Server 1 Server 2 Server 3 Server 4
You'd still be able to cycle between servers by pushing hotkeys from the TinyPilot web interface and the Legacy KVM would intercept them and cycle machines.