
What are
/r/overclocking's
favorite Products & Services?
From 3.5 billion Reddit comments
The most popular Products mentioned in /r/overclocking:


The most popular Services mentioned in /r/overclocking:
HWiNFO (32/64)
OCCT
GPU-Z
MSI Afterburner
EVGA PrecisionX 16
CPU-Z
Files.fm
Blender
FanControl by Rem0o
Youmagine
BlueScreenView
ImgBB
SpeedFan
vgy.me
PassMark CPU Benchmarks
The most popular Android Apps mentioned in /r/overclocking:

Kernel Adiutor (ROOT)

DevCheck Hardware and System Info

Boost for reddit

CAM Mobile

Remote Panel
The most popular reviews in /r/overclocking:
To avoid corrupt OS, create a usb bootable windows installation and use that OS for memory testing. I recommend https://rufus.ie/ for creating a usb boot device.
Also, some boards allow you to set your reset button to safe boot, it saves a lot of time when trying to train your memory and figuring out timings.
A very important note about the HEDT chips:you *MUST* use cellulose based nail polish *OR* this stuff: https://www.amazon.com/gp/product/B008O9YIV6/ref=ox_sc_saved_title_2?smid=ATVPDKIKX0DER&psc=1
to paint over those caps completely, and then let it dry, so that liquid metal will not touch them. Not only for short circuit protection, but liquid metal (gallium) will *absorb* the solder on those caps and then they will just fall off by themselves. This is VERY important to remember!!
​
Nail polish is cheap (transparent, cellulose based).
And you can't replace SMD's that small without professional equipment.
it ain't Samsung B-die but these chips are really impressive nonetheless, and way better than my Hynix AFR chips I had prior to them.
fun fact: I needed to bump the CPU voltage up by 0.06v to keep it stable - the switch from 3333mhz CL16 to 3533mhz CL14 brought that much extra CPU performance that it ended up being unstable at the voltage it used to be stable on.
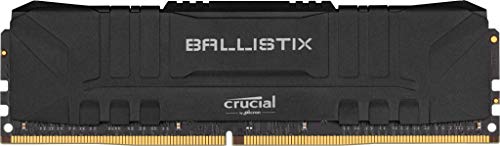
the sticks I used are: https://www.amazon.com/Ballistix-PC4-24000-288-Pin-Gaming-Memory/dp/B07F6JPLJ2/ref=sr_1_5?keywords=ballistix+sport+lt+2x8gb+3000&qid=1559403642&s=gateway&sr=8-5
the tRCDWR and tRCDRD are not stable on anything below but the values you see
For some reason the amazon link didn't even get inserted originally.
Edited the above message with an alternate way to "bake" gallium into a copper IHS to avoid premature LM hardening (because ideally you want gallium to get absorbed into the copper quickly and early as much as possible before mounting, so you can apply a second layer after).
The LM applicators I use are these cheap lint free ones here. And they are far better than the crap that comes with conductonaut.
https://www.amazon.com/gp/product/B00MEC5084/
Note that I also make my own Galinstan LM from raw gallium, indium and tin (100g +40g +10g), which costs 10% of the price per total grams of the commercial (Thermal Grizzly LM / Silver King /coollaboratory) stuff.
Well, it's all in the sidebar, but here you go: GPU-Z will show you your GPU and VRAM clock speeds, CPU-Z will tell you your processor clock speed, memory clock and timings.
Edit: I understand that you probably won't know what to do with all that information. If you just post a bunch of screenshots, we will figure it out together from there.
I think you can use your graphics card built-in fan controller if you use a GPU fan cable adapter like this: https://www.amazon.com/CRJ-Splitter-Adapter-Sleeved-Graphics/dp/B07T95C68T/
Planning to do something like you did for my crappy loud single fan 1660 Super
Just FYI, you actually underclocked your 9600K. It has an all core turbo of 4.3GHz, max single core of 4.6GHz.
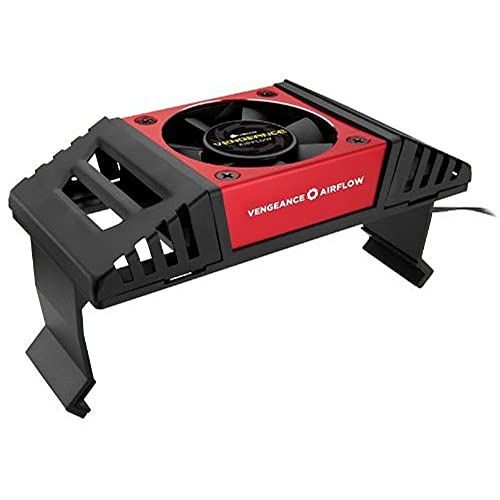
You might have issues with VRM and VRAM temperatures on your GPU. It is recommended to have fans provide forced airflow to those areas. Something like this:
https://www.amazon.com/Noctua-NF-R8-redux-1800-PWM-Performance/dp/B00KF7MVI2
Some people also add heatsinks as well.
In general, you can get different readings especially if you're using 2 different softwares at the same time, stick to one at a time. Otherwise it's actually reading 1.4V on vCore. I myself had issues on my Crosshair VI Hero, and one day found the CPU to kicking out so much heat, checked hwinfo and it was 1.7-1.8V, a restart and a bios flash fixed it.
I and most other people use HWiNFO64, CPU Core Voltage (SVI2 TFN) is what you should look for in general. If you really want to be precise, get yourself a multimeter and read it from the voltage points or socket.
Martin authour for HWiNFO talks about here , if you see a different voltage between what the motherboard and CPU is reading for voltage.
This was my first time delidding a CPU, I 3D printed a delid tool from Chri's plans [1], then replaced the stock thermal paste with Coollaboratory Liquid Ultra.
Cooling setup:
- EK Supremacy EVO
- Black Ice Nemesis 240GTS Radiator (x1 initially, then x2 after delid)
- D5 pump
[1] https://www.youmagine.com/designs/intel-kaby-lake-delid-tool
You can use Fan Control for setting the fan curve, it allows you to use GPU temp as target for motherboard fan headers. https://github.com/Rem0o/FanControl.Releases
For connecting the fan to GPU headers, you can cut the connector to fit. It’ll work fine as long as you don’t damage the contact point and wire.
You can use GeekBench 3. Look at the multi-core memory performance score.
Subtimings can help a bit but it's up to you to decide whether it's worth investing the time to tighten them as RAM OC doesn't really help that much considering the amount of time you spend on it.
What ICs do you have? You can check with Thaiphoon Burner.
Also, wrong flair.
The hwinfo author explains it differently as I said measured by the vrm not the cpu
CPU Core Voltage (SVI2 TFN) value is the voltage measured by Voltage Regulator, which is supplied to the CPU (as VRM output)
https://www.hwinfo.com/forum/Thread-Ryzen-CPU-Voltage-explanation
It doesnt work quite that way. Clock speed its only part of the picture, improvements in efficiency in the individual cpu cores have improved.
If you compare a older intel core 2 duo to a modern intel xeon you can see even though the xeon is running slower at 2.6 vs 3.0 ghz the "single core performance" has significantly improved.
Xeon:Single Thread Rating: 1758
Core 2 Duo:Single Thread Rating: 1256
Source: http://www.cpubenchmark.net/cpu.php?cpu=Intel+Xeon+E5-2685+v3+%40+2.60GHz&id=2538
http://www.cpubenchmark.net/cpu.php?cpu=Intel+Core2+Duo+E8400+%40+3.00GHz&id=955
The picture and post title question alone, don't provide enough information for anyone to give you meaningful input.
- Is it stable when benchmarking?
- Are these settings for benchmark/fun, or everyday use?
- Is it stable when stress testing?
- Is it stable with your daily workloads?
- What cpu temps are you getting? (I recommend hardware info https://www.hwinfo.com/download/)
- What voltages are you actually using? (CPUz reports VID, which is not the same as Vcore. VID is what the CPU is requesting and Vcore is what the CPU is receiving. Those can be completely different things especially when the CPU is in a loaded condition. Make sure your watch Vcore. VID is good to know for certain things, but Vcore is the important thing. View your Vcore using hardware info)
- Are you using AVX offset?
- Whats your LLC set to?
- Are you using a reduced cache ratio?
I'm not familiar with your particular cpu. I have an i5-2500k oc'd at 4.5ghz. I think this guide will help you: here
You shouldn't need another mobo. You'll still find the necessary settings to change everything manually. Some mobos just have software that will help you. And to answer your other question, yes you will need an aftermarket heatsink especially if you want to get into the 4s. Without one I'm pretty sure your temps will be too high.
CPU pulled 260W even (not R23, different load). It depends on load and cooling. Basically, more Watts of heat you can remove with cooling, more Watts of power CPU can pull, up to a point. With static OC ppl were pulling way too much, above 300W easy. Pulling more Watts won't make better results. It's all about balance of things. You can check OCCT bench results , just switch to 5950x in dropdown, and look at multicore AVX and SSE loads. You'll see my results in top 10 pulling the least amount of power of all there, 2nd lowest voltage (just 4mV difference) but way lower temps than others (click on white arrow to open individual results, scroll down and look at temps, power, current etc). If you'd look at scores better than mine, and compare temps, you'd see that mine are in mid 70s, while some go even above 100C. I'm not gonna run my CPU at 103C pulling ~200A and 250-300W just to move one spot up in some bench. If THAT'S what takes to beat my daily, then I'm happy, and they can keep their spots.
The use of the word "literally" for emphasis is so common and widespread that it has even made it into the Oxford English Dictionary.
Yeah could be part of the issue. Maybe it's heavily thermal throttling. Grab HWInfo64 and check temps, MCLK, UCLK and FCLK should be synced, download ZenTimings and ditch DRAM Calculator.
That's definitely weird. A 7870 should be miles ahead of a regular 460 in terms of performance even on Guild Wars 2.
Are you sure you uninstalled drivers properly? Uninstall all your drivers through Catalyst, use Driver Fusion, try this out, except delete all the nVidia AND ATI/AMD drivers, and redownload. Here's a tip: when deleting drivers using Driver Fusion, remember not to delete any "chipset" drivers, just the "display" drivers. The chipset drivers could be critical to your motherboard functioning properly.
EVGA Precision X or MSI Afterburner. Most people will say that overclocking a card like that is worthless, but in all reality, overclocking any GPU only produces small gains. My 290Xs perform only marginally better at 1190/1497 than they do at stock, which is 1000/1250.
But overclocking a GPU is similar to overclocking a CPU. You up the core and memory speeds until they can't go any higher without your drivers crashing, check the temps, make sure there's no artifacting, then raised the voltage and go higher. Keep going until your voltage is either way too high or your card gets way too hot.
I'd go it when running a benchmark such as furmark, since it loads quickly and can be ran infinitely and in a window.
I personally use Afterburner. It's more straight-forward, and signing up for EVGA is probably one of the worst things I've done in my short life. I used to have an EVGA GT 640, so I thought that Precision X would be the best for me. Nope. Now I get shitty emails about their overpriced GPUs that are dwarfed by mine.
Download OCCT (free) and try to run the full benchmark a few times. Result doesn't matter, just if you'll get any errors while running it. Alternatively you can set AVX and run just that one. It's pretty fast and good for exposing "easier" errors.
> What is safe for voltage generally?
I would only go up to 1.5v. After around 1.4v you may want to look at placing a fan over the VRMs to help with temperatures.
You want to keep core temperatures < 60°C and socket temperatures < 70°C. Both of these temperatures can be found in HWiNFO64. Core temperature is called CPU (Tctl) and is only accurate under load. Socket temperature is called CPU.
For reference, my poor 6300 does 4.5GHz at 1.45v and can hit 4.7GHz at 1.5v, but it's not 100% stable.
For stressing, I'd recommend RealBench. How long you should stress for is up to you to decide. Personally, I'm lazy so I only stress for 15 minutes, then I just play a few games.
> VID is the voltage that the CPU requests from voltage regulator and which it "thinks" it is getting. Vcore on the other hand is the real monitored CPU voltage value that the CPU is getting. If the mainboard implements additional Vcore "offsetting" then the CPU doesn't know about this and so the difference between VID and Vcore can be explained. >
The cooler is probably fine for 24/7. OEM's are not idiots, they won't want warranty calls they can avoid.
If you want to run the card cooler, do some cheap mods.
Move the whole PC to a high airflow case. If you need the warranty in the future, just move the parts back.
Remove the shroud + fans, replace with some 92mm models.
https://www.amazon.com/F9-PWM-Rev-Dynamic-Bearing/dp/B00H3SVWF4
Make a custom aluminium backplate, put thermal pads between the PCB and backplate.
The hot spot being 100C is not an issue. In the past, hot spot temperatures were not even reported to prevent consumers from panicking. What really matters is your average package temperature, which if it remains in the 70-80 degree range is normal.
You can put a better cooler on your card if you wish, but it won't change the longevity of the card.
https://www.amazon.com/ARCTIC-Accelero-Xtreme-III-CrossFire/dp/B007YLUCKQ
Actually it isn't thermal pads but thermal goop. Getting a pad height right on those suckers is a bitch.
You should use https://www.amazon.com/viscous-thermal-replacement-60g-Aspire/dp/B00K04D3UK
Asus seems to love this stuff.
Gotcha.
If you're sure it's heat related, have you considered something like this? Even a twist-tie mounted DIY with an old CPU heatsink fan would be more than good enough for a quick test.
It's tough to recommend which timings or sub-timings to focus on; you'd have to try them individually, but that would take AGES since your crashes are somewhat random. Even with that, they'd be unlikely to affect heat production much.
The two things that generate the most heat are higher Voltage, and higher ProcODT (needed for stability).
See the little washer clip thingies on the bottom side of the heatsink? They are designed to slip on one way and bite into the post when trying to pull them off. A flat head screw driver and some needle nose pliers should do the trick. You’ll likely ruin those clips on the process. And be careful not to stab yourself with the screw diver. Here’s an assortment pack if you want to try and use the same mounting mechanism with a different fan. cSeao 150pcs 304 Stainless Steel Starlock Internal Tooth Push On Locking Washers Assortment Kit, M3/ M4/ M5/ M6/ M8/ M10/ M12 https://www.amazon.com/dp/B07DSTQSGG/ref=cm_sw_r_cp_api_glc_fabc_6Fa4FbD7V4BNQ?_encoding=UTF8&psc=1
Hmmm amazon selection seems limited.
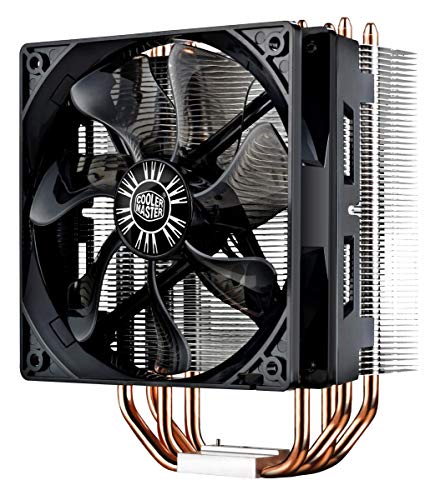
212 evo at $30 is just slightly inflated.
Cryorig h7 is $50+, too inflated.
tc14pe is $75, slightly inflated.
d14 is only $70, great choice but still maybe above your price range.
tc12dx is $50. Not too inflated but compared to the $70 options I don't think it's great.
I did but its the gigabyte gaming 3 z170x mobo here is the link on amazon: https://www.amazon.ca/Gigabyte-LGA1151-Intel-Motherboards-GA-Z170X-Gaming/dp/B012N6E996/ref=sr_1_1?ie=UTF8&qid=1473045417&sr=8-1&keywords=gigabyte+gaming+3
The best and most accurate way that I know of (unless your power supply is one of those smart ones like corsair has) is to use a Kill-A-Watt meter from Amazon, link below.
​
Basically you will take the Kill-A-Watt meter and plug the PSU into it this will tell you the exact amount of power in Watts that the PSU is using. Than you will just need to factor in the efficiency of the power supply and you will know what the PSU is outputting. For example lets say that the PC is using 250w of power at the wall (Kill-A-Watt meter) and the PSU has a 90% efficiency ratting, that means you are losing 10% of the power. So... 250 - 10% = total power output of the PSU or 250 - 25 = 225w of power the PC is using.
​
Note:
The efficiency ratting of the power supply should be provided by the manufacture. The efficiency that the power supply operates at will vary with the amount of load being placed on the PSU. Keep this in mind when using the formula above as the resulting number is an estimation and the actual amount could be more or less. Some manufactures will provide you a chart showing the exact efficiency level of the PSU under various loads, this can be useful in determining a more precise output wattage.
​
Link:
Please find a cooler for 7.00 plus shipping or less.
​
I just put a pair of EVGA's Hybrid water coolers on my 980 TIs. $110 per for an AIO solution with no maintenance requirements. It's an option to look at if expansion capability and cutting edge OC isn't a requirement.
That being said I have no experience with the Kraken coolers or custom loops in general. YMMV!
FYI: My build
Yea because you didn't manually set anything, auto voltages very likely killed your CPU's memory controller and system agent.
As a test/way to look (you can probably do this with your older CPU), still keep the voltages on auto and see if there's any voltage readouts for VCCSA and VCCIO, either in the board firmware's sensors screen, or in a software like HWiNFO. If They're above 1.3 volts, I fully expect this to be the cause.
Regardless, I think you should manually set the voltages.
Ditch hwmonitor and use hwinfo as hwmonitor supposedly has tons of issues.
You are correct about VID and VCORE but they do not need to match up. VID is preprogrammed into the v/f curve and is normally requesting higher than needed.
I would recommend spending a few hours to properly overclock the cpu. here is a guide. I do not think your cpu should be bottlenecking a 1070 that badly.
Spend half an hour hopping through the firmware menus. If you can't find it, then you probably can't.
​
Also I would be extremely careful on overclocking on A320, nevermind Biostar. B350/X370 saw god awful VRM configs across the board, and Biostar is straight up not competitive. (yellow star is like 100'C VRMs in awful case airflow)
That said, you might be okay with 3200G; as long as your VRMs are below 110'C, provided that you can tell, in a software like HWINFO.
I think its worth overclocking, and if you're only targeting a minor overclock, ie something around ~5.1 the risks are low.
When OCing, I recommend making only making small changes at any given time. Testing to see impact, save Bios profile, before making more changes, so you can always role back to a stable Profile. This will seem tedious at first, but will save you time in the long run, if you can't figure out why an OC isn't stable.
Monitor your system via a free program hwinfo. Use it to track temps, and voltages in Windows. https://www.hwinfo.com/
Ensure the RAM is stable before OCing the CPU. (you don't want to be guessing if your system crashed cause of a change to memory timings or cpu overclock). Just a heads up, RAM OCing will be the most time consuming part of the process.
Test with Cinebench, before making changes, and after, so you can compare improvements. When using something like pime95, if you're gaming, or not planning on pegging the CPU with heavy workloads for long periods of time, I think a 15-30 minute stress tests will suffice although others may disagree.
Expect to run in the range of 1.27-1.35 voltage to get 5.0 or 5.1 Ghz all core with the i7-10700k or kf. Start at the high end of that voltage, and lower it until you're no longer stable. Higher clockspeeds will likely need more voltage or more aggressive LLC.
I'd recommend reducing the cache ratio to below your multiplier. Try 44 low and 48 high for cache ratio. Having a lower cache ratio will not significantly reduce performance, but will allow for better overclocking, which does.
If you're having stability issues when load testing, try adjusting the LLC to a more aggressive setting. Just avoid setting the LLC to the max for daily use.
- edit fixed a typo
>aida 64 stress test.
>cinebench r15, and it crashed
That is why aida64 stress test is terrible.
Use latest prime95 build, small FFTs run. 2-hours run if you just want stability for gaming.
Longer if you want to ensure 99% stable
I like to use blender as well. Bunch of demo files you can run: https://www.blender.org/download/demo-files/
Blender is a good real world stress test.
BMW car demo, classroom, barbershop, Cosmos laundromat demo render, maybe fishy cat, those are what I recommend
Or blender official benchmark runs most of those: https://opendata.blender.org/
https://alternativeto.net/software/hwinfo32/?platform=linux
see if anything here works. good site in general for finding linux alternatives
Are you aware of the logs generated during a crash? Digging through your Event Viewer for the Fatal event that kicked your system out is the first step of troubleshooting a crash that doesn't generate a BSOD. Combined with Google, you'll be able to hunt down some root causes. Alternatively, BlueScreenView is a neat utility that basically does it for you.
During your gaming, you really should be running a temp logging tool like MSI Afterburner or HWMonitor to see if you really are running into a thermal limit somewhere just before your system says "no", IF you think the shutdown is temperature-related. You should also familiarize yourself with the BIOS setting that controls your temperature shutdown.
The tools exist to troubleshoot this yourself, they're just a little scattered around.
I believe you're power limited more than anything else. Check out HWiNFO to read sensors; it will expose more information on the sensors (the "Performance Limit" list should tell you what's limiting you.
I believe most maxwell (v2) can hit around 1450-1500MHz at 1.2V on the core; and 2000MHz on the memory. However clocks towards 1.5GHz will be extremely power limited. For example, my GTX 960 did 140-150 watts at ~1.5GHz 1.2v; extrapolating from this, I expect a GTX 970 to do 220-240 watts.
However, I don't think your power limit slider can go up to like 60%. Luckily, maxwell is before Nvidia started cryptographically signing their bioses, so you can edit its bios to remove artifical limits, if you wish to go that far.
I would use Realbench + Blender. (if just mostly gaming, streaming, video rendering)
Because Blender has cpu 3D rendering and it's used for animation, making video games, and more.
Realbench stress test is just GIMP photo editiing, video rendering, luxmark(gpu), and multi-tasking on a loop, which is still great, just missing 3D rendering workloads.
Blender official benchmark can take a while if you run the full load though. Like 90 minutes.
Cant find the laptop online, please provide specs.
Im not sure what your asking for anyways, Turbo mode is a (shit in my opinion) hardware level feature, unless its a MSI software thing. What do you need the clock for, what architecture the chips are, what ram we are overclocking, how much cooling does your CPU/(insert overclockable chip here) have, and how much of the above determine what you can do.
If your looking for GPU overclocking download Afterburner: https://www.msi.com/page/afterburner
If you want to overclock your CPU then download Intel XTU or use your BIOS: https://downloadcenter.intel.com/download/24075/Intel-Extreme-Tuning-Utility-Intel-XTU-
If you meant system ram, you usually cant in laptops. You could probably mod your BIOS to allow it however. Just search around and you could probably find a forum on like Overclock.net that has a link to a community modded BIOS.
Hope any of this helps, if you need any more info ill need specs and what your goals are. :)
First, I would using MSI Afterburner and furmark. I would recommend to only keep those two applications running in order to properly stress test your gpu.
As for the actual overclocking; I turn on the custom fan curve and max power and temp limit (it should never get this high). Then, in 20 mhz intervals increase the core clock. Wait a few minutes, check if you get any artifacts on furmark, then up it again. Keep going until you get a stable (0 artifacts) core clock. Do the same thing with memory clock, except you can go up by 100 mhz.
I hope this helped, if not this is a useful video I used!
Maybe some of these? https://bookauthority.org/books/new-software-architecture-books
https://bookauthority.org/books/new-computer-hardware-books
I have some from from college 2 years ago but they were a little outdated when I got them for free lol.
This may or may not help but you are running a very old BIOS on there. Yours is from 2006, last update was 2009 found here
You might want to try upgrading it, but keep a backup of your current BIOS in case it makes matters worse.
I was checking some forums, I think it was here - http://www.evga.com/forumsarchive/printable.asp?m=373629&mpage=3 someone said the Q9450s have trouble at 3.6+. I'm going to try 3.5 and see how far I get.
Thanks
You're going too high.
Win XP/Vista/7 would hang, screen would flicker, and it'd produce an error message that would say 'Display driver has stopped responding and has recovered', it seems the error message in 10 instead tells you which program was trying to use the GPU when the drivers crashed. In XP/Vista/7, when the driver restarted, it'd drop every setting to stock, so it'd be stable afterwords, but one had to go in and apply all the stuff in Afterburner again (and at that point, it'd be unstable again if they just tried the same settings). I dunno about 10, but if the driver crashed and afterwords everything was stable, it may have just cleaned out your settings in Afterburner after the crash (just trying to explain how it could be a one-off error message).
GPUs are more limited on voltage than temps, generally speaking. Usually the GPU bios locks voltage at some tiny little number above stock so there isn't much in the way of overvolting, but the core is mostly unlocked (I'm sure it caps somewhere), and it's all modified in Windows, so it's pretty quick and easy to crank the dial to a clock that doesn't have voltage to back it up.
There are 2 options, turn down your overclock until it's stable, or, (I don't recommend this if you don't read up a lot on it), flash your GPU bios to one with more voltage control, and feed it more power (it might still be unstable though, and if it lets you crank voltage way past safe levels, you might end up doing just that, so I don't recommend it).
AI Suite has horrible uninstall routines... I should know. Many years ago I had to deal with that pile of junk and it was not fun at all tracking down and deleting (manually) all the files and registry settings it left behind. As mentioned the AISuite uninstaller program will help, but it too leaves a few things behind (way to go ASUS, nice try). All I can say is be diligent and careful and you can usually track down all the files it scatters everywhere.
As for fan control, I recently found this at majorgeeks.com, it's called FanControl by Rem0o and it has been a Godsend. He updates it quite regularly and it is very simple to setup and control. It runs in the background/tray as a scheduled task once you have set fan curves and you can store different profiles for different usage scenarios.
FurMark can be a useful tool for stress-testing. It's a very intensive OpenGL benchmark.
If your card runs cool enough during FurMark, it will run cool enough when doing just about anything else.
You could figure out if its the PSU if you stress test with something like Furmark.
And is it only crashing on SC2, or is it all games? Could just be something with Starcraft, some random file that is corrupt.
Reset bios, and Re-activate XMP so you can fully test the power. Then download OCCT and start the option "Power". If your pc turns off within 10 seconds, then your PSU is probably the reason it shuts down
Those sticks are DDR which is double data rate they true speed is half of what they are advertised at. If you load up CPUz or HWINFO64 those utilities will report their true speed which is half of what is advertised or the value you set in the bios.
So you would not do 15 divided by 3466 x 1000 to get your latency, you need to use 1733 the true base speed of the memory.
The official memory support for the 1800X is 2666 MHz anything over that and you doing good. When these chips first came getting 2933 MHz was a big deal. The bios updates since then really improved things.
If you are doing anything other than playing games I would stress it with something like OCCT , Prime 95, or RAM Test . Memtest is ok but it passes some timings that are unstable if you don't let it run for really long time.
OCCT is the name of the stress testing software I was recommending for testing CPU core / cache stability, you can find more info and a download link for it here on their website. If you can pass one hour of the LDS test (Large Data Set) without any errors you can assume your system is pretty stable, two hours if you want to be extra thorough.
I wouldn't be concerned at all if my CPU reached 80 C when stress testing, I start paying attention my temps when they approach 90 C.
1) Please list as much information as you can about your hardware.
CPU: Vcore, VRIN/VCCIN, vRing/Cache, vRing voltage
RAM: Timings, voltage, XMP or non-XMP (I would recommend manual settings)
Mobo: Model and BIOS
BSOD: Error code
2) Try to log your information as much as you can. This makes tracking trends much, much easier. Also helps keep you organized. I'd recommend a GoogleDoc spreadsheet for this (so you can easily track it on the phone even).
3) Search for the BSOD errors (if they are in Eventvwr) or better yet download BlueScreenView so you know exactly what codes you are getting.
If you are getting hard-locks, then you are nowhere near stable though :p
Your voltage may be higher under load because your LLC is set too aggressively. If you're using LLC, I recommend bringing it back by one or two levels. HWiNFO's sensors are generally more accurate than HWMonitor's I've found. In particular, HWiNFO correctly adjusts it's temperature output to account for the 1700X/1800X's 20C temp offset (see here for more info). If you set your TridentZ to 3200, then I'd trust HWiNFO and your BIOS.
This is the only app I found that gave useful information. It doesn't give you core temps, but it does give you the package temperature which is usually a few degrees hotter than your hottest core. At the very least, the package temps will not exceed core temps so it is the best, and really only, way to monitor your cpu temps on a non-k cpu.
the hardest part was finding a vise! i used paper for the internal padding of the delid tool
make sure you put the delid tool on correctly. there should be a gap on the top cap for the caps on the back of the cpu core pcb!
I think most 3D printed methods use this:
https://www.youmagine.com/designs/intel-kaby-lake-delid-tool
Tbh I'm also paranoid about using this as well, but meh I wanna experience the "pain" to gain confidence for next time haha..
Just a heads up: I'm not sure when will my CLU arrive though, the seller is away for three weeks so it might arrive after mid June if you're gonna wait LOL.
I attemped to use this tool to delid my 6700k last night. I had to sand down some of the edges if the tool since it didn't fit quite right (likely my fault). In the end the plastic on the tool started to give before the IHS came off so I gave up. :(
It's a distributed computing project like Seti. Thousands of pc's plugged into the matrix creating one massive supercomputer for a common effort pursuing various scientific causes.
You can directly download the client (for Seti, WCG, etc) here
The HOF's voltage regulation work a bit different than other cards in that in that overvoltage can be set outside the official guideline limits without firmware modding, but to do so you'll need a specially little enthusiast-developed utility that we can't really share directly for various reasons. Here's a link where you can get it though: http://www.adrive.com/public/YbVc8A/HOF_NVVDD_Public_V2.rar
Enjoy.
LOCBONDSO DIY Rear Window Defogger Repair Kit,Easy to Use,Fast Repair The Broken Grid Lines https://www.amazon.com/dp/B08TG8K2BV/ref=cm_sw_r_cp_api_glt_fabc_W232JZ7D2BSDJFEDDRZF?_encoding=UTF8&psc=1
Something like this you can get from any auto supply place for around the same $10.
This one, its a nice cooler but pretty expensive, got it mainly to fit the build and the noctua fans are a nice bonus.
yes but I put a noctua fan on the top of backplate.
With fan vram is between 82c to 88c
Without is minimum at 92c and more
So my plan is to remove the backplate and put individual heatsink on each vram.
these heatsink -> https://www.amazon.com/gp/product/B077VM8FJW/
Hey, I'm not at home right now, but do you think this will fit if I lay it right on top of the 3090FE? It won't hang over the right-handed fan which exhausts up, right? I think it's just long enough to not cover the fan there. Wonder if I just sit it on the backplate without any thermal tape if that will do anything. Worth a shot.
AMD Ryzen CPU is a solid choice and good value.
The M2 1TB SSD you will love its speed!
Include case fans and GPU.
Re Power Supply...I believe you can get a better value for your money. I just went through this with PSUs to choose one.
Double check you're at the right capacity for all your components with this power calculator. It's easily the best one out there. But you do need to choose a GPU since it's one of the largest consumers of electricity in a PC.
https://outervision.com/power-supply-calculator
In short, you add up the max wattage consumption of all components, add 20% extra on top of that, and that's the MINUMUM wattage power supply.
And power supplies usually last a very long time, like you could use it in your next pc. Some have a 10-12 year warranty. Might want to do 2 things...
Buy more wattage if you can afford it for down the line. 4 years ago when I built a pc, I bought a 900w psu. Just started using it to its max recently with the addition of top notch GPUs. You have 750w. Consider 850 or even 1000w for future expansion/reuse.
Read up on the ratings like bronze, silver, gold, platinum, and titanium and what each means. I think you can do better than bronze for your money.
Has to do with power efficiency so a greater degree of power goes to your system rather than be lost as heat. I was recently in the market for one and wound up getting a Seasonic Prime Titanium 850w unit for $241 at Newegg.com.
Even if you went platinum 850w, you should only spend like $50 more than the cost listed on list. Well worth it.
Other things to consider with a PSU is sound level, fan vs fanless, and unless you're into colored lights on your pc, anything saying with "RGB LEDs" or "programmable LEDs" can be ignored. It's fun but ultimately useless functionally.
Good luck!
This is the brand I bought
https://www.amazon.com/dp/B000FPAN2K/ref=cm_sw_r_cp_apa_glc_fabc_17HKK2PV4CPQ1VJE1P0F
Here is a forum that shows images of how we use it at overclock.net
https://www.overclock.net/threads/liquid-electrical-tape-is-awesome.1067846/
https://www.amazon.com/dp/B07WW26KV7
That one? It is junk, you need a lot more cooling for an i7-10700. Something like a $30 tower cooler.
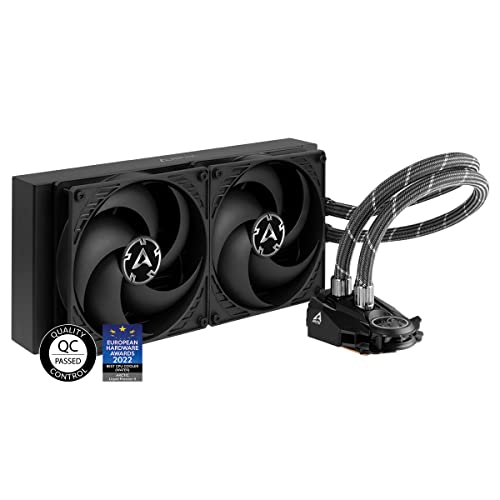
https://pcpartpicker.com/product/ByGxFT/arctic-freezer-34-cpu-cooler-acfre00052a
haha i was going to do this yesterday, however i was lazy and bought this for $13
I'm running a kit of Ballistix Sport LT -AES 2 x 16GB 3200 CL16 ram. It's low profile (32.5mm tall) and is dual rank 8Gbit Micron Rev. E. It's short enough to fit under the front fan of my NH-D15.
It's not in production anymore, but at least in Canada you can still buy the 3000 CL15 kit on Amazon.
Buy this, split off and connect one of the buttons to the CMOS clear jumper, then just press the button to reset CMOS whenever you need to. Saves so much time when doing this over and over again. $5 and it's got extras for... your friends?
https://www.amazon.com/gp/product/B074XDTVN1/ref=ppx_yo_dt_b_asin_title_o07_s00?ie=UTF8&psc=1
Longshot but is there any way you can get stuff delivered from Canadian retailers? Oddly enough the SF750 is widely available on most Canadian hardware stores and retail shops.
There is also this , it appears to be in-stock on Amazon.com so could be available for cheaper elsewhere possibly?
After seeing this result.
I think I'll buy these Noise Filter Cable Ring for all my cable. What do you think? Have I gone mad? 🤣
a person who bought from amazon said his processor working @ 5.3ghz with max temp 73 without delid!
Hey so the reply from /u/phlegm_ got filtered because of an amazon referral tag which I guess they haven't been able to edit out, so here's a fixed version;
>this is my cpu cooler: here . I have regular case fans
I bought a cheap Delid tool form Amazon called the EG Starts delid tool. I then bought the Thermal Grizzly liquid Metal TIM and finally I bought a tube of gasket sealant.
​
I removed the IHS with the delid tool, scrapped most of the sealant around the sides of the CPU which kept the lid on. then cleaned the CPU die and put on a very thin layer of liquid metal. I masked of the same shape as the die on the under side of the IHS and put a very thin layer of liquid metal on the under side of the IHS to match the die. I then covered the small ICS next to the die with the Gasket sealant. I finally used the gasket sealant in for small dabs on each corner of the CPU and closed the IHS back on the CPU... All done. It took about 30 to 45 minutes do complete everything and put the CPU back in the motherboard and it all worked perfectly....
​
​
All I would say, is take your time, watch a load of you tubes video's and keep one on whilst you are doing the Delid...
A year ago I bought 4 x 8GB 3600MHz CL17 for $580 USD. (G-Skill Trident RGB).
This only filled 4 of my 8 slots on my motherboard (X299) and so I thought at the time I would wait for RAM pricing to go down and then buy the same kit again and fill all 8 slots.
Well just last month I bought my second kit as I was concerned the B-die was going away and I wouldn't be able to get another kit identical to my first one.
Cost $309.31 USD. I'm quite happy with the saving. Looking now the kit I bought is now at $619.88 USD.
These prices are from Amazon UK, converted into USD. Here is the exact kit I now have two of: https://www.amazon.co.uk/G-SKILL-F4-3200C16Q-32GTZR-Trident-PC4-25600-Channel/dp/B01MS6EL43
Seems like I made off like a bandit.
I probably should have been more specific.
First, using a Qtip is a no-no. Q-tips have cotton fibers which can interfere with contact. It may not be much, but I've seen as much as 2C worse on a core by one of these fibers (once you get used to the temp spread on your chip when testing prime95, it becomes very obvious when there is an artifact in the layer!).
This is what I use and recommend to others, and even Mr Fox over on notebookreview / Hwbot approves of these:
https://www.amazon.com/gp/product/B00MEC5084/
Second, even though you managed to break the surface tension with extra pressure, the lonevity of the LM will be compromised once it heats up and compresses. This happens if the heatsink/IHS surface is too smooth, and the LM gets thinned out. The LM will wind up "re-pooling" to itself, which can cause hot spots as well as early oxidation. I found by doing the 1500 grit sandpaper wipe trick, that gives the LM something extra to adhere to, making it last much longer when it gets compressed and temps heat up via the expansion/contraction sequence. This even works very well on a reference Vega 64 (molded die) blower card (and these cards tend to play havoc with LM longevity, despite all the foam dams/super 33+ tape/prep work involved to protect the SMD's around the chip and air oxidation of the LM).
Crucial Ballistix - 16gb 3600 cl16 is about $80, a bit more if you want rainbow puke rgb, and they will clock up to silly speeds.
Other good option is Patriot Viper Steele 4400 cl19 - this stuff is samsung b-die
https://www.amazon.com/Viper-Steel-4400MHz-Performance-Memory/dp/B07KXLFDL6/
https://www.amazon.com/ID-Cooling-Frostflow-Graphics-Radiator-Cooling/dp/B07VDYHW6S
Not sure if it’s worth it to you or not but if you got any knowledge of how the cards work it’s not that hard to install. I have mine on my rx5700xt ThicIII Ultra, and overclocked as far as I can go and it never tops 65 under full load no matter how long it stays there. During gaming it stays about 45-50 max.
It's CL16 https://www.amazon.com/Crucial-Ballistix-Desktop-Gaming-BLS8G4D26BFSEK/dp/B01N7RQLVZ Thaiphoon burner picks them up as D-die by micron, it's now been 4 hours with random usage Firefox, Horizon Zero Dawn, memtest etc and no bsod or anything funky so I'm assuming it's actually stable at 1.25v. Thanks for the help thus far greatly appreciated.
Do you have the mesh front? That is a lot better than the solid one.
I went a step further and 3D printed a hexagonal front panel. More airflow, but with no dust filters so it needs cleaning every few weeks.
Like I mentioned, side exhaust fans help. Stops heat from the GPU and CPU staying trapped inside, otherwise the ATX power supply is basically doing all the work, and that can actually shorten the PSU lifespan.
https://www.amazon.com/Noctua-NF-A9x14-Premium-Quiet-92x14mm/dp/B009NQM7V2
I had to remove the GPU shroud + fans to make it work.
It's an RX570, temps never go above 65c while gaming, it's a 500w PSU so I don't know what to tell you here
Yeah I understand silicone lottery but mine on stock performs worst then people on Yt with less clock speed or same
Prebuilts don't support XMP (you can enable it by hacking into the BIOS with some tools though. Otherwise it is hidden.
samsung b-die is the way then for DDR4. I did the same change myself (I had micron rev e first) and ended up just eventually picking up some b-die. This is a 2x16 DR kit for $160.
it's rated at 3200 CL14. I run it with my 5800X3D @ 3733, and previously with a 5900X @ 3800. It easily runs 4000 mhz, but since none of my chips would do > 3800 without WHEAs I left it at whatever max it would take there.
Here are some images that I just took of the bios settings. I was following a guide when I did this months ago so if anything looks odd it is probably because of that.
I've attached a screenshot of what I've been using to measure the temperature.
To apply the TIM, I used a "pea-sized" amount in the middle of the chip and put the cooler on top. Having a quick look now, this may well be far too much.
The fans were going at ~700 rpm quick test I did now when I got the temps up to ~ 80 C.
i got some noctua redux fans, the higher pressure ones because they went on a radiator, if you want airflow ones then it's some other model number: https://www.amazon.com/Noctua-redux-1700-high-Performance-Award-Winning-Affordable/dp/B07CG2PGY6
my meshify s2 came with three 140mm fans, that's fine for a build, no need to buy more fans depending on what you are aiming for. so you could just look for a case that comes with more than 1 fan with it.
I was having the temp issue for the past 1-2 months. Been busy for a while and didn't want to open the PC so I turned on PBO to manual and set the temp limit to 75c manually. I was using Lian Li Galahad 240 ARGB AIO Liquid CPU Cooler Link- https://www.amazon.in/Lian-Li-Galahad-240-AIO/dp/B08GXCXN67?th=1
Thought it was having some issues without completely testing if it's the issue of AIO. Then replaced it with the stock cooler. The stock color had some pre-applied paste cooler already so didn't bother to use extra. But the issue is still there. What could go wrong?
The 905P comes with a U.2-to-M.2 adapter, or you can use a U.2-to-PCIE adapter like this - https://www.amazon.com/gp/product/B01D2PXUAQ
I've used both without issue.
Endurance-wise, the 905P is rated at 10 drive writes per day (DWPD) compared to the Samsung 990 Pro's 0.3 DWPD. In other words, the 905P has 33x the endurance rating of the 990 Pro.
Also, Optane doesn't slow down as it fills up like regular SSDs do.
If you don't mind helping a guy out, what are you thoughts on kits like this 2x16 5600 30-36-36-89 (1.25V)? I assume this is almost certainly M-Die? The lower voltage stands out and I assume it's basically this 28-34-34-89 kit pushed to 1.35V.
Trying to get caught up on the memory game for a 7950X build and been up all night debating myself so I'd appreciate any insight. Planning to push whatever I get to 6000.
those are the cheapest single rank b-die you can buy, just clock them to max out your infinity fabric then lower the timings
Admittedly I have no actual idea what I'm doing, but I'm currently running 4 sticks of 16gb at 6400mhz.
​
At first, when I upgraded from 2 sticks to 4 and turned on XMP again I got a bluescreen loop, but making sure that PMIC was checking voltages independently and changing VDD and VDDQ to 1.5 fixed it for me. YMMV
​
G.Skill Trident Z5 (Intel XMP) 32GB (2 x 16GB) 6400 CL32-39-39-102 1.40V