
What is Reddit's opinion of
Filter Forge?
From 3.5 billion Reddit comments
➔ Filter Forge website
By popularity on Reddit, this Service is:
34 reviews of this app found across Reddit:
Kind of embarrassed for you that you would just grab generic texture presets from [filterforge] (https://www.filterforge.com) application then give them away claiming them to be your own. Then you actually want to charge people to get these textures at high res, a higher price than the software. Anyway I've let filterforge know about your website, have a nice day.
anti-aliasing = blending pixels together to make things look smooth. Anti-aliasing is commonly used to get rid of choppy-looking lines, but can make images look kind of muddy or smudged. So if Melee appears "crispier" than Brawl, it might be because anti-aliasing was used on Brawl, but not Melee.
u/vvsleo_ look at this set here: https://www.behance.net/gallery/78709259/36-days-of-type-2019
The artist says they used Illustrator to design the letter and [https://www.filterforge.com/](Filter Forge) to create the metallic / chrome effects.
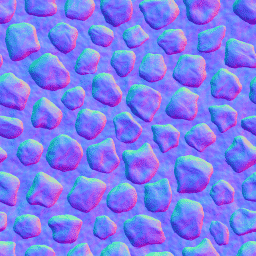
This type of noise is called Cell or Worley noise (using the euclidean distance metric).
One way to generate this type of noise is to use the Stones component in Filter Forge.
Just to expand on this, for anyone who is curious and doesn't already know how normal maps work:
"Baking" refers to generating normal maps off of the high-poly detail. In essence it is like looking in at the model from the outside, and projecting the detail down onto the lower poly area as a texture. Of course the detail is no longer actual geometry; but it needs light to react to it as if it were. This is how the magic is made. The normal map does this by basically having several colors that make it up which correspond to different "normals."
The normal of a polygon refers to a 1 to 0 to -1 range of if the surface is facing a light source, 90 degrees from it, or is facing away. A normal map utilizes the previously mentioned colors on a texture to basically tell light hitting the model that, rather than reacting to the surface based on the actual geometry, look at this texture instead and react to what it tells you. This makes light hitting a geometrically flat surface, instead cast shadows or highlights based on the details that are not actually there.
Here is a simple example of a normal map. The light blue which makes up most of the texture seen there is more or less your flat surface color. However if you look at the bumps themselves, you see how there are dark blues, cyans, and purples making up their edge. These are the colors that are telling light to react to this spot as if its normal was actually something other than what the geometry is providing.
Filter Forge is one of my favorite programs ever, super-good for procedural textures or just dicking around in a node-based interface. Shameless advertising of my own filters
Hi all,
This Arctic Temple may be the perfect location to fight a BBEG that can fly.
The free map is 50 x 50 @ 75 pps while the patron versions and lava alternate go up to 300 pps.
Support me on Patreon.
>The mod however I thought look pretty cool.
What'd you miss 90s school picture day? One of four is passable but i can't name it because was tripping while coming up with them .
The spires are so vast that they can hold desert wastes inside. You can basically use whatever you want. In this case maybe some greeble texture generator might be of use?
Seems like pretty much all of these textures are stolen from https://www.filterforge.com/filters/ (proof). Did you get permission from the original filter creators? Do they know you're selling their work? Seems a bit sketchy.
Dwarf fortress is like 15mb. Kkrieger is 96kb. http://web.archive.org/web/20120204065621/http://www.theprodukkt.com/kkrieger It really depends how much stuff is pre-rendered, high res textures can be generated. https://www.filterforge.com
I don't mean to be pernickety, but this is not normal mapping. Normal maps use x, y and z coordinates that are manipulated through RGB values respectively. (Primarily used in games)
Bump maps (as you named them on imgur) are grayscale. The normals are affected depending on the values: black '0' (flat) - white '255' (raised). As you demonstrated, the raised area is dependent on how close the values (0-255) are.
You could also blur the lines to achieve a subtle slope. Something like this. Try adding some scratches and cracks to your tiles with this method.
Finally, if you add some lighting to your scene you'll really see the bump map come into play.
Goodluck!
In addition to this comment, I would add plug sockets and a laptop charger in there too! Would be fairly straightforward if you use a spline BP for the cable!
EDIT: extra comment, I'd add reflection and normal maps to some surfaces so they don't look too perfect. Here's a subtle paint normal map you could add onto the wall texture - I'm not sure if it is seamless, though.
Taking a Unity class right now (so not quite the same, but an industry-standard analogue). It's all about how this type of thing is utilized. A normal map (the modern bump map) looks like this basically it abuses the three color channels (red, blue, green) that are standard for images. It basically has enough information for the engine to know how to reflect light depending on the direction it's coming from. After that, there's a specular map. This defines how shiny something is and the colors it reflects. Shininess is defined by how white or black a pixel is and the color is defined by the actual color of the pixel. This is, afaik, standard and has been standard for a long time. It simply hasn't been utilized properly. This is the reason rocks in Halo 3 look like they're always wet.
If you want realistic seamless textures and come from a programming background, I recommend Filter Forge (https://www.filterforge.com/)
It's a lot like doing node-based shader development (which makes it easy to pick up if you have any graphics background) and the textures can come out looking really nice. It also comes with access to a huge library of textures other people have made, which you can use unaltered if you don't want to bother learning how to use the software.
Examples:
https://www.filterforge.com/filters/6790.html
https://www.filterforge.com/filters/11724.html
Edit: Because of the way their noise functions work, the textures also pretty much all tile seamlessly, which is really convenient.
This looks awesome! We're doing something similar in our 2D game Blacksea Odyssey, but less hardcore. It's more along the lines of Spritelamp. Since our art style revolves around geometric shapes, we easily create normal maps (in Flash Pro) using the normal map colors. We're only doing it for environmental art at the moment though (scope).
But this looks much more robust. :)
I would start by unwrapping the UVs around the sides of the knob in a cylindrical projection (i.e. So you end up with a rectangular strip of quads), and then map a knurling pattern onto that part of the texture. I wouldn't go overboard giving the knob a ton of space on the texture map.. just enough to suggest the effect.
To unwrap the cylinder, you may find you need to mark seams - basically, in edit mode, select the two rings of edges around the dial (top and bottom) and in the UV/shading properties click 'mark seam', and do the same for one of the vertical edges. Marking seams just gives blender more information about how it can lay out the mesh on the texture.
I believe halo used bump maps as opposed to normal maps. Which is a single channel grey scale image instead of three channel normal.
Oh dear lord no. The "Weird Purple Maps" Are normal maps, various colors correspond to various angles, the lighting engine pretends that's the angle it's hitting when a light ray hits it, instead of pretending it hit a perfectly flat surface. For example, this is a sphere normal map. As you can see, for whatever program this was made for, green colors angle down, blue to the upper left, pinkish to the upper right.
Parallax mapping is done through the use of a height map. Most engines will use a dark/light map to represent low/high respectively. It's been a while since I worked with it, but I believe the GLSL shaders have a funky way of using the Normal map's alpha(transparency) channel for height. Since a pixel's transparency doesn't lose it's color value, even at full transparency, you can use transparent for low and opaque for high. This makes sense from a file-storage perspective, but honestly, as a graphic artist it's a pain in the butt.
A specular map (The shinyness factor) Is a grey-scale map with dull/shiny mapped to dark/light.
Source: I do an awful lot of this
The shader:
shader_type spatial;
​
uniform sampler2D DitherMap;
uniform float DitherStrength = 0.1;
uniform float ColorDepth = 3.0;
​
void light() {
float light = max(0.0, dot(NORMAL, LIGHT)) * ATTENUATION.r;
vec2 ts = vec2(textureSize(DitherMap, 0));
vec2 uv = mod(floor(FRAGCOORD.xy), ts) / ts;
light += (texture(DitherMap, uv).r - 0.5) * DitherStrength;
light = round(light * ColorDepth) / ColorDepth;
DIFFUSE_LIGHT += light * ALBEDO * LIGHT_COLOR;
}
​
You can find the dither map here:
https://www.filterforge.com/filters/12565.html
remember to set the texture to no filter and lossless.
Like someone else said, each screen contains a raster that is meant for each color, CMYK. This image shows what it looks like up close. The screens are processed through a camera that in a dark space... I dont know the terms in english (i did this work, and offset printing, but i'm dutch) And they are left in there for a while. The projection "burns" into the screen creating openings for ink to pass through, you clean dip the screen in (something chemical) and wash it. Now when you swipe the board over the screen, the ink can pass through on the designated spots meant for each color, Do this with 4 boards, one of each CMYK color, and you create a full color image!
> Lightsongs is described as all different shades of red, where as kaladins is described as shades of red, black and white.
Wouldn't this be plausible from perfect color? There's a famous painting that looks all black until your eyes adjust and you can see the different shades. When you have perfect color you would immediately see the shades while someone who doesn't may not notice the shades ever. That can be extrapolated across all the red spectrum and then I can see where really white reds and dark reds look white and black to someone who doesn't have the third or greater heightening.
so the Top of This picture could well be considered White if you are below the Third Heightening, while the darkest parts of This picture could be considered black. If you have the Third Heightening you would see all of the colors as Red, but if you don't it would be easy to mistake the highly tinted and hued Reds as White or Black.
> next to no noticeable visible impact.
Ambient Occlusion should have a huge visible impact, it's what gives 3D images realism and makes them look less flat. To give you an extreme example:
https://www.filterforge.com/images/version2/ambient-occlusion/ambient-blocky.jpg
Use something like this image to select pixels and mask the second image inverted. Then just use a brush with opacity at like 50 to bleed the background image.
> Not that post processing is some magical trivial fix either
Post processing actually makes a huge difference if you have never noticed it first hand, especially Ambient Occlusion.
In engines like Unity, it's as simple as clicking Apply.
Not at all. Please do a bit of research and read T&C. https://www.filterforge.com/termsofuse.html
FF gives ownership of all images generated via ff to the user. (not the filter files though, those are property of ff)
Let me understand... you have an image of a sphere like this one where the centre of the image is the coordinate origin and you want to compute the z?
In this case for each point, you have two solutions. One where the z is pointing toward the camera, and another one where the z is pointing away from the camera.
First of all, you have to convert you pixel coordinate into a range [-1; 1].
x = (coord_X-Xmin)/(Xmax-Xmin) y = (coord_Y-Ymin)/(Ymax-Ymin)
then if you assume that the plane represent z = 0 you have
x^2+y^2+z^2=1
so z=sqrt(1-x^2-y^2)
of course this is valid only if x^2+y^2 <=1 otherwise you are outside the sphere.
so z=sqrt(1.f-min(1.f, x^2+y^2))
This happens on every resolution and even on native resolution, it doesn't have anything to do with shaders or the nvidia drivers as far as i can see, just a guess but i think the game simply loads too many LOD assets for cemu to handle atm. It probably just can't find the correct texture fast enough from time to time or there is some kind of limit to it, the pink/lilac textures are just how the untextured normal maps look like (https://www.filterforge.com/filters/1160-normal.html). Exzap probably would need to take a look at this but i guess it's way down the priority list.
They eyes are metal. Shiny, polished metal. If you watch the scene in HD on a widescreen TV in slow motion, it doesn't look "suspicious" at all. What you're seeing is specular reflections in the metal.
It's only in a low-res gif that it looks magical.
Eg: https://www.filterforge.com/more/help/images/reflection.jpg
Are you using bump map? A bump map image is grayscale, a tile's bump map looks like this. If this is the case, you just need to change the light gray to white with the color ramp (so every value between light gray and white will be white only, or any value really).
If the image is not grayscale, and you try to use the same image you use as the diffuse texture, you can't do this easily, I mean you can, but with drawing, not with nodes.
Nah FilterForge does just textures, and while it does have cartooney stuff it's way more useful for a realistic style.
And thanks, the car models are made with Cinema 4D, and the few example textures that are in there is just manual Photoshop. Most cars are just flat Unity3D materials.
What you need is first set a flat green color.
Then, set up a bump map like this: https://www.arroway-textures.ch/sites/default/files/styles/huge/public/tiles-035_b010.jpg?itok=RThNIyV5
And then set up a decals texture over it. This one looks fitting: http://www.textures.com/download/decalsleaking0260/85902
But you need an account to download things in www.textures.com
If you wish, you can also add a repetitive specular map: https://www.filterforge.com/filters/2291-bump.html But do it in a very low value, so it's hardly noticeable but it's there. This will be the cloud texture Scott uses a lot thatis also present in the office's walls
Filter Forge is handy for procedurally based texturing. They have a large library of textures you can download and tweak to get a result quickly. It's not free but I've used it a lot on my games.
I like vecteezy for vectors - free with paid option and filter forge for rasters but it's paid.
edit: Formatting kicked my ass ty /u/kushmaster3000