
What is Reddit's opinion of
Pixlr?
From 3.5 billion Reddit comments
100 reviews of this app found across Reddit:
The gem she's fighting is tinted about as blue as she is pink.
I've done the color enhancement in Photoshop to demonstrate it.
You can do it, too. All you have to do is pull the mural into any photo editing software and crank up the saturation, and you'll see it. Pixlr works nicely. I'll upload a video of the process if you want. But, if you're impatient, try this:
Open the image in Pixlr.
Choose Adjustment > Hue & Saturation. Crank up Saturation to 100. Leave the rest alone.
Do that again. You'll not notice the red levels are too high in the figures behind Rose. Let's fix that.
Choose Adjustment > Levels.
In the drop-down that says RGB, choose "Red"
That graph is called a Histogram. You can set the black and white levels as well as the gamma. Just drag the black box on the left up to the left edge of the graph. You'll see the color drain from the figures if you did it right.
Is the other figure blue? Yes.
At worst, it's White Diamond (her figure on the left—check that pose—also turns somewhat blue if you do this with the full mural). I've done a version which adjusts each element of the triptych individually in Photoshop to try to correct for this. That might be wrong, but White-Pink-White-Yellow doesn't fit the expected pattern. White-Pink-BLUE-Yellow* does.
And, we know Rose fought Blue Diamond's forces directly in The Answer.
TL;DR I'm very certain the figures in the mural are White, Blue, and Yellow Diamond based on the colors. It's the simplest, most obvious interpretation.
* (B, A, Start. Now we have infinite lives.)
I'm pretty sure he meant using the polygonal lasso tool in photoshop to cut out manually. Besides the pen tool, that's your best bet if you're working with a mouse.
I wouldn't recommend paint for this purpose. If you don't have Photoshop, this online editor is what I would recommend and it has the tools to do the cutout.
Hahahaha. If this is you actually expressing your lack of Photoshop, I'd recommend using Pixlr's editor. It's online and it's quite powerful. I probably sound like an ad or something but I use it a lot, both the editor and the express version and I love it.
kiwi6.com (Simple, free audio hosting site. Additional plus is the lack of copyright enforcement, if you need that sort of lenience.)
https://pixlr.com/editor/ (A free, browser based image editor that's extremely similar to photoshop.)
If the face is the layer above the pirate, you just erase the face right where the fingers are.
So really, the fingers are just showing through a hole in the face, even though it looks like the fingers are on top. I use https://pixlr.com/editor/ (free and in-browser), highly recommended!
Hug of death so I can't check the site out at the moment.
In a pinch if I need a photo editor I currently use: Pixlr
My question is: What key elements does your site have that other online image editors don't or lack?
I will have a look at your site once it's back online.
I posted this just recently for another user, but you might find it helpful, too:
There are some decent programs out there that allow batch watermarking. You won't be able to place them as nicely as you might like (like on your thigh or wrist, consistently), since they just put the mark in the same position each time, but it's quick. I'm not sure if there are any free options out there, though.
A free alternative I've used for similar projects (well, similar enough) is this online photo editing tool, which allows you to create and save an image as a .pgn, so you can give it a transparent background, which is what you want for a watermark. Then you just upload your photos to that tool, paste in the watermark image, drag it where you want it, rotate and/or resize it as desired, and save. Once you get the hang of it, it takes less than thirty seconds per photo, start to finish, with neat and nice looking results.
-End
I understand if you still don't think it's worth it, but there are some pretty quick and straightforward options which will, in the long run, probably make things easier and more enjoyable for you.
Well, at least more enjoyable than seeing your nudes in a pop-up ad or something.
Edit: There really should be a link in the sidebar of the GW subs to a tutorial and/or tools for easy watermarking. I've seen far too many foxy ladies end up too frustrated to continue posting.
Here's a simple way to fix shit like this.
- Download the image as a png anyway
- Open it in an image editor (pixlr is a pretty good in-browser one)
- Select the magic wand tool and set the threshold to between 30/70
- Click on the fake png background to select it
- Erase
If that doesn't work you might need to manually add an alpha channel.
Here's screenshots with the new additions: Direct Share(Quickly edited in Pixlr) and Starred Messages.
Some people may not like the Direct Shares, like /u/armando_rod said, he wants Pushbullet's ones back. I personally like them, because I use Whatsapp A LOT. If you want to get another apps Direct Shares back, try use that app more, direct shares is supposed to learn your behaviour.
I like that the professor's a monster for disliking people watching porn in class, and not for saying "You're gorgeous! Are you mixed?" to a student, in class. On what planet is that acceptable? (The planet of Make-Believe).
Also for future reference, there are plenty of online image editors you can use to crop your screenshots if you can't just do it on your computer for whatever reason. Pixlr, for instance.
epic trolling instructions:
- download Determination font
- open pixlr (basically photoshop but free)
- open this image and select the text tool, set font size to 26 and add a black border
- go to fonts, select 'add local font', and locate Determination font
- place text in bottom right corner and write whatever you want
- trolling successful
i lost the original source, but i have the image
As a shout-out, you can make shit like this with the free, browser-based "photoshop," Pixlr.
I think my favorite thing about this is that it makes Rich look like he has a rat tail.
I don't have access to photoshop or wacom tablets right now.
Did this using a cheap mouse and an online photo editor.
I used the sketchy-pencil tool.
interesting to hear. Do they really make huge improvements between releases? I feel like a massive number of people would just keep using the last real release a la windows xp. At the same time GIMP development would probably go crazy
Lastly, Pixler is a pretty great free online one for when I don't want to load GIMP on my shitty computer.
I hate to be all hyperbolic and shit but a world where all the means to create and process things with computers are all onlineonly sounds like some kind of cyberpunk nightmare world.
It's an easy fix with photo editing software (yes, this is a hassle sometimes, but it'll even happen with DSLRs).
I just used https://pixlr.com/editor/ and 'fixed' it: http://imgur.com/UEhZFRl but any tool that has some kind of healing tool (or clone stamp tool) will do the job.
No, this isn’t advertising, but I use this website ( https://pixlr.com/e/ ) to add color to photos. It took some experimenting and a lot of scrolling to find out how to add color to photos, and tbh it’s kinda complicated.
I like to follow the rule of Three Ts (Title, Tagging, Thumbnails). Do you use custom HD thumbnails? You can make some using Pixlr.com. Do you properly use tags for your content so people can actually find your videos in the search engine? Use TubeBuddy or Rapidtags.io to help out with that. And Lastly, do you create interesting, captivating titles? Things like "GTA V Online Episode 1" Won't cut it if you are a Small YouTuber.
Besides that the only other advice I can give is making sure you edit your videos. It is SOOOOOO important for Gaming Channels especially to use a proper video editing software (Free or Not) to help chop down your video length to the best parts of the recording. No one likes to watch 20+ Minute videos of smaller gaming channels playing a game, you just haven't built up the sub base for people to really know who you are. I would recommend trying to keep the videos anywhere under 15 minutes MAXIMUM when starting out
Hopefully this helped out and best of luck growing your channel :)! Make sure to remember to stay consistent
Getting the original gifs, splitting into still frames with this, deleting duplicates, editing frame-by-frame in Pixlr Editor and putting the gif back together with this.
Takes time but I've managed to get pretty fast with it.
This is photoshop online basically. If it wants a size 1:1 then make the size (width and height, go to image, image size, uncheck keep proportional, make the numbers the same {I recommend 800-1000 just so you have enough space} and make what you need in the space provided.) the same. If it's 2:1 then it wants the WIDTH to be 2x the number of the height (ex. 1000x500), and 4:1 means 4x the height (ex. 2000x500). I hope this helps if not ask me to clarify what is confusing.
I am aware of that tool, but at the time I was using the online pixlr edition which does not have it. Don't have the real Photo Shop installed on this PC at the moment.
I also received this good tip from /u/pomegranatemagnate :
"Or copy paste the image into Pixlr E, duplicate the layer and rotate 180º, then set transparency to 50%. Takes about 20 seconds."
Web link for on-line Pixlr E application: https://pixlr.com/e/#editor
Might I recommend an image editor instead of playing God with zoom? https://pixlr.com/mobile/
Still, point made. Though, I'm curious about where this happened? "Cunt" seems to be regarded very differently depending on where you are.
I edited the handheld PSP in [Pixlr editor]https://pixlr.com/editor/).
- 3 main image layers: (PSP console, Hands, & highscore screen)
- Cutout hands (original image is holding different console), adjust color balance/lighting to make right one look like a dark glove.
- Cut just Anakin's name, then duplicate name layer over other names on screen.
- Clone stamp background to remove top name completely.
- Cut individual letters from existing names, then duplicate layers to spell out OBI-WAN's name (the hyphen is a sideways I).
- Combine all the layers.
Once I was satisfied with the edited image, I had to record the GIF in 3 parts because I don't have a tool to combine GIFs.
- Record title screen of game from youtube video. (Then pause recording but do not change window aspect ratio.)
- Record myself zooming in on the edited image I made. (Then pause again.)
- Record scene from movie with CC turned on.
I was prepared to manually remove unnecessary frames between the 3 recordings, but thankfully I pulled it off on the recordings on the 1st try without needing further frame editing.
Here's a link to the very low tech GIFCam recording software I use.
It's a screenshot from this youtube video. For making those "shots", you can use free online graphics editors, for example pixlr or picmonkey
https://www.kindpng.com/picc/m/129-1293933_pink-wojak-shotgun-hd-png-download.png
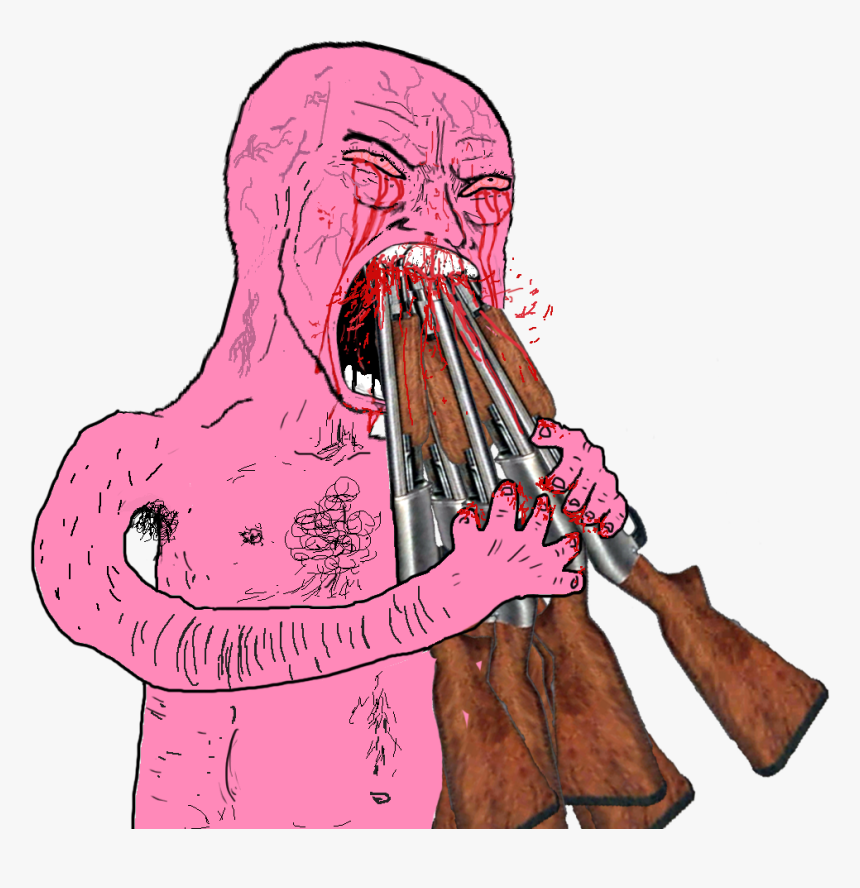
You should put it into pixlr.com/x/ and use the magic cutout tool to get the background out.
This is my first post to /r/dataisbeautiful. Let me explain what went into this.
I own a copy of The Cyanide & Happiness "Depressing Comic Book".
http://store.explosm.net/products/depressing-comic-book
For those that don't know, this is a book of comics who's purpose is to make you depressed.
I went through each and every comic in the book and noted what factor made the particular comic depressing. I also categorized this by author, as there are four authors of the book. I did not categorize any comic in more than 1 category. If there was overlap, I picked the more appropriate category.
I used https://pixlr.com/editor/ to create the visualization.
Any questions, ask here. I appreciate it.
Simple trick I did
Goto https://pixlr.com/editor/
Open the image you want CNC engraved then goto filters -> find edges
Now basically edit the image until the lines are single and looking ok.
Nobody made this as far as I know. Probably because (if memory serves me right) the chinese alphabet has over 300 characters
The easiest way to go about this is grabbig an existing tileset and simply "overwrite" it with your own stuff. That way you know it should work from the start.
I haven't done anything with tile editing but I believe transparancy is important so make sure you got half-decent software to edit images with. Gimp is a photoshop-like program that's free but you can also use an online editor like this
If you guys want to add semi-transparent text as a watermark on screenshots but don't have Photoshop, a free alternative Paint.NET and GIMP are available, or if you don't like installing and want to do quick editing instead, Pixlr is for you (runs directly to your web browser, uses Adobe Flash plugin).
in the future, you can use pixlr.com to do re-sizes like this very easily. Just open up the picture and go to Image and then either Image Size or Canvas Size, depending on what you want to do. Hope that helps!
The background needs to be transparent. If I might, I recommend you edit the texture sheer with Pixlr: https://pixlr.com/x/ It's my go-to for editing images, and it helps with creating PNGs better.
Like the other guy said it looks good without colour. If you did want to go with colour maybe "cross hatching" style would be good instead of just trying to colour normally, but practice cross hatching first. Or just try to transfer it into digital, https://pixlr.com/e/ is free. Best price.
Danke für den Link, werde ich mal testen. Als Hobby Photoshop User der ne CS6 Version immer mal wieder genutzt hat, habe ich bisher https://pixlr.com/e verwendet, aber Alternativen probiere ich gerne mal :)
I got a bucks jersey that is Eric Bledsoe's jersey and used a photo editor called Pixlr. I used Jrue's picture cutout his head and that was the result. If you want to use it here it is https://pixlr.com/editor/
There's only one Photoshop - the one made by Adobe (notwithstanding PS Elements and all the various mobile apps).
So your question should be "what is the best free image editing software i should use for my projects" instead. But even that is hard to answer without knowing what you want to do with it - compositing? digital painting? retouching? The list goes on, and your question is far too vague.
Having said all that there's /r/gimp which tries to do a little bit of everything, Krita is quite decent for digital painting and www.photopea.com for a toned down version of the real Photoshop that runs in a browser. These are all free. Affinity Photo is a very capable program on its own merits (one time payment of about $50 though). Take your pick.
Edit: forgot to mention Paint.Net (Windows only) and Pixlr X which, like photopea, also runs in a browser (but HTML5 as opposed to Flash). Both also free.
There are some decent programs out there that allow batch watermarking. You won't be able to place them as nicely as you might like (like on your thigh or wrist, consistently), since they just put the mark in the same position each time, but it's quick. I'm not sure if there are any free options out there, though.
A free alternative I've used for similar projects (well, similar enough) is this online photo editing tool, which allows you to create and save an image as a .pgn, so you can give it a transparent background, which is what you want for a watermark. Then you just upload your photos to that tool, paste in the watermark image, drag it where you want it, rotate and/or resize it as desired, and save. Once you get the hang of it, it takes less than thirty seconds per photo, start to finish, with neat and nice looking results.
It sucks that these scumbags are stealing your content, but hopefully this'll make it easier to retain control of it.
You can search Google Images for transparent images with no background (Search Tools > Color > Transparent)
To easily make it the correct size, which is 1x1, go to this webiste: https://pixlr.com/editor/
Upload the URL of your image. Then go to Image > Image Size and make the width and height the same and save it and upload!
If in future you'd like to post more filtered images I asked the person responsible for the shallow to projected spectrum images and after some discussion with her and other mods we found that you can replicate the effect by using a web photo editing program called pixlr.
Use this filter sequence: find edges > invert > emboss > emboss.
You could also check out Pixlr. There's a web app version which has great features and a version you can download to PC or Mac. The base version of the desktop software is free. Pro version is $15/year. I just use the in-browser Pixlr Editor. It works for everything I need.
How to do it:
So let's cover the easiest part first, the wallpaper. Just download an image (whatever image on google works just click and hold the image to download it.) Boom. Wallpaper done. Now the time. Go to the appstore and search up "Persona" or "Persona 5." There should be an app that pops up called " Persona 5 widget" install it and 9do not open the app. Instead go to your phone's homepage and hold any empty space. Press "widgets" and search "Persona" the time widget should appear. Place it where ever you'd like. Now the hardest part, the icons. First the app you need to edit the icons. I used an app called "X Icon Changer". It allows me to change all icons in the homepage AND let's me change the names of the apps as an added bonus. Now time for the special icons. Click the first link I felt. Download an icon and click the second link I put and click photo. Choose "files" and insert the icon you downloaded and press "reform" and then press "resize". Scale it to 700. Download it and go to the X Icon Changer app. Click the app you want to change. Click "photo" and then pick "Gallery". Pick the edited image and boom! You are done! You can add a gif which is something I have never done but you're done! The rest is extra
Links:
This one comes with a free tutorial! I just wanted to show someone how to do a couple quick things using pixlr cause I feel like some of it is simpler than people think, and that more people might have fun making stuff if they had a few simple ideas on what to do.
Hope this helps someone: https://www.youtube.com/watch?v=mY77RYoV2K8
>I love this
And the rainbow ribcage heart thing in space loves you too <3
I thought you all were kidding when you mentioned paint. What about just using Pixlr.com? Ah well, too late to start over again, I guess. lol, Very good idea, though! Read old books and gt yerself some basic chops on thee olde 'meme making' workbench.
when i was assigning my (levelup) points, i didn't know that the "draw" stat exists... but i put few points in imagination and steal xD
note: i don't own anything of this, everything was stolen from the web and just mixed in by little old (thiefy) me:
maybe not the winning material, but i hope it does inspire some real artists :)
P.S. I used some "online photoshop" @ : https://pixlr.com/editor/
has an option to save the image with layers, so it might help peeps + if anyone needs that img in layers i can send (pm me)
as for winning, idc about it (as it's not original content), just want our ~~shit~~ sub to look as op as possible :)
I use Photoshop, but if you're looking for sites to make thumbnails, there's Backgrounder and Pixlr. Backgrounder has some templates for thumbnails, channel art, Twitter art, and a few other things. They aren't crazy good or anything, but they will be better than nothing. Pixlr is sort of like an online version of Photoshop or Gimp. It's got some filters, masking options, layers, and some layer style options (things like stroke, drop shadow, and bevel). Considering the fact that it's free and online, Pixlr is a pretty good tool. If you're looking for free programs, as /u/StandardToast mentioned, Gimp is really good. I took an art class recently, and my professor said Gimp is pretty much Photopshop, just a few versions behind. Some of the tools that came with the most recent version of Photoshop won't be in Gimp, but you can still get a lot done with it. I know very little about Gimp, but I know less about Paint.NET. It's free, and can do some imagine manipulation.
I currently use a chromebook 2, it works well for web based services only. You can get crouton running and whatnot but performance is kinda poor worse is application support.
If you think you can accomplish everything you could need to do using web apps (run 100% in browser with server side support to assist you CB) then maybe you can make it work.
here's a few examples of available web apps:
otherwise I would say find someway to make the scratch to buy a "proper" laptop for now to get going. We're still a while away from an ARM CB being remotely close to a replacement for a good x86/64 chipset with windows or linux, even something a few years old will run circles around the cb2.
sorry, I babble
Not sure what you're looking to do with editing but Pixlr has a desktop and an online tool as well. I've heard great things about GIMP as well, though I use Photoshop personally.
For the rare occasions that I need to draw anything, Pixlr is pretty good, or at least much better than mspaint, and free. Mspaint's only real purpose now is as a running joke.
I make my art using Pixlr.com. What I do for the glitch effect is to draw a bunch of tiny multicolored squares (using the paint tool) on a separate layer (sometimes putting two different-colored squares right next to each other. Then I go to the Filter header and play around with the Glitches>Fringes or Slice settings, and/or Effects Library>Mosaic (usually a mix of both settings) until I get it looking right.
I scaled it back to 1920px since pixlr.com wouldn't allow bigger. Use it however you want! (also, i actually missed some bloodstains in some of the clothing, but.... let's just say it's dirt)
I did, thank you! Just shopped a cutout of Matthews face onto an image of Stone Cold, so it wasn’t too much work.
I like your idea! I use Pixlr for my edits. Pretty straightforward to use, and for my basic purposes of making fantasy team logos it’s more than enough.
i suggest using pixlr instead of whatever "pic collage" is, pixlr is a super good alternative to photoshop, and its 100% free with no watermarks (specifically pixlr E)
heres a link to pixlr: https://pixlr.com/e/
imho, theres a little too much going on here, you should probably focus on one thing only.
also, this is a little nitpicky but maybe you should compress your images? I have some sites that can do that. https://eyy.co/tools/artifact-generator/ and pixlr.com. (for pixlr, you can open that image and save it as a jpeg, a slider will appear and you can compress your images there)
hope this helped!
I think you can definitely pass with longer hair, maybe even Pre-T though that will be hard, it looks like it suits your face more, either way, you're not wrong about that.
You have the whole internet to look around for, if you see something you like and have photoshop or ( https://pixlr.com/ a free online alternative ) just take a picture with your hair tied straight up so you can "cut" it all off and replace it with a haircut you might want to try.
Thank you so much! I actually edited this on PIXLR, using a readymade template then just adding Malfoy's picture and touching up here and there, its super simple and easy tbh lol here's the link https://pixlr.com/e/ :D
My steps to get the pattern:
- Took a photo of Potato on my phone
- Uploaded it to a free online image editor to remove the background (you can use the lasso tool. This is needed so the pattern maker doesn't pick colors for your background. If you want the background of the photo as well, skip this step.
- Then I took that photo and uploaded it to Pixel-Stitch. You can pick the number of colors you want (I choose 30) and some other customizations and it just spits out the pattern for you
In the past I've also used Stitchboard. Both are free, though Stitchboard offers you more customization if you create a free account.
Tbh if you’re gonna use creative suite professionally, the entire suite is worth its weight in gold, if you’re just looking to do fairly basic stuff and aren’t really proficient yet, this would definitely cover beginner-intermediate work. https://pixlr.com/editor/
Krita is probably one of the best free Photoshop alternatives. There's also Pixlr. That said, Photography Creative Cloud which includes Photoshop is good value if you use it a lot. Just think of the time you spend learning programs, there's so many tutorials and resources for Photoshop.
For painting onto objects directly I like 3D Coat too.
It's basically the same steps as bbbmods modding guide but you'll have to make the image you want as a cardback the same resolution/size as the original cardback.
What I usually do is I just copy and paste the image onto one of the cardback images and resize it in Photoshop or Pixlr until it looks okay.
Then once you've done that, you have to edit the file of the cardback you want replaced in UABE.
Then you load your image, you set the quality to slow(multithread),you save it, then press ok, then save it again and put your new file in the folder before the original file.
Now you have to close UABE(And Gwent if you had it open), then rename your new file to the same name as the old file and then replace the original file with the new file.
Now finally open Gwent and now the cardback should have your image on it.
If I wasn't clear enough or something's not working, feel free to ask for help
Group is trying to play D&D on Roll20 for the first time due to coronavirus quarantine. To make things easier on the DM, we decided to play Waterdeep Dragon Heist instead of a homebrew.
We had just gotten our tavern and we're debating if it should just be a bar or tavern. When we decided on a tavern, I put out the name Airdnd as a perfect joke name. The group had a good laugh and we adopted the name
After that everyone was shopping for gear. I was bored waiting for my turn and came up with combining the Airbnb logo with D&D's. Jumped on to https://pixlr.com/x/ and whipped this up quick. Shared it with the group and they were blown away
Mně se to líbí, Smusič je poznatelný, což je vždycky plus, líbí se mi Twilight na jeho tričku a ten nápad na "My little Smusa" je dokonalý! Nikde jsem to ještě neviděla, takže plusové body za originalitu! ☺️ Hlavně to chce trénovat a ne hned skákat z bláta do louže, jak ti radí Aliralira.
Radím ti si prvně vypilovat styl, a pak teprve, pokuď budeš mít chuť, se vrhnout na digitální grafiku, navíc vůbec nepotřebuješ takovéhle programy, na počítáč můžu doporučit online pixlr editor (https://pixlr.com/editor/) [GIMP (který snad měla slečna namysli) je peklo samo o sobě] , je jednoduchý, zdarma, funguje na způsob photoshopu, ale je dobrý i na kreslení, jen jede na Flash player, na telefon pak MediBang paint.
S kvalitou světla si nelámej hlavu, ta se dá vyřešit obyčejným oskenováním na tiskárně (jen doporučuji nerýt obyčkou do papíru, ta lesklá plocha odráží světlo skeneru a nevypadá to dobře a když se přetáhne, tak se špatně gumuje, pokud budeš chtít mít v díle lineart, doporučuji před vybarvením obtáhnout centropenem a pak dogumovat). A dodávám, že i s obyčejnou tužkou č. 2 se dají dělat divy.
S pozdravem, člověk co se těmto věcem věnuje již nějakou dobu a studuje uměleckou střední školu. ~DiscoRaven
(fakt se mi to líbí, rozhodně jen tak dál 😉a snad se jedná o konstruktivní kritiku, není to myšleno nijak negativně, takže doufám že to tak nevyzní) (a promiň za tak dlouhý komentář, ráda píšu slohovky😅)
I suggest just searching up "thumbnail background" on google images, then adding some big bold text and one or two cropped out images from the video. https://pixlr.com/editor is a great site if you can't use photoshop.
Youtube does have their own little "editing" thing when you upload. But its pretty bad to be honest. Thumbnails need to be uploaded separately, they don't have a creator for that. (Although it automatically gives you 3 screenshots from your video to pick if you don't want to create a custom one).
For recommendations:
Sony Vegas is my go-to program for editing videos. (Although its rather expensive, i only have it due to a special way back)
Photoshop is the best for thumbnails. But there is a free online photoshop alternative that is pretty close to the same thing that i used to use before the real photoshop https://pixlr.com/editor/
Hope this helps :)
The biggest mistake I see most people do when they start out (other than having hugely unrealistic expectations) is trying to do too much. When you start out you don't have to do crazy stuff; it's more important that you develop your skills and ideas first.
So far, we seem to get to a starting point, but never beyond that. And that's the reason why we have so much low quality content, because no one ever seems able to develop them further. If you don’t really have a clear goal, defined work structure (planning, how many hours you put in) then often what you do will crumble to pieces, regardless of how great your idea is or what stuff you got.
Before you even think about paying for any services, software or equipment, you should always prototype and try ideas using whatever limited resources (or free ones) available to you. You don’t need Adobe Premier Pro or Sony Vegas to make videos, or Photoshop to create thumbnails, artworks or other stuff. Use the default free software on your computer like Windows Movie Maker. For any art or graphics stuff, try free stuff like Pixlr (https://pixlr.com/editor/). See if you can find ways to do things in new, interesting and unique ways. And not matter how hard it gets, keep trying again and again.
We’re looking for long term results, so being persistent and patient is key here.
Also, don’t hesitate to ask for help. There are a fair number of people in the community who are willing to help with what they can. Back when I posted PIO on reddit, I offered free advertisement for people’s content if they filled out a form to give me info on what they were doing. In a 2 month period, less than 3 signed up so I ended up doing away with it.
Here's an easy way to do it.
I'm not sure what files you get from the Mavic it self put if you have a panorama, go to this website and upload your image. Then go to Image>Flip Canvas Vertical and Filter>Polar Coordinates and press enter.
Easy as that!
Its really not hard to do it yourself! Pixlr is free and has a browser version so you don't even need to install anything. Basically open the image in there, add a new layer on top of it and set it to something like 50% or less opacity. Then just use the paintbrush and color on top of the image. You can do a pretty good basic color job if you just color the areas the colors you want them to appear.
did this in about 10 mins with pixlr
Sorry I don't have time to do the full thing, but really it is pretty easy. If you aren't able to, maybe someone can see this and give it a try themselves!
So that you don't have to ask in the future: https://pixlr.com/editor/ -> Adjustment -> Brightness & Contrast... fiddle with it until you get something you like.
Disclaimer: better ways exist, but this is online, free, and relatively easy.
Got you bro, compare via setting as your background for both images, as web browsers rarely do zooming correctly. Note this isn't the dimensions you listed, but it is nearly double the resolution of the posted image, if you want 16:9 you'll have to crop it in https://pixlr.com/editor/ or something, I would but am on mobile at the moment.
Link: Dbr.ee link as they don't compress uploaded images like imgur does.
Hoverboards don't work on water! But they do work on ice!!!
I gotta say. This was exhausting. I don't have Ps, so I Googled a free online photo editing tool. It took me waaaaay too long to do what I wanted to do and it wasn't exactly compatible with my MacBook or maybe Chrome or both.
When I finally got the upper body on McFly's legs and was ready to put it on the background of the original image, it was too small and looked pixelated. I said "fuck it" and so, yeah, this is my final product.
edit: And the paddle is for if he does run across liquid water...sigh.
Take these:
https://jackaloupe.com/2016/07/06/all-pokemon-go-team-logos/
and this:
Resize the image to 40x40 and save that as a .png (make a 20x20 version for the smaller version).
Then adjustment -> hue and saturation, lowest hue highest saturation to make it white, do the same as above to make the black/etched version.
But y'know what? I realized this takes so little time and effort to do that I just went and did it for the other two teams anyway.
As far as photoshoping the pictures, you can use this site: https://pixlr.com/editor/
Together with this extension: https://chrome.google.com/webstore/detail/colorzilla/bhlhnicpbhignbdhedgjhgdocnmhomnp/related?hl=en
Use the extension to colorpick the color values of the paints; then brush over the pictures after changing the brush's colour.
Be aware though, that this won't look the same as IRL.
IMO: You should pick one of these:
T-5115 Sugar Dust
T-5104 White Sand
T-5103 Ice Mist
T-5207 Cream Surprise
T-5137 Tinkerbelles
Something earthy and light to absorb less heat. You should go to the store and ask if its possible to get a small test sample, smear it on the wall and see for yourself
These were most likely done in Photoshop, not through any special printing technique. If you don't have Photoshop, I recommend the Pixlr website. You'll want to put the Doctor and the text on separate layers, with the text on top in "Multiply" mode. Here are a bunch of Pixlr tutorials to get you started. Hope this helps!
I use https://pixlr.com/editor/. Its basically a free version of something between ms paint and illustrator/photoshop. Don't do this for money so I don't see the point in buying programs but I certainly would love to be shown the ropes by someone. I wouldn't even know where to begin
Have to agree, Photoshop's a very non-cheap bit of software, probably costing more for a licence than the entire cheap PC most internet cafes use. Don't suppose you could get by with something like https://pixlr.com/ ?
Not OP, but all you have to do is save this image (http://imgur.com/Hj67Vv3) and put it in an image editing program like photoshop or even a word processing program, then type your message over the star. If you don't have photoshop, you can use this image editor online: https://pixlr.com/editor/. You can also just print out a bunch of them and hand write your messages. :)
I had that feeling as of the past couple months.
When I was younger, I never really drew much of anything because what I did draw I found to be just mad and stick-figure-like. But then, the time came recently where I decided that along with my writing work, I wanted to try to pitch an animated series. And to do that, I'd need artwork for the pitch presentation. But since I wasn't confident in my own abilities, I decided to go to Fiverr to hire an artist assuming I could find one who had a similar art style to what I had in mind... but no one did.
So I decided "if you want something done right, do it yourself", and I decided to try drawing the characters myself... and it actually turned out really good. Now I've pretty much nailed down my own personal art style and I'm really happy with it.
(It helps that Pixlr.com has a stretch option for their brush tool so I can actually make eyes that don't look wobbly like when I draw free-hand/traditional.)
It's simple actually. For mockups I use MockuPhone and PIXLR helps with the editing stuff. If you want to know about the whole process feel free to ask me.
Artwork - I find it from Chaotiki or DeviantArt
Card Template - King-Of-Craziness has a bunch of Chaotic related templates for the card outline, different elements, rarities, etc.
Editing Software - I use Pixlr.com , it's free!
It's limited but with Pixlr you can take square designs and reduce them in size to 32x32 to get the proper pixel by pixel proportions.. I don't know as much about the program's use for color control or other features though.
​
Lockdown has been difficult for everyone, but especially for those of us who need to vent our creative energies, therefore I've chosen to channel some of my ideas into composites. How convenient it would be if we could just teleport to places using a portal, or in this case an archway.
I'm an amateur editor and in the past I would struggle to create composites like this because of my inability to utilize photoshop to its fullest. After trying many editing softwares, I found that using Pixlr X the easiest for creating collages and composites. This edit took about an hour and a half to create.
Please leave some constructive criticism below, it would be greatly appreciated!
Also here's the link for the editing software :)
I make custom prints by using already existing prints that on lego pieces and they're official and made by Lego, I just export (file>export) these prints from mecabricks and then I colour them as I want. I also screenshoot some printing on official figs and then I cut everything i need/don't need. I use app called Pixlr X (https://pixlr.com/x/#editor). Also here somthing to help you:) https://youtu.be/pMUFso0GLuI
your videos are really good, but I would really suggest making some thumbnails. Makes them look a bit more professional. What I do is I screenshot a point in my video, then go on https://pixlr.com/ and put in a watermark of my channel.
Add amazingly realistic depth of field and create various beautiful bokeh effects with Focus Studio today at https://pixlr.com/x/?utm_source=reddit&utm_medium=post&utm_campaign=pixlr_reddit_x
Impressive you were able to do this with Paint. You should try Pixlr, it’s a great photoshop app with most essential effects being free. I use it all the time, as photoshop can be annoying as hell.
I figured it out for Cricut machines. Cricut doesn't include software that makes cutouts out of a whole picture. I used pixlr ( https://pixlr.com ) to make the files into cutout files. Easy to use FREE online photo editor. I used the MAGIC CUTOUT tool with a tolerance of 10. Now I have perfect little individual stickers that will work on the Cricut using Print then Cut. I did break the sheets in half because Cricut restricts the size of page you are using with the Print then Cut feature. Thank you again!
It looks like the original image may have more details than is preserved on the Reddit server.
If you want to try with uploading the original direct to https://pixlr.com/e/ which I use its pretty straightforward to adjust the contrast and colour balance but I can help if you want
I found links in your comment that were not hyperlinked:
I did the honors for you.
^delete ^| ^information ^| ^<3
I heard this is a good tutorial if you want to use Inkscape (I might use this but idk)
For me, I just use the shape-making tool on Google Earth, take a screenshot of the track, and then mark out the turns, runoff, etc. in a photoshop program. My 2 posts aren't the best tracks (layout of my 1st one is too curvy), but they're a good representation of what I use.
I take a promotional image online with little to no text, then use a black stadia logo with a transparent backround. I use black because it give me the most color control. I use a browser based photo editor called Pixlr and it gives me all the tools I need.
I use a lot of filters and tinted colors for my images. With this watch dogs one, I used a pink theme, and used a few dozen filters on the stadia logo to get it to look all glitchy.
Edit: Would like to add, I'm using a Samsung Chromebook Plus V2 for all of this. It has a core M3 and 4gbs of ram, along with 128gb of storage. It also comes with a stylus almost S-Pen like, which is extremly useful.
https://pixlr.com/remove-background/
Hello u/pixlr_official, it appears you tried to put a link in a title, since most users cant click these I have placed it here for you
^I ^am ^a ^bot ^if ^you ^have ^any ^suggestions ^dm ^me
If your Chromebook supports Linux/Crostini GIMP runs perfectly on most devices with sufficient RAM and CPU resources.
Online -- photopea.com and pixlr.com
Android apps on Chromebook -- Check out Krita, although it leans more towards artists and designers than photographers. But definitely worth trying it out in my opinion. Snapseed and Lightroom have their uses too, but if you've become accustomed to using a fully fledged editor like GIMP it can be hard to move to the app versions of both. They still have their use cases though.
Although this art is officially copyrighted, and it’s future home obviously the Smithsonian, I award you to take any artistic liberties you’d like to enhance your experience. Not only that, original artwork always appreciated on r/Tvlse. Thank you. Love you. Mean it.
I use Goodreads.com to keep track of my reading challenge each year, and then I take a screenshot of my progress, and use pixlr to crop it, add an overlay and save the new image to my computer.
This is exactly what your looking and it’s the one that I’ve been using. It only took me about 30-60 min to get the hang of 60% of its tools, also if you hover over the tools they give good explanations on what they do.
There’s also a more advance version of that which has many more tools similar to a normal photo editor like photoshop: https://pixlr.com/e/ I’ve only touched on it a bit but if your ever find your self limited by the simplicity of X it would be a good idea to move on to E
I liked the 4 and 5 picture and also the last picture. What I would do is use an free online editor https://pixlr.com and crop to show more of just you and Less of the background. It will make you standout more. Not saying go crazy with it but it doesn't hurt to improve your image even more. I think once you get these pictures up and have a snappy about yourself you should have no issues getting dates.
Disagree, also if you want a good photo editor, Pixlr is free and good
You should really update to Windows 10.
Since it doesn't look like you shot your images in RAW you could just as well use an online editor instead of downloading and installing some software.
Try https://pixlr.com/x/ to see if that fits your needs.
I dunno man, it an easy place to mess around with ideas is pixlr.com
I’d just dig for an online photoshop guide article or YouTube video a and get an idea of the methodology (layers, masks, etc are probably a good place to start) and then mess around!
No, I don’t use a flash; instead, I use the best ambient light I can find — the bluer the better (i.e, not incandescent light). Sunlight is ideal, especially if it is indirect or shaded, like through a window that has a northern exposure.
I used to be a camera snob and felt that only a dedicated camera was good enough for the job, but not now. The smartphone cameras of today are simply amazing and — with careful use — are capable of astounding results. That’s not to say that they don’t have their limits, because they do — but they are certainly good enough for posting photos of your artwork online. If you look at all my posts of watercolors here on Reddit, the photos have all been taken with smartphones, specifically the Google Pixel 3.
As far as post-processing the images are concerned — yes, I use apps. Snapseed is excellent, and is available on iOS and Android (free). If you’re more comfortable with using a desktop or laptop, https://pixlr.com/x/ is surprisingly good, OS independent, and free. For me, if the app in question includes the ability to use curves, then it’s generally advanced enough for my needs.